

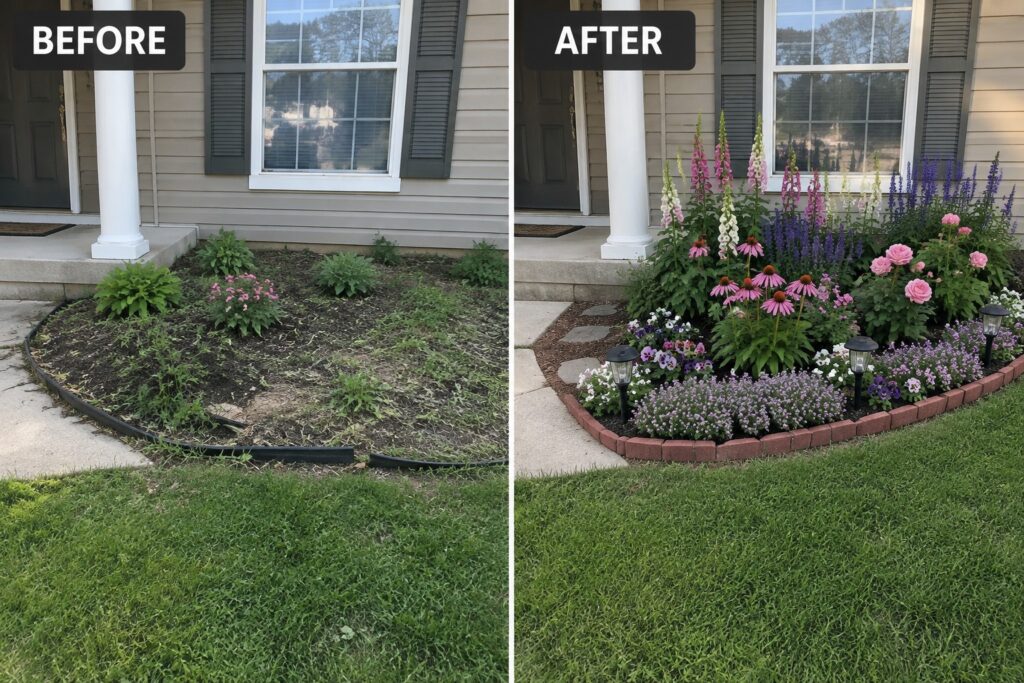
I often notice that flower beds start to look neglected once the edges soften and plants grow without any plan.
Defining those borders first gives the area a shape that holds up even after a season or two of growth.
I tend to test simple edging materials before adding more plants.
Layered planting comes next and helps the space look fuller without needing a lot of new additions right away while also giving better coverage as things mature.
Over time that approach keeps the yard looking tended rather than scattered in a way that feels more lasting.
Create A Clean Brick Border For A Front Flower Bed
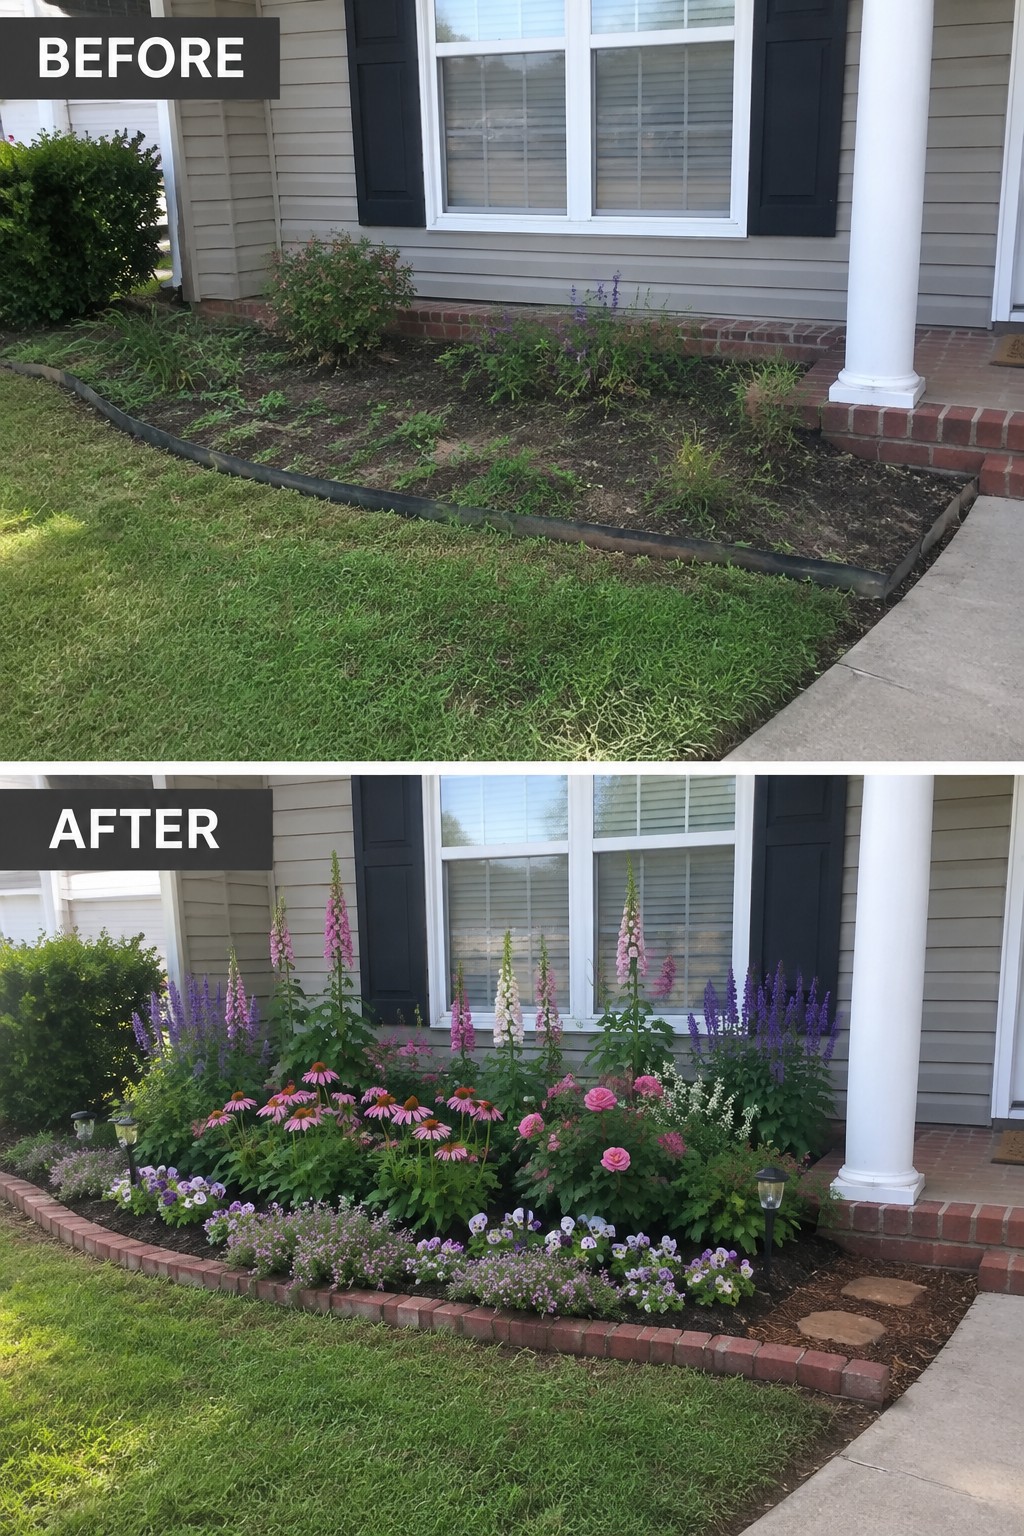
One of the quickest ways to fix a messy front bed is to add a clear border before anything else. The area along this house went from an uneven grass edge and scattered weeds to a clean brick outline that keeps the bed contained and the lawn tidy.
Once the edging is in place, fill the bed with plants in layers so nothing looks scattered. Put taller flowers toward the back and shorter ones up front. This works on most homes where the beds have lost their shape and need structure again before adding more plants.
Use Metal Edging To Organize An Overgrown Flower Bed
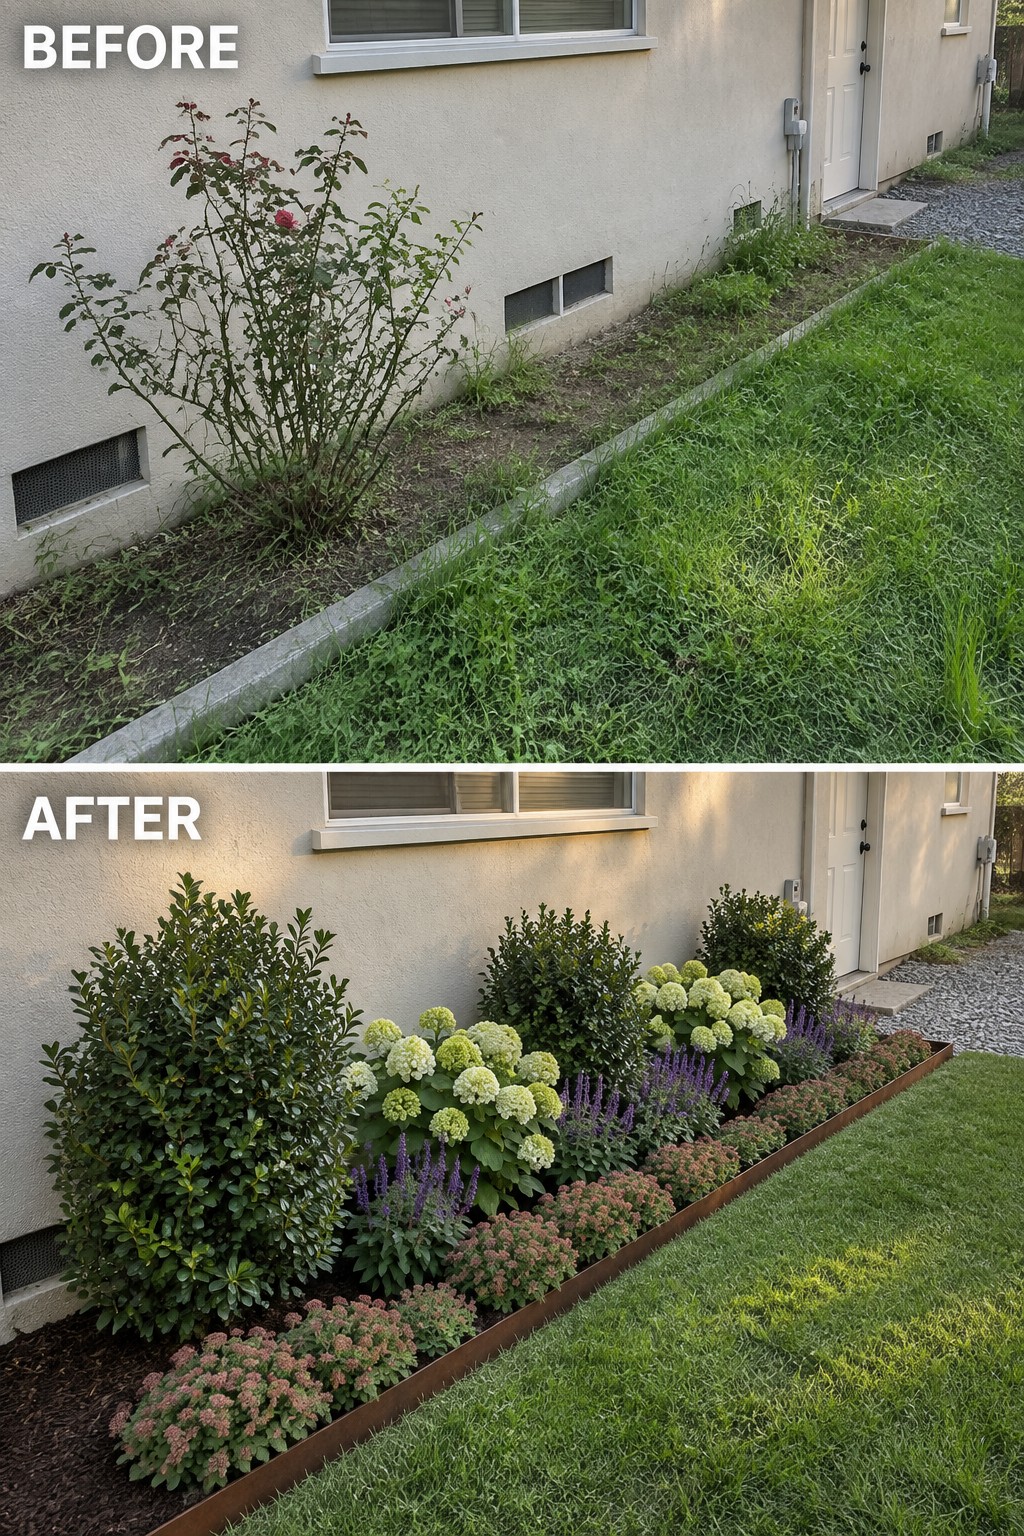
Adding a clear border turns a messy strip of weeds and random shrubs into something that actually looks intentional. The before photo shows plants spilling onto the lawn with no real shape, while the after uses a low metal edge to hold the bed in place and lets layered planting do the rest.
This idea works best along a house foundation or lawn edge where things have gotten out of hand. Clear the overgrowth first, put in basic edging, then plant taller shrubs at the back and shorter flowers in front so the bed stays neat without needing constant trimming.
Define Flower Beds With A Low Stone Border
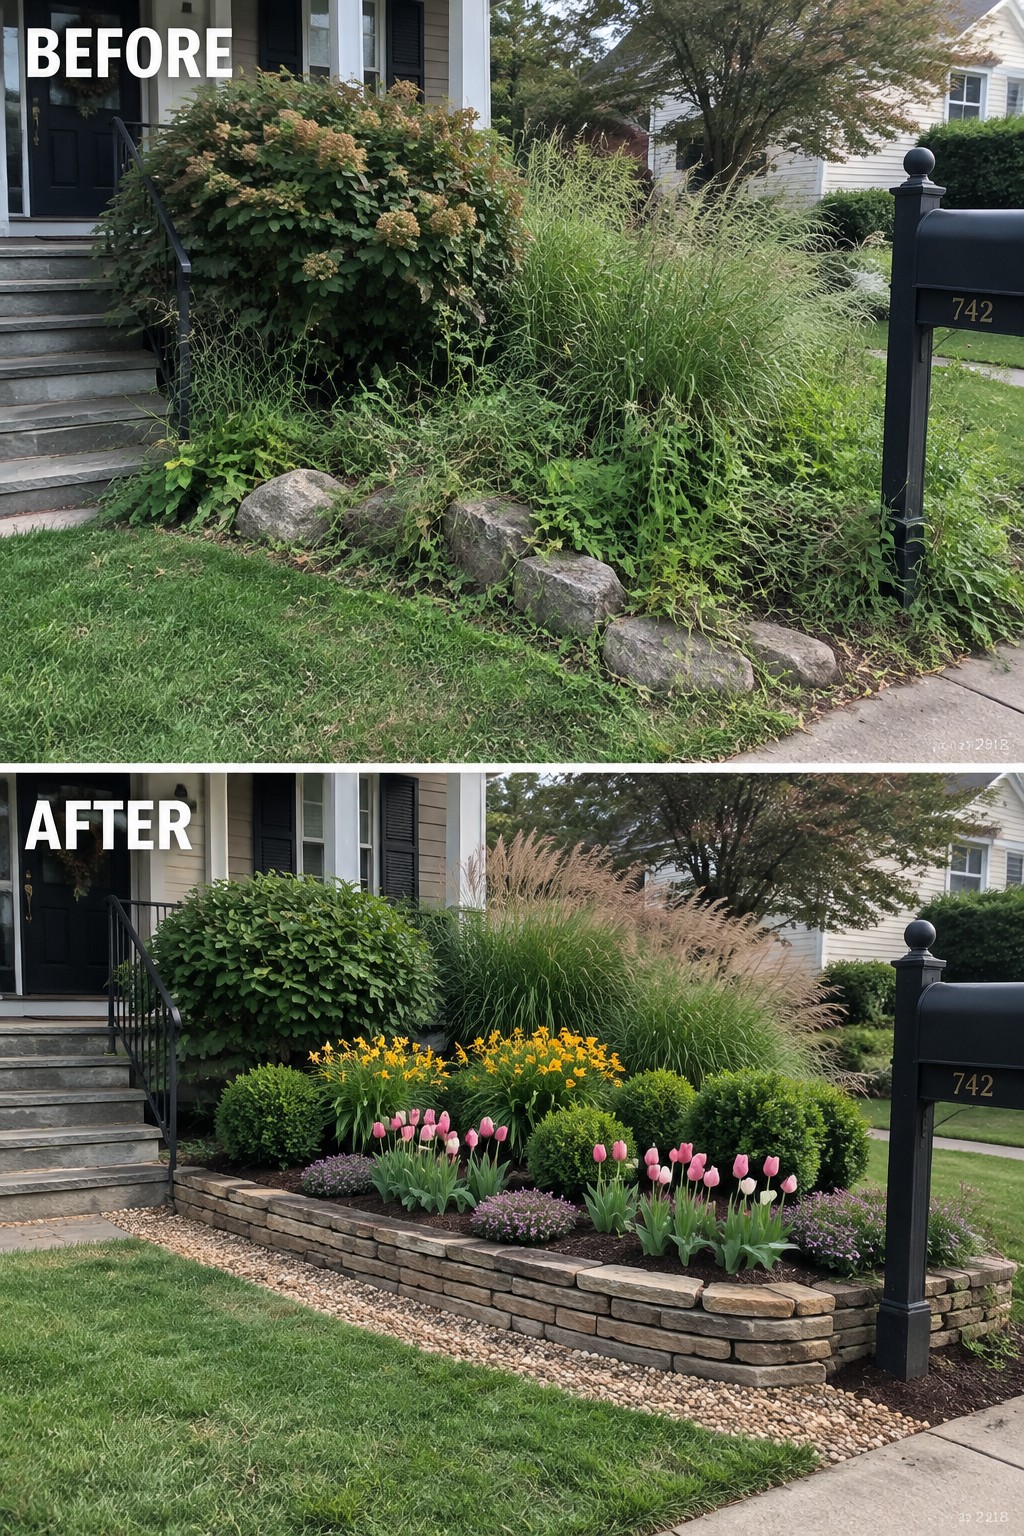
The main improvement came from adding a clear edge. A low stacked stone border turned a messy mix of weeds and random rocks into a contained bed that actually looks planned instead of neglected.
This idea works best along the front of a house where the lawn meets the foundation. Build the border first so you know the shape, then fill it with a few shrubs for structure, some mid-height plants, and a bit of ground cover. The border does most of the work by keeping the bed neat even when the plants are still filling in.
Add A Raised Bed To Define Foundation Planting

A single messy shrub against the house can make the whole front look neglected. Switching to a raised wooden border brings clear structure, keeps the mulch contained, and gives room for several layers of plants instead of one overgrown clump.
This approach suits homes with narrow foundation beds where plants tend to sprawl. Clear the old growth first, then add a simple raised frame that follows the line of the house. Place taller shrubs toward the back, medium perennials in the middle, and lower flowers along the front edge so everything stays visible and easy to maintain.
Define A Curb Strip With Borders And Layered Plants
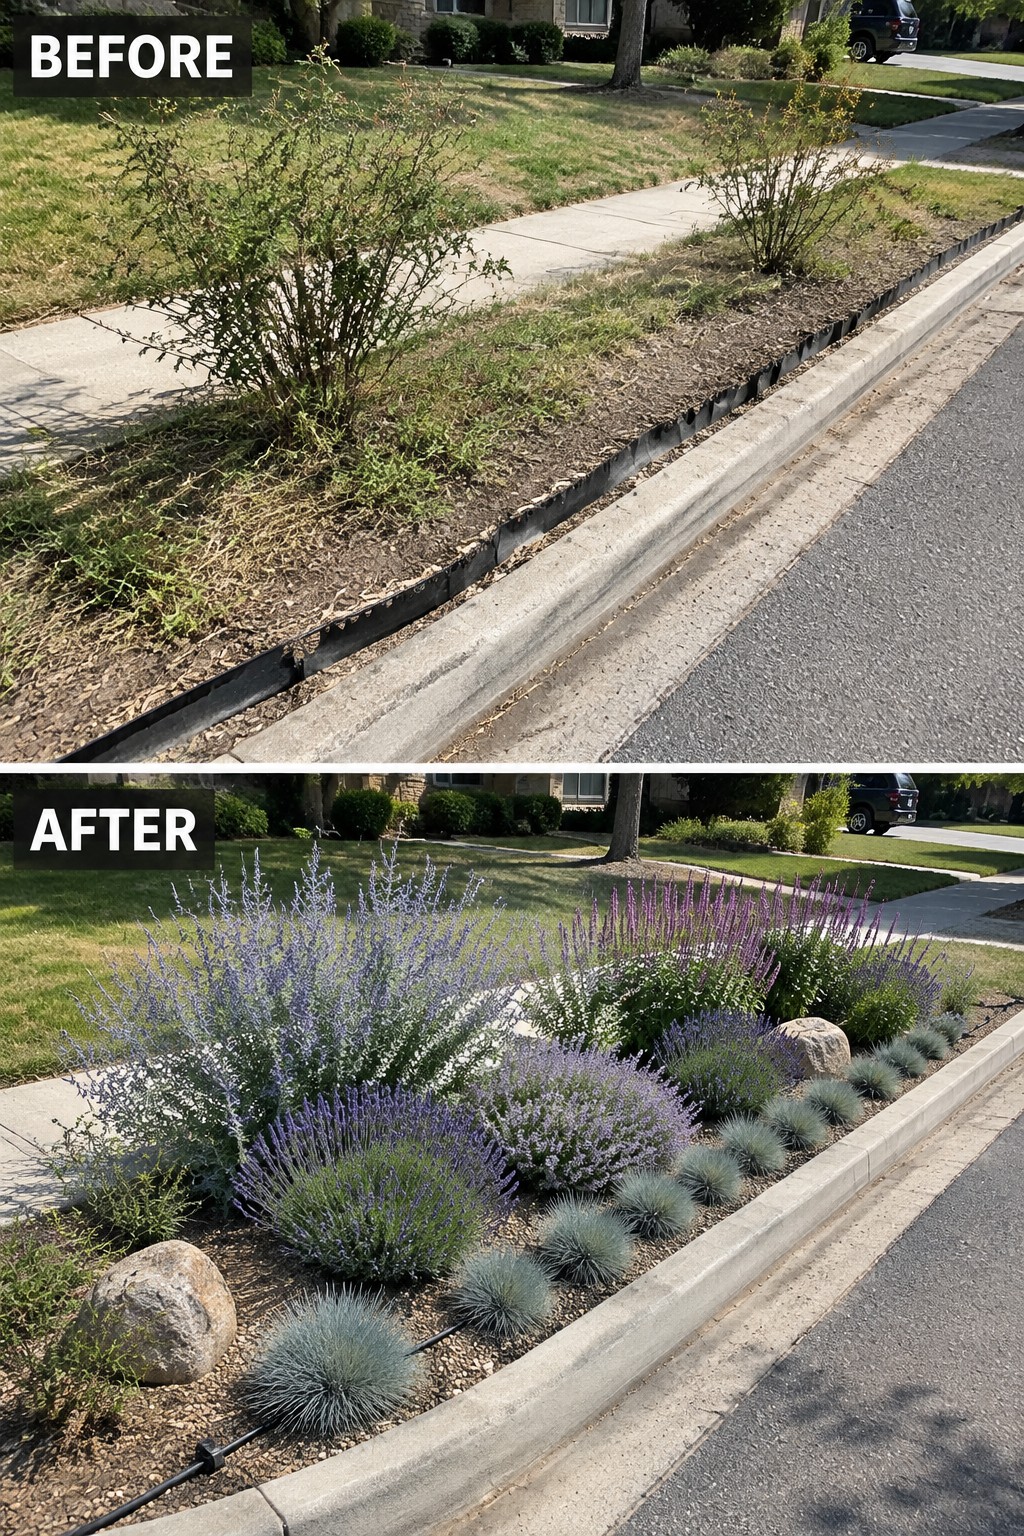
The before photo shows a typical problem: a narrow strip along the street that had grown weedy and uneven, with no clear edge to separate it from the lawn or sidewalk. Adding a simple border and filling the bed with layered plants gave the space a finished look instead of a neglected one. The after version shows how the same narrow area now feels intentional rather than leftover.
This approach works well on any long, thin strip that sits between a sidewalk and the road. Start by installing a clean edge so the bed has a clear shape, then choose a mix of taller plants in the back and lower ones toward the front. The result stays low-maintenance as long as the plants are suited to the sun and soil already there.
Define A Bare Spot With Edging And Layered Planting
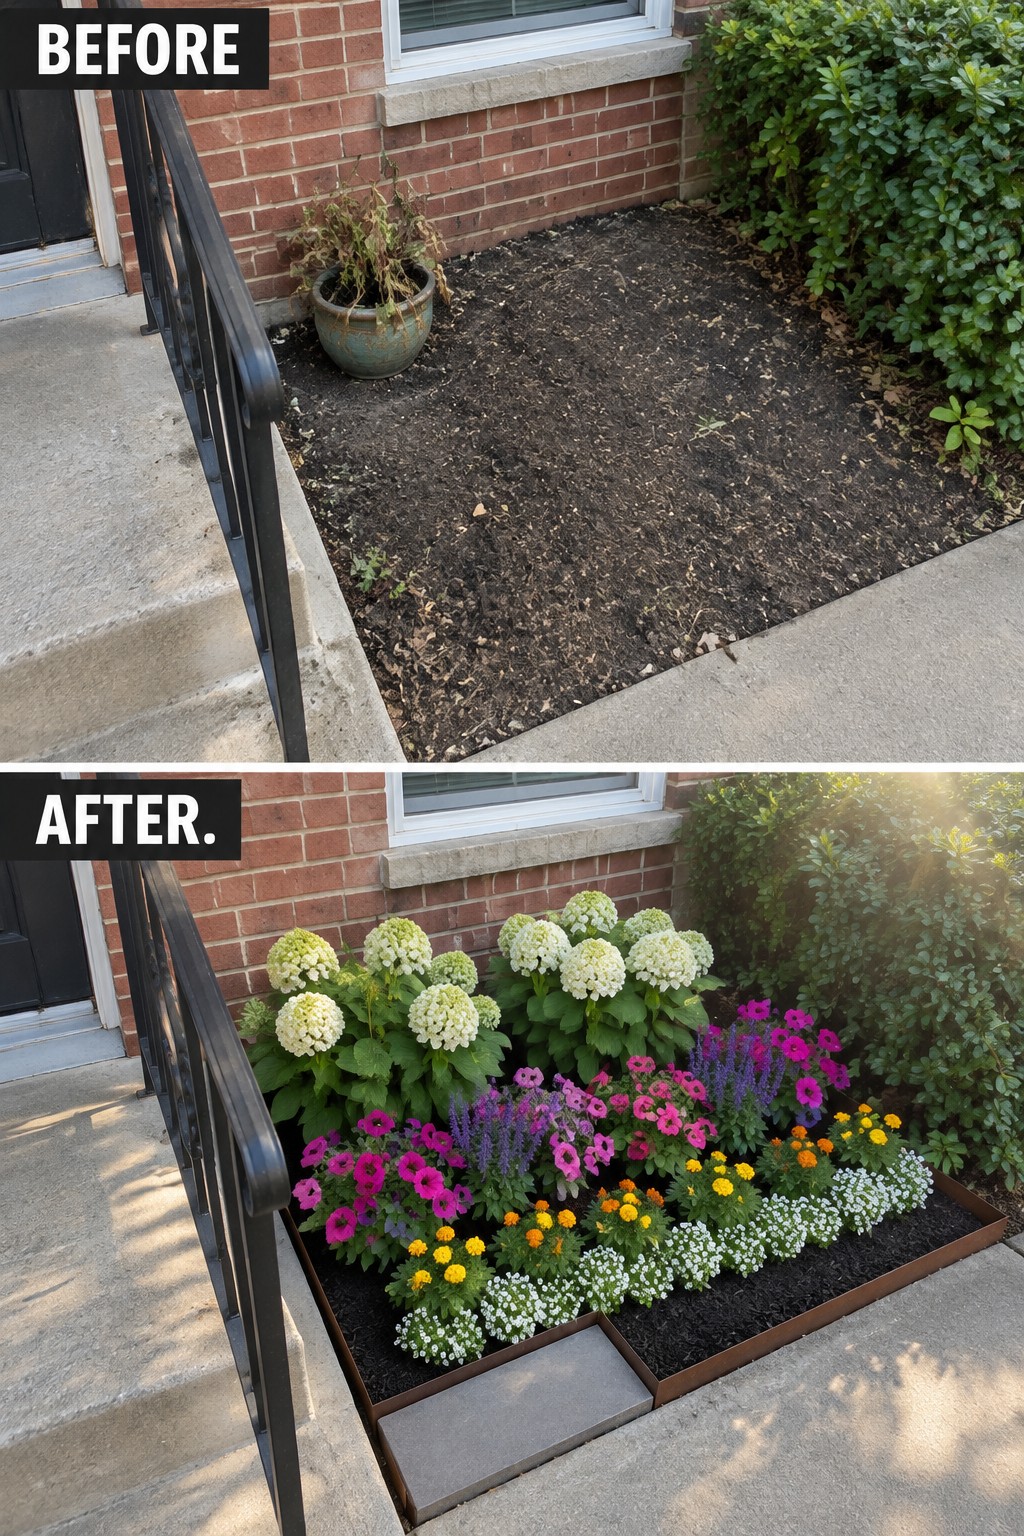
Adding a border turns an empty patch of dirt into a real flower bed. The metal edging holds the mulch in place and gives the space a clear shape, while the plants are arranged in layers with taller shrubs toward the back and lower flowers along the front edge.
This idea works best in narrow areas next to a house or along a walkway. Clean up the soil first, set the edging, then plant in groups of different heights so the bed fills in without looking crowded. It suits small foundation beds where you want structure without adding a lot of hardscaping.
Add Defined Borders To Shape A Garden Bed
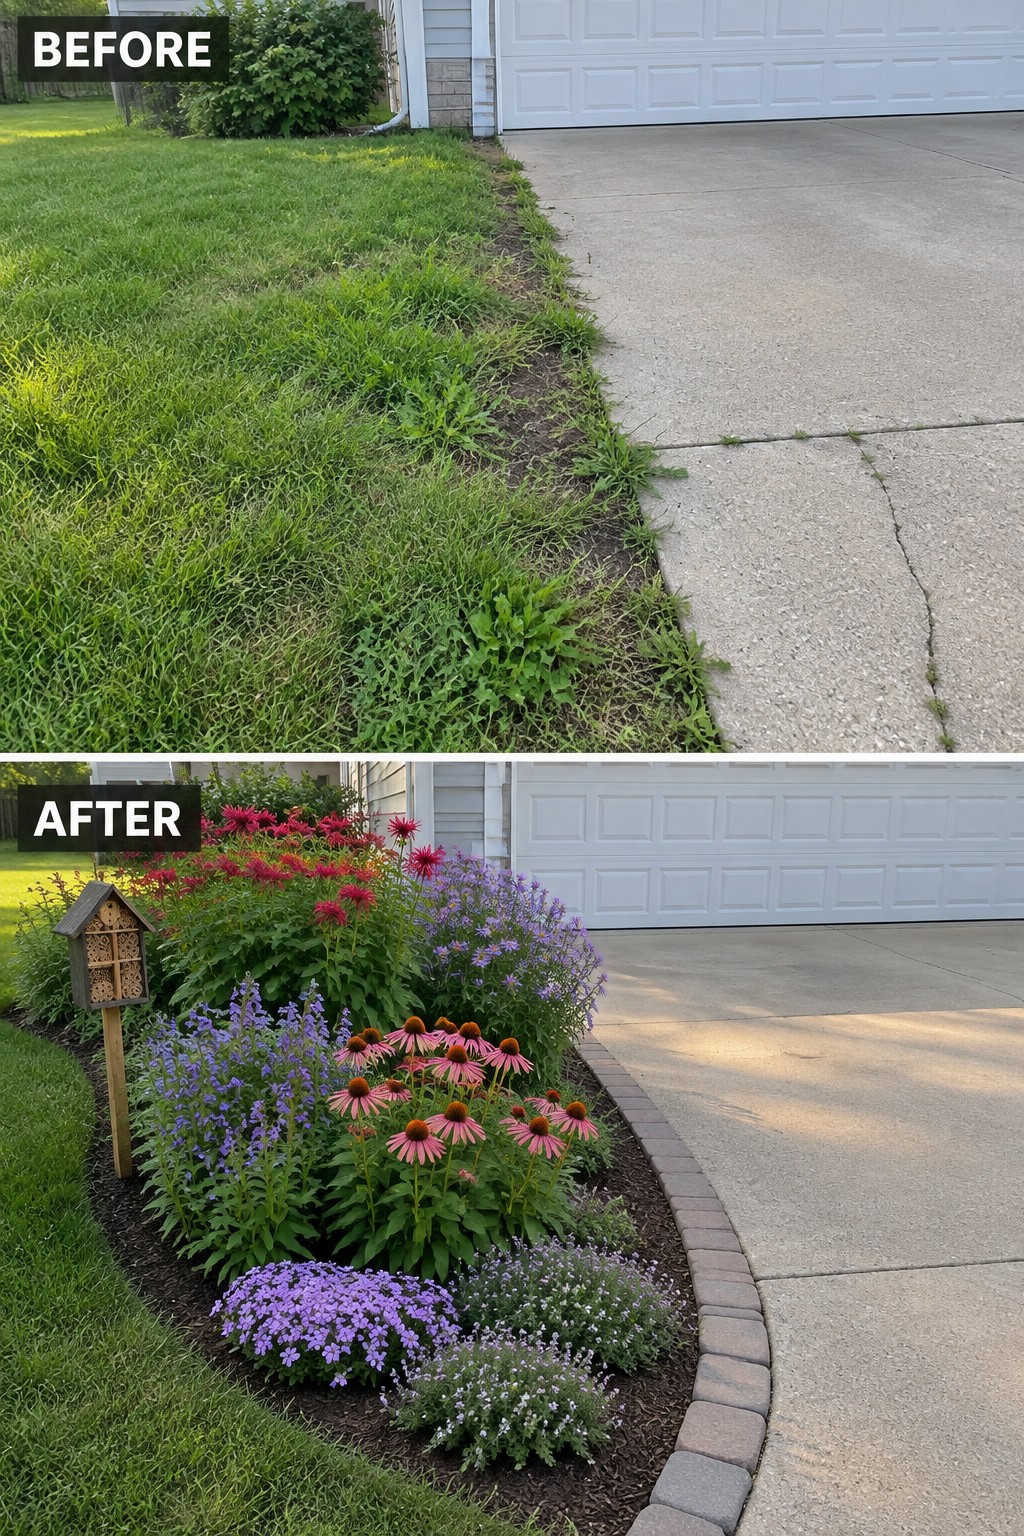
A messy lawn edge next to a driveway often turns into a strip of weeds and uneven grass. Adding a simple border and filling the space with layered plants turns that strip into a clear garden bed that stays neat and easy to maintain.
This approach works best along driveways, sidewalks, or house foundations where grass tends to creep. Cut a clean edge first, lay down a border material like brick, then mulch the bed and plant in layers with taller flowers toward the back and lower ones in front.
Add Defined Borders To Shape An Overgrown Bed
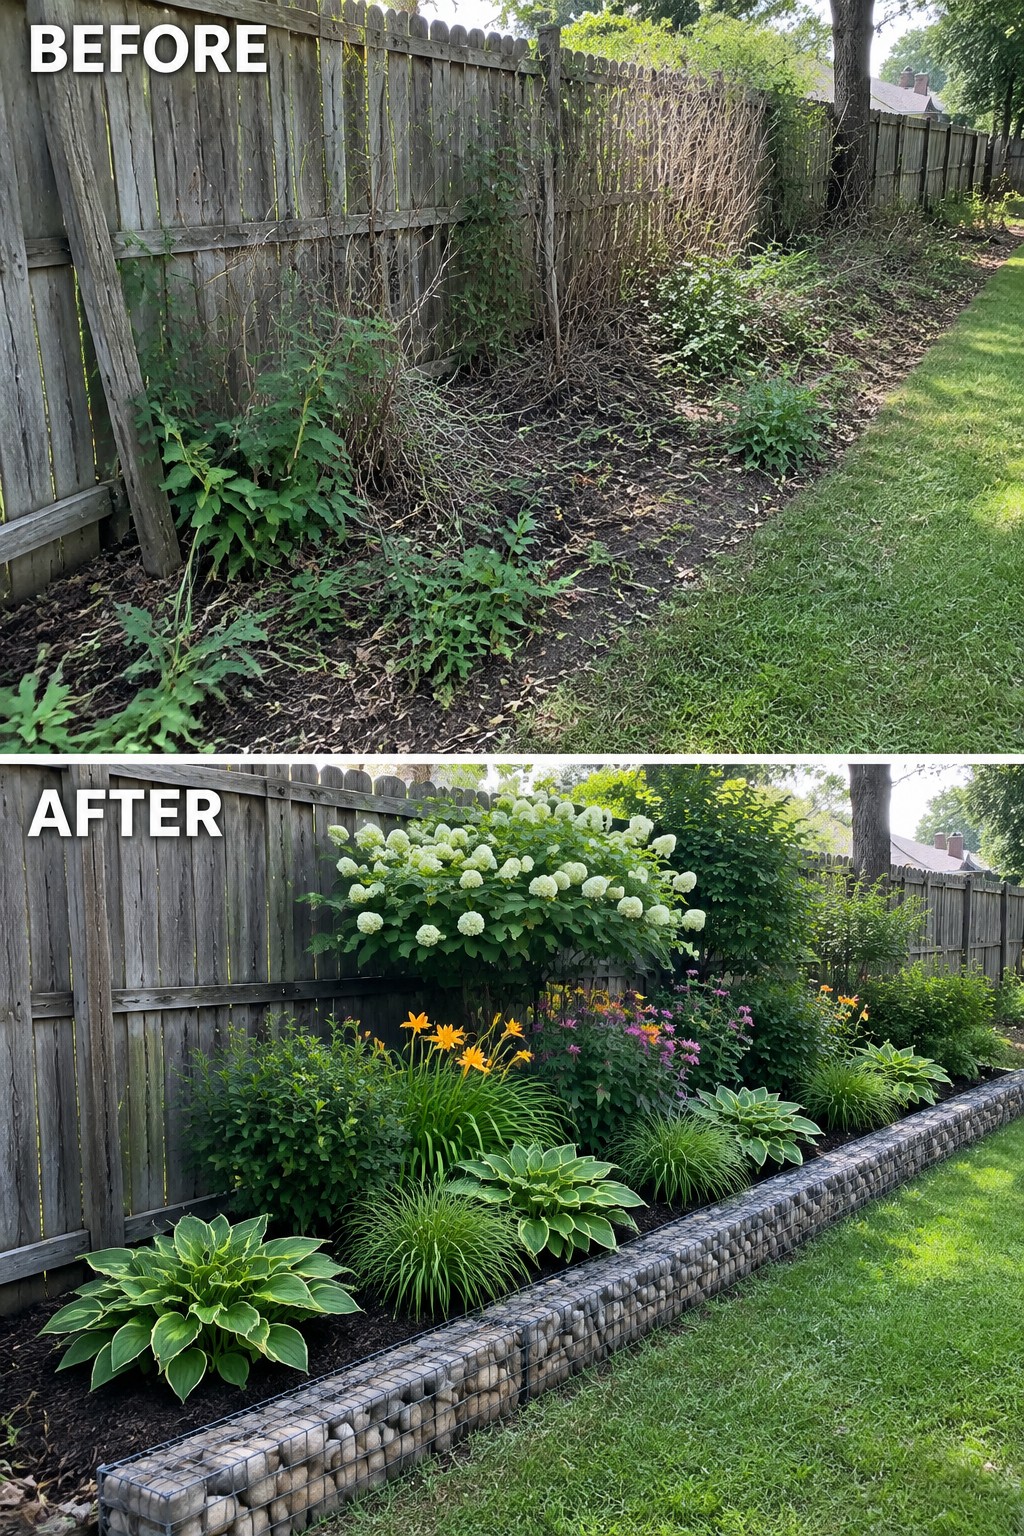
The before photo shows a messy strip of weeds and volunteer plants running along the fence with no clear edge. Once the overgrowth was cleared, a low gabion border was added and the plants were arranged in layers by height and texture. That single change turned a neglected strip into something that looks intentional.
This approach works well along fences, side yards, or any long narrow bed where things tend to sprawl. Start by removing the worst of the weeds and grass, then install a simple border that can handle the soil level on both sides. After that, plant in layers with taller shrubs or flowers toward the back and lower ground covers or hostas in front so the bed stays neat without constant trimming.
Add Defined Borders To Shape Layered Flower Beds
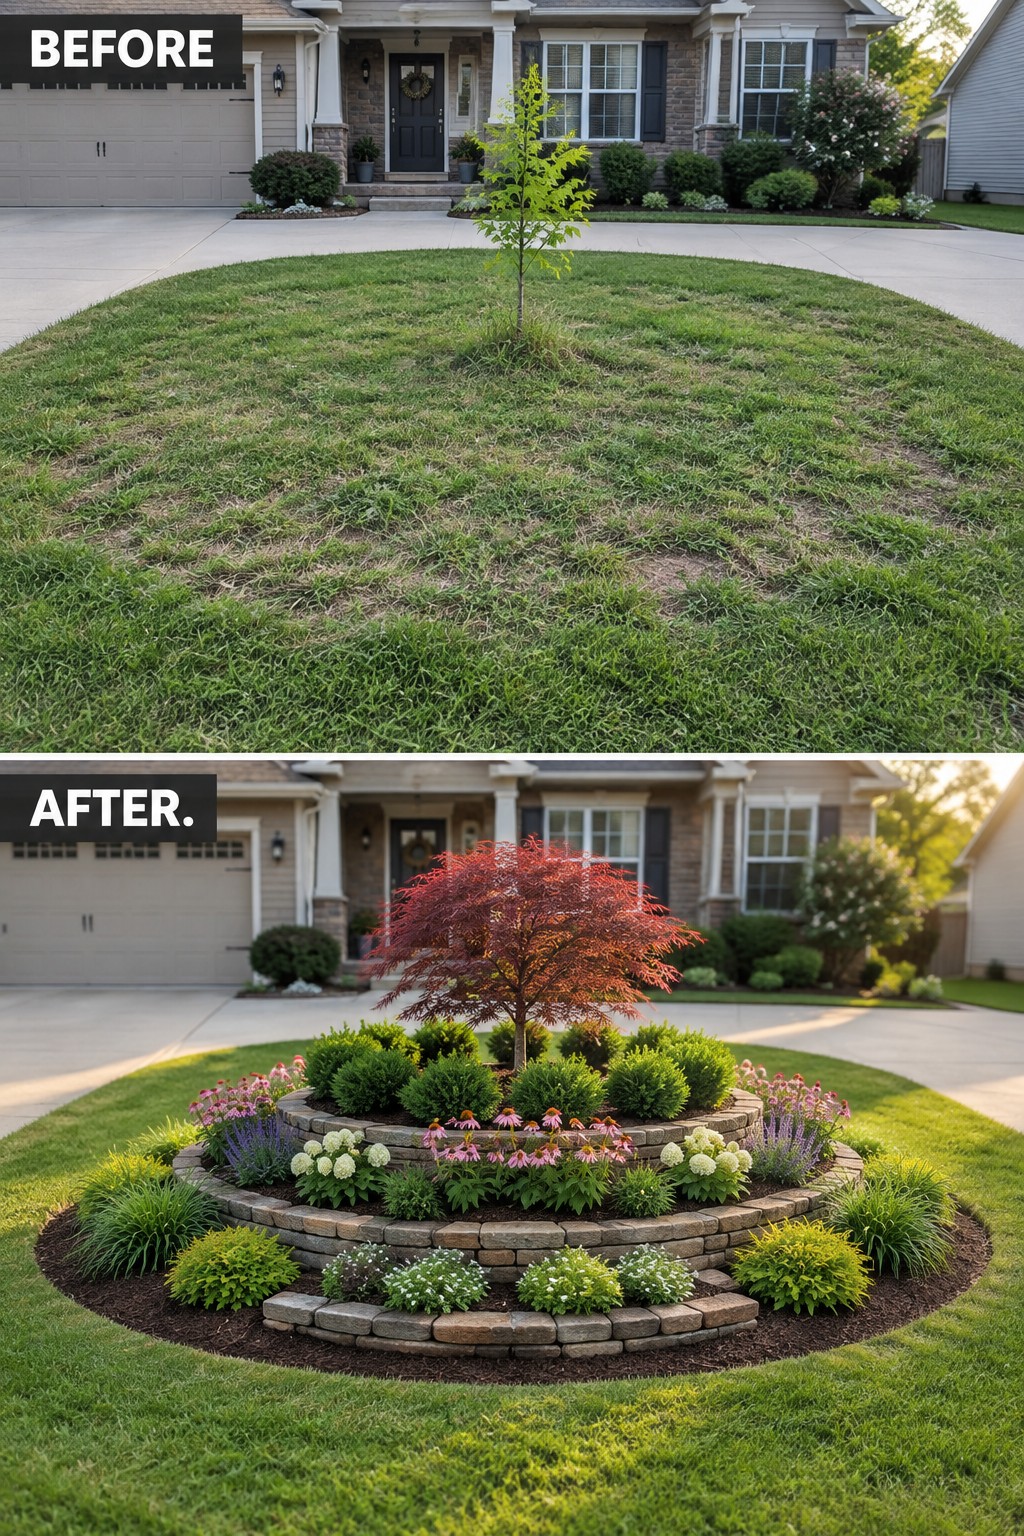
A plain stretch of lawn with nothing but a single tree in the middle feels unfinished and hard to maintain. Adding a clear stone border turns that same spot into a planted bed with real structure, letting you layer shrubs, perennials, and lower ground covers in one contained area while the rest of the lawn stays simple and easy to mow.
This approach works best in front yards where the grass runs right up to the house or driveway with no clear planting zones. Mark the shape first, set the border material level with the lawn, then fill in plants from tallest near the center to shorter varieties at the edge. Mulch the finished bed so it stays neat and the layers stay visible instead of blending into the grass.
Add Defined Borders To Shape Your Flower Beds
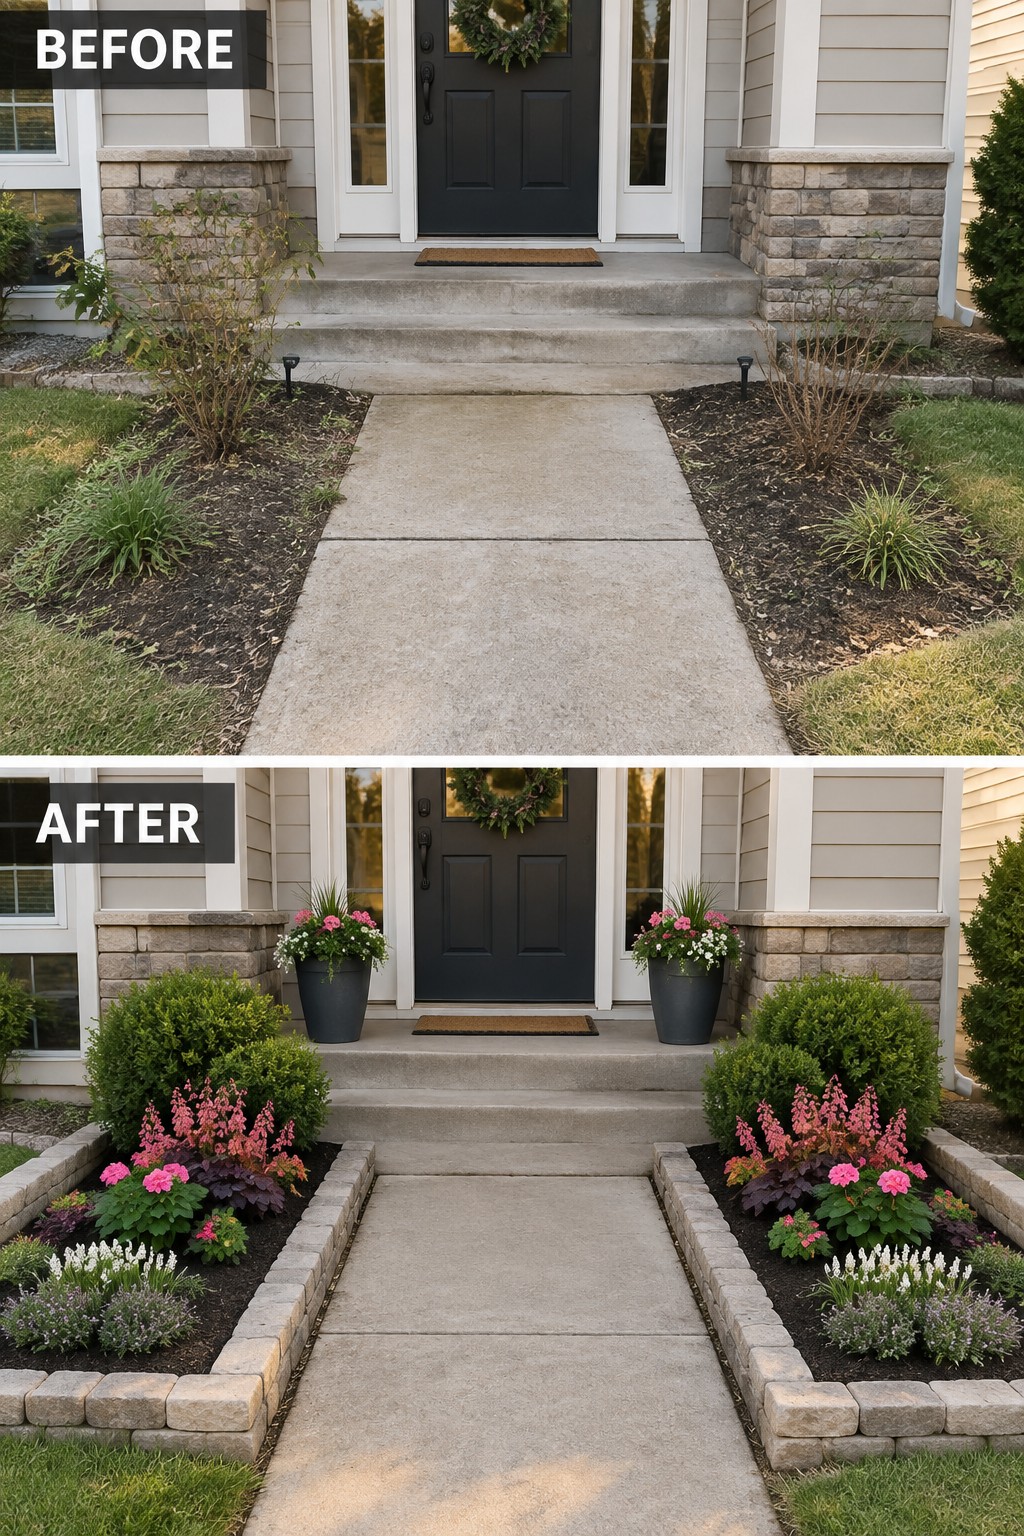
The biggest shift here comes from adding a clear stone edge along both sides of the walkway. That simple border turns loose, weedy mulch into two tidy beds that feel intentional instead of leftover space. Layered planting then fills the beds with a mix of low ground cover, mid-height flowers, and a couple of small shrubs, so the beds look full without crowding the path.
This approach works well on any narrow front beds that run beside a walkway or driveway. Start with the edging first so the shape stays clean, then plant in layers from the front of the bed to the back. It keeps the beds looking neat even when a few plants finish blooming, and it works on both small lots and larger yards where you want structure without a big redesign.
Define Garden Beds With A Clear Border
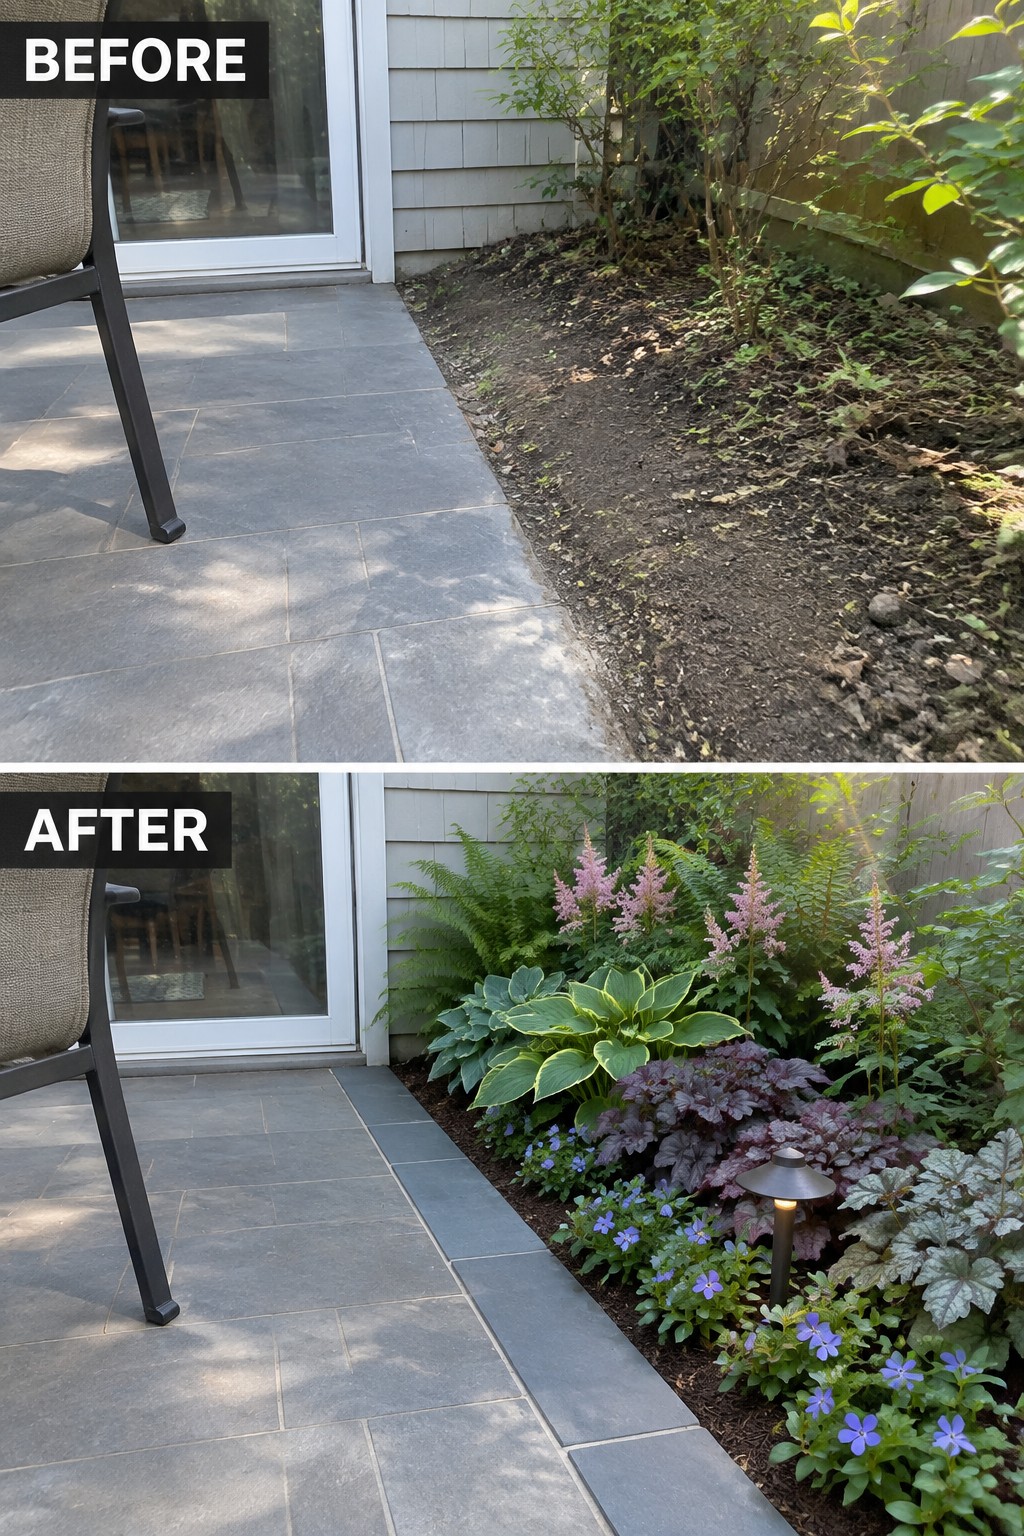
The bare strip of dirt next to the patio looked unfinished and made the whole side of the house feel neglected. A simple border created a clean line that separated the seating area from the planting bed and gave the space an intentional shape.
This approach works best along patios, walkways, or house foundations where the ground just ends without any structure. Lay the border first so the bed stays neat, then fill it with a few layers of plants that vary in height and texture. It suits small yards or side yards where you want the planting to look planned without taking up much room or blocking movement.
Add Defined Borders To Shape A Roadside Strip
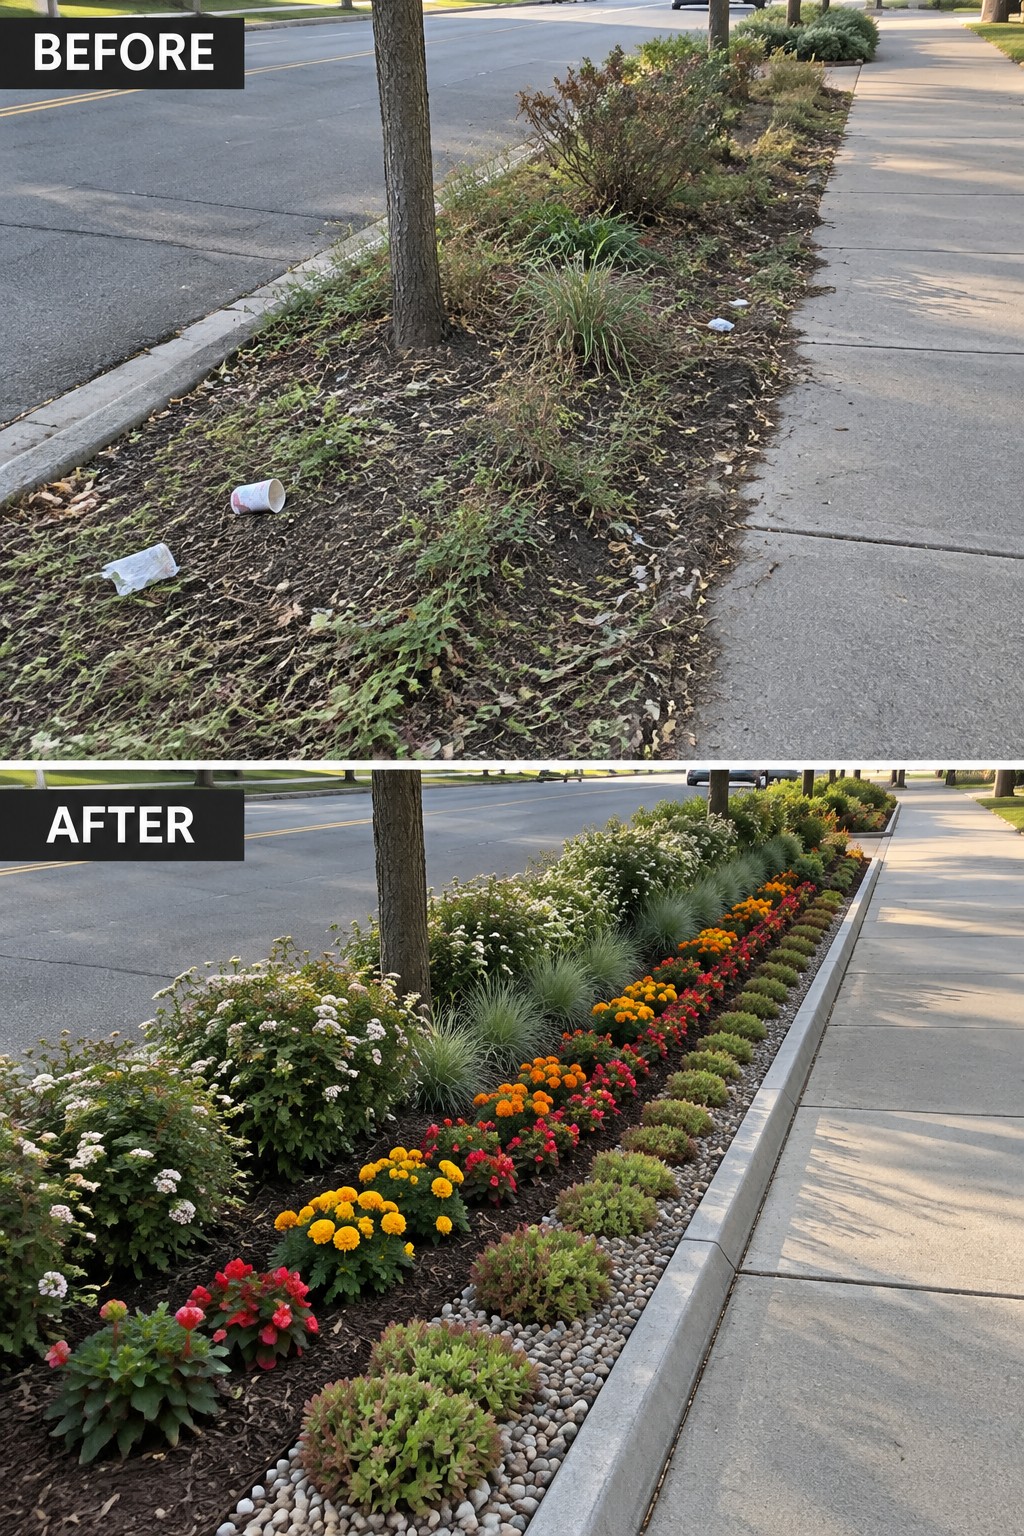
The main change here is the addition of a low concrete edge that turns a loose, weedy patch into a clear planting bed. Once the border was in place, the area could be filled with plants in different heights instead of letting everything sprawl together.
This idea works well along sidewalks or driveways where the planting needs to look intentional. Clean out the weeds first, install the edging, then layer taller shrubs at the back, midsize flowers in the middle, and lower plants along the front. The structure keeps the bed from looking messy again within a season or two.
Define Flower Beds With Clear Borders
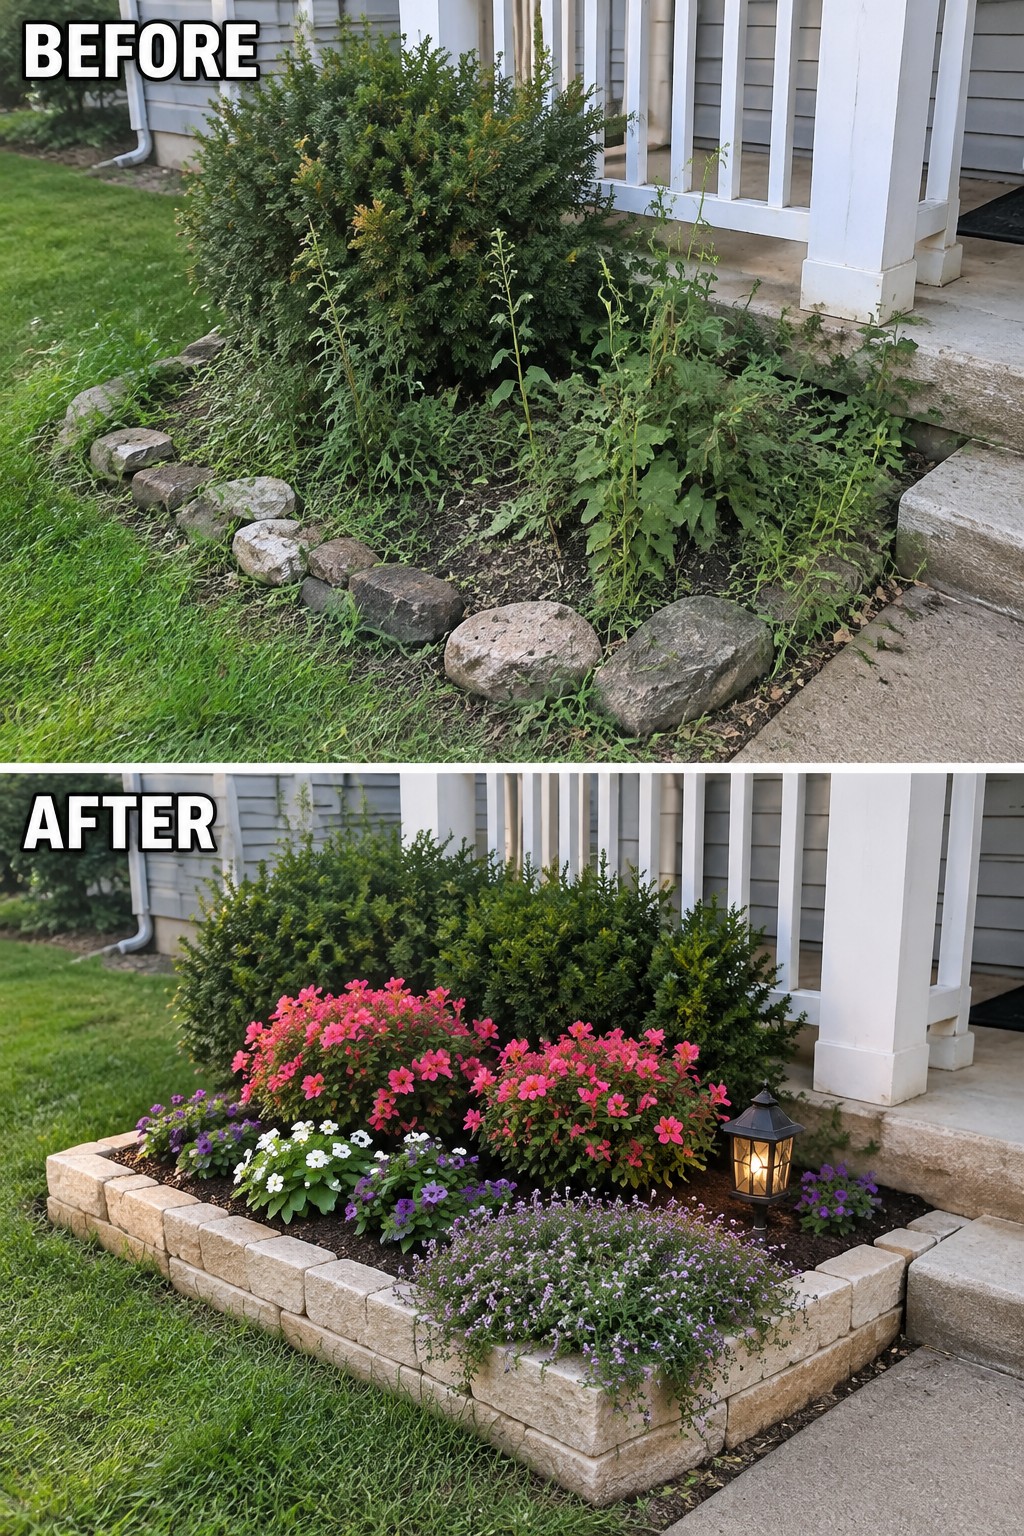
Adding a simple border is often the first step that makes a messy bed look intentional. Here the low stone wall created a clean edge along the house and steps, while the plants were arranged in layers from taller shrubs in back to lower flowers in front. That single change turned scattered weeds and rocks into a planted area that feels planned.
This idea works best along a foundation or walkway where the bed needs structure. Start with the border before adding plants, and keep the layers simple so nothing overpowers the space. It suits most homes because it improves the look without requiring a full redesign.
Create Defined Flower Beds With Simple Edging
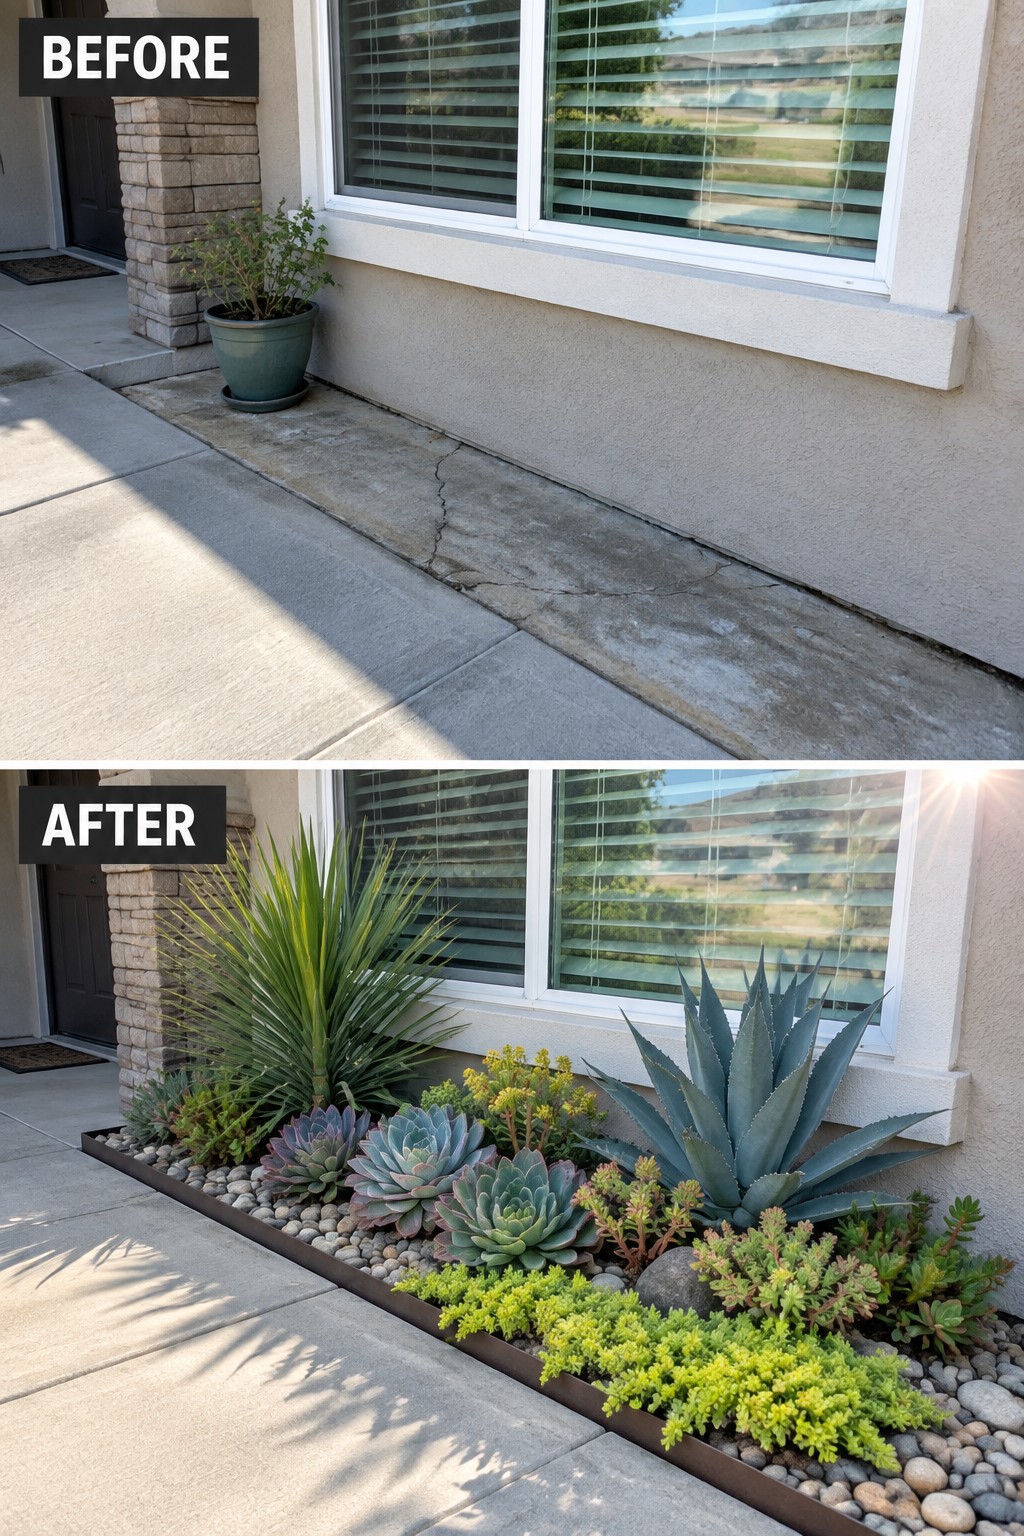
Adding a metal border turns a plain strip of concrete into a clear planting area that feels finished. The succulents and larger plants now sit in their own defined space instead of looking scattered against the house.
This idea works best along foundations where you want low water plants that still look full. Put the edging in first to hold the gravel, then place taller plants toward the back and lower ones up front so the bed stays easy to maintain.
Add Defined Borders To Shape Up A Flower Bed
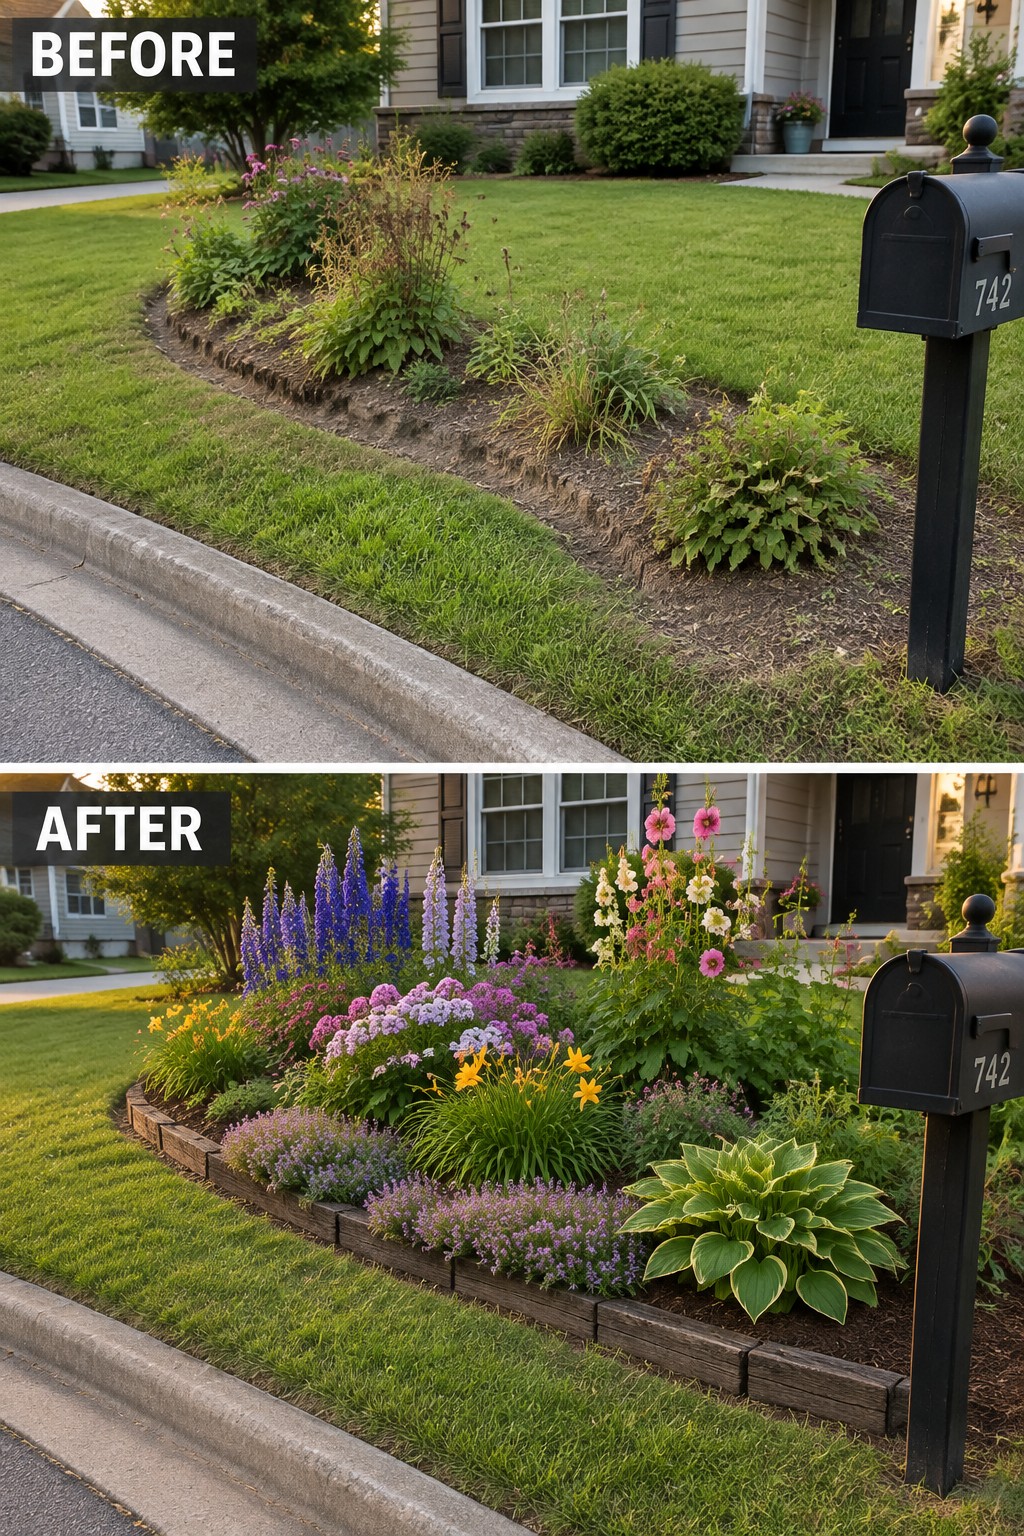
One of the simplest ways to improve a tired flower bed is to give it a clear edge first. The before photo shows a loose, weedy strip with no real shape or separation from the lawn. Adding wood edging and grouping plants in layers makes the same space look planned and much easier to maintain.
This idea works best along a front lawn or walkway where the bed needs to feel intentional without a lot of upkeep. Lay the edging in a smooth line, add a few taller plants toward the back, and fill in with lower ones in front so the bed has some depth instead of looking scattered.
Build Low Walls To Terrace A Sloped Flower Bed

A bare dirt slope is hard to plant and easy to lose to erosion. Adding a few low stone retaining walls turns the hill into a series of flat beds that hold soil and give you clear planting zones. The change from loose dirt to stacked stone and mulch makes the whole area look intentional instead of neglected.
This approach works well on any gentle to moderate slope where you want flowers without constant washouts. Start with the walls first, then fill each level with a mix of taller plants at the back and shorter ones toward the front. Keep the beds narrow enough to reach across for weeding and watering.
Use Defined Borders To Shape Front Flower Beds
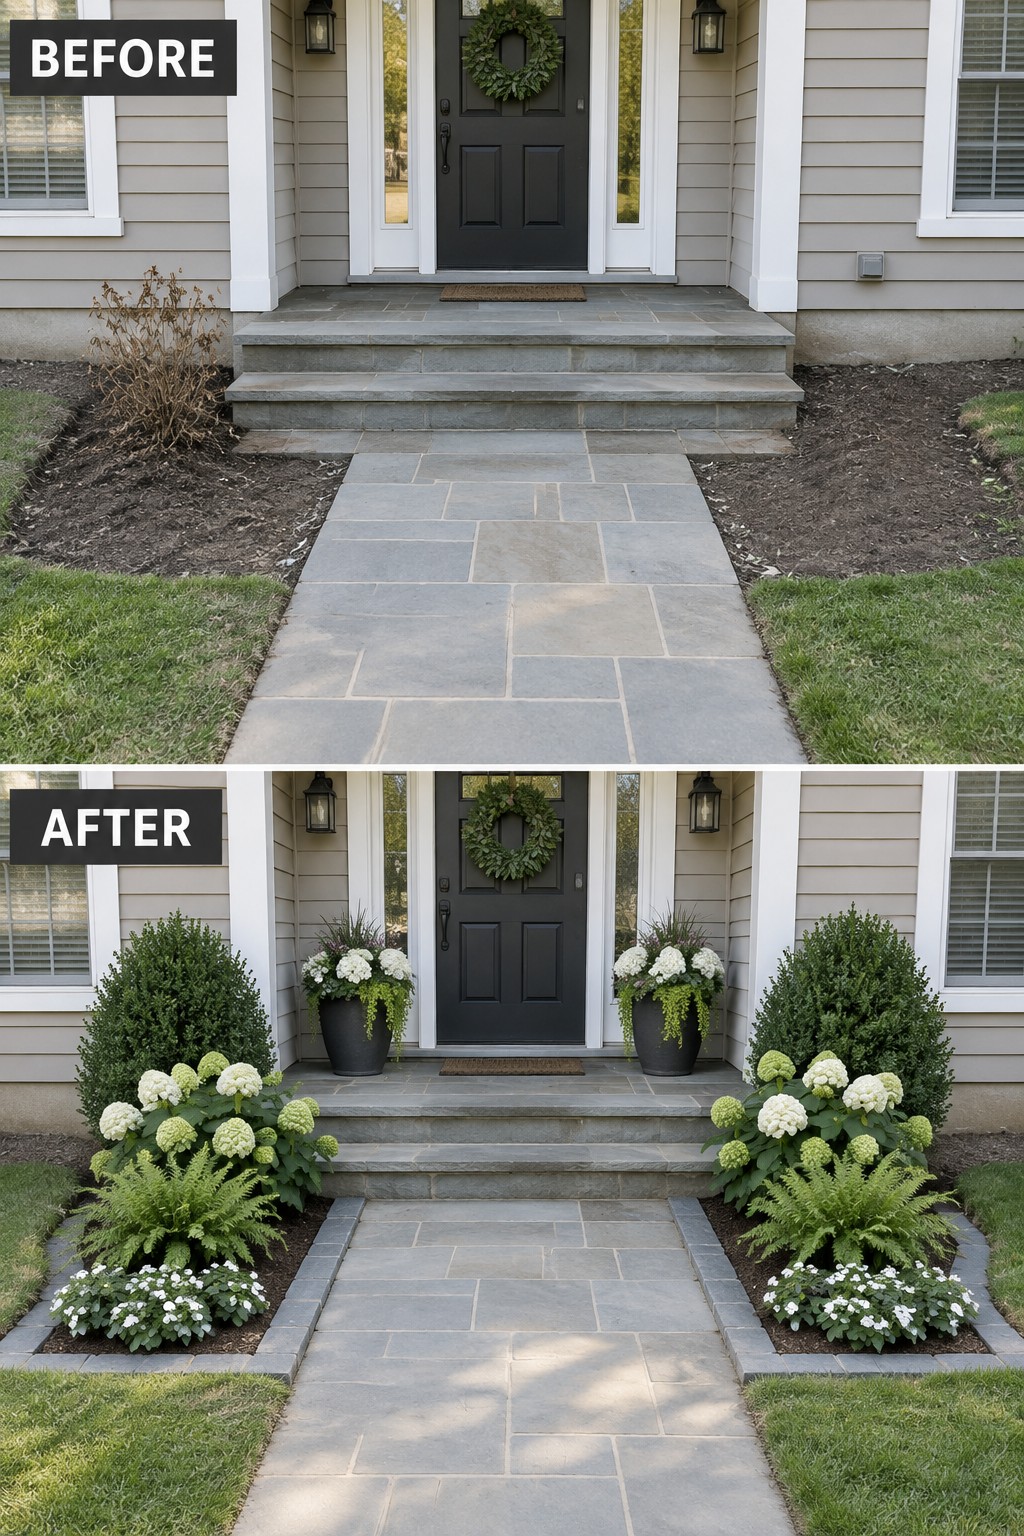
The front beds looked messy and unfinished before, with dirt and stray plants running right up to the walkway. Adding a clean stone border and filling the beds with layered planting gave the whole entry a much more intentional feel. The low flowers sit in front, ferns and hydrangeas fill the middle, and taller shrubs anchor the corners, so the path now feels like it belongs to the house instead of just cutting through empty space.
This approach works especially well on narrow front yards or small entry areas where you want structure without crowding the walkway. Start with the edging first so the beds have a clear shape, then build layers by height rather than trying to fill everything at once. It keeps the planting simple to maintain and makes the front look cared for even when the rest of the yard is still a work in progress.
Define Flower Beds With Edging And Layered Planting

The before photo shows a loose line of shrubs and mulch with no real shape, while the after version uses a concrete border to hold everything in place. Layering taller evergreens at the back, medium flowering shrubs in the middle, and smaller plants along the front gives the bed clear structure instead of letting it look scattered.
This idea works best along fences or house walls where the planting needs to feel intentional. Install the edging first so the lawn stays separate, then pick plants in three heights so the bed fills out without constant pruning. It keeps the look neat even in a narrow space.
Add A Raised Border To Shape A Small Flower Bed
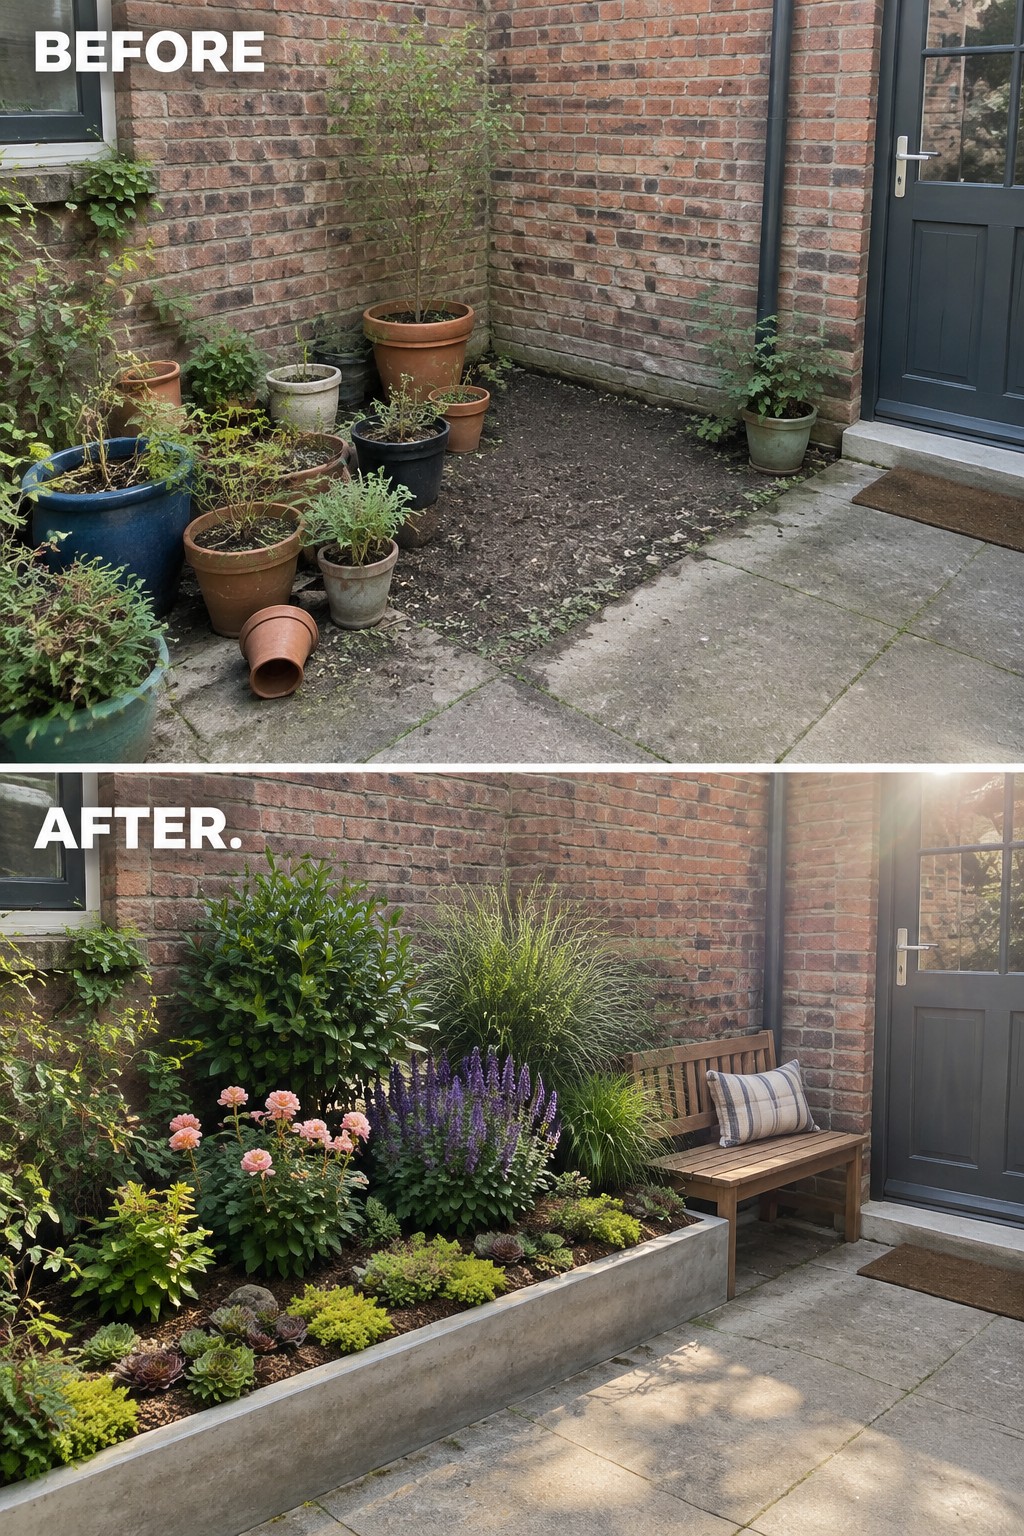
A raised concrete border turns a scattered collection of pots into one clear planting area. The before photo shows plants spread across the ground with no real edge or order, while the after shows everything contained in a single bed that follows the wall line.
This idea suits tight corners or side yards where you want to add planting without losing walking space. Keep the border low so it does not block light, then layer low succulents along the front, mid-height flowers in the middle, and one taller grass or shrub at the back for height.
Frequently Asked Questions
Q: What border idea works if my flower bed sits next to the lawn?
A: Dig a shallow trench along the edge and fill it with river rocks. The rocks hold the soil back while letting water drain through. Grass stays out and the bed looks neat without much work.
Q: How should I layer the plants so everything gets enough sun?
A: Place the tallest flowers toward the back where they won’t shade the rest. Then add mid height ones in the middle and low growers up front. Check each plant tag for sun needs before you set them in.
Q: Do layered beds need extra weeding?
A: Mulch helps block most weeds. Pull the few that show up right away.
Q: What if I want to update an old bed without digging everything out?
A: Cut back the messy plants and add new ones in the gaps. Define the border first to give the whole thing a fresh shape. Then fill in with layers around what stays.
