

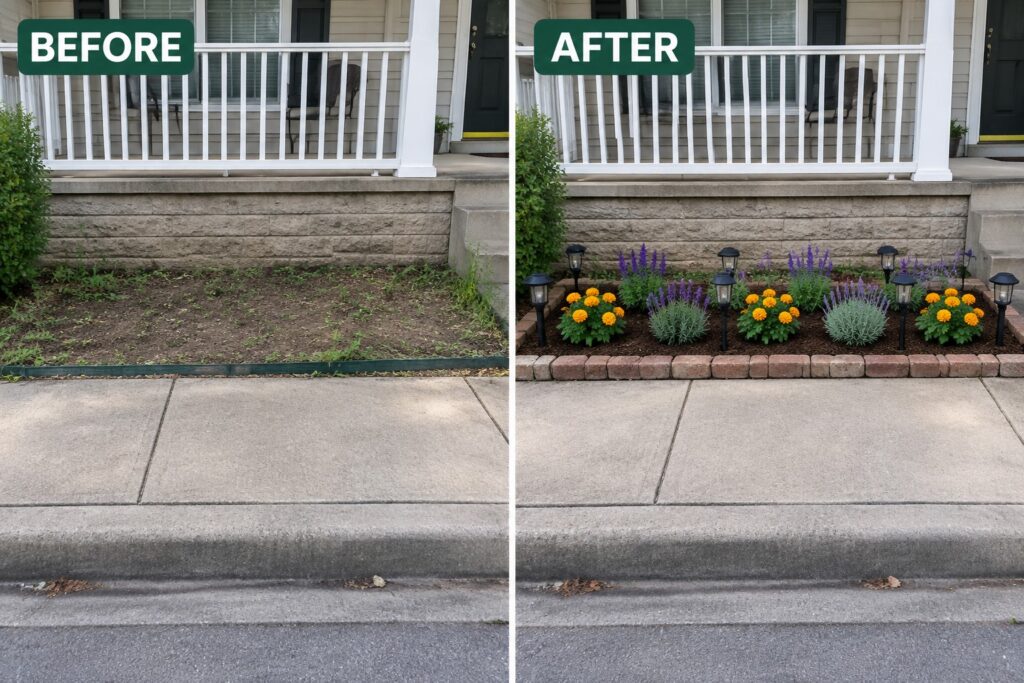
I often notice that the edges around a yard are what keep the whole space from feeling scattered and unfinished.
Adding a few flower beds gives the ground some clear lines so the rest of the yard starts to make sense.
One weekend is usually enough to get something started.
I like to begin with basic edging and soil prep because those steps make the planting go faster and look more deliberate once the flowers go in.
Small beds like that tend to improve the layout over a season or two without requiring a full redesign of the yard.
Create A Defined Front Yard Flower Bed
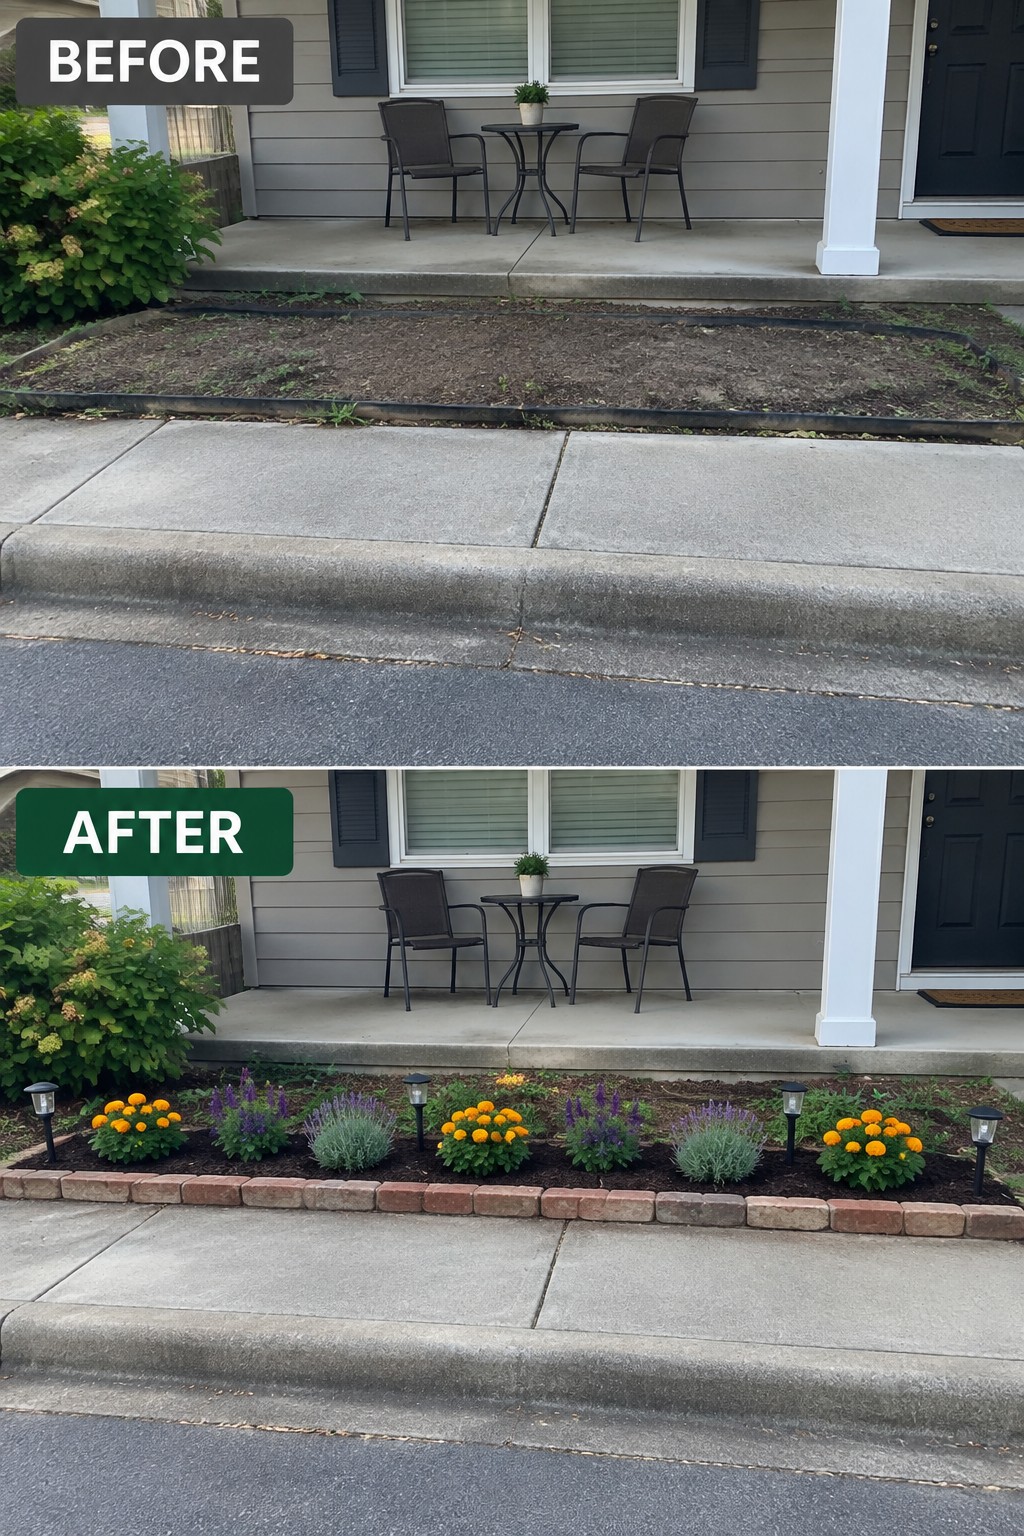
A long bare strip of dirt right in front of the house makes the whole yard look unfinished. Adding a low brick edge and filling the bed with mulch creates a clear line that separates the lawn from the planting area. Grouping flowers in small clusters instead of spreading them out keeps the bed looking full without needing a lot of plants.
This idea works on any narrow strip where the house meets the sidewalk or driveway. Lay the edging first so the shape stays straight, then repeat the same few plant types along the length. It gives the front a cared-for look even if you keep the rest of the yard simple.
Edge A Narrow Fence-Side Flower Bed

An overgrown strip next to a fence or house wall quickly turns into a mess of weeds and random growth. Adding a low wood edge along the length of the bed, then covering the soil with mulch, keeps everything in place and gives the area a finished look without much work.
This approach works best in tight side yards or along property lines where space is limited. Clear the overgrowth first, set the edging, and plant in groups so the bed stays easy to maintain once the flowers start to fill in.
Add A Flower Bed Along Your Fence

A straight fence line next to a plain lawn can feel unfinished. Adding a flower bed with simple edging and mulch gives the space clear shape and turns empty grass into something more useful. The paver border and fresh planting make the whole area look intentional without needing a big redesign.
This idea works well along any long fence or property line where the lawn runs right up to the wood. Mark a gentle curve first, install edging to hold the shape, then mulch the bed before adding plants. It keeps the border tidy, makes mowing easier, and gives you room to grow flowers or shrubs without crowding the rest of the yard.
Add A Rock Border To Clean Up A Weedy Strip
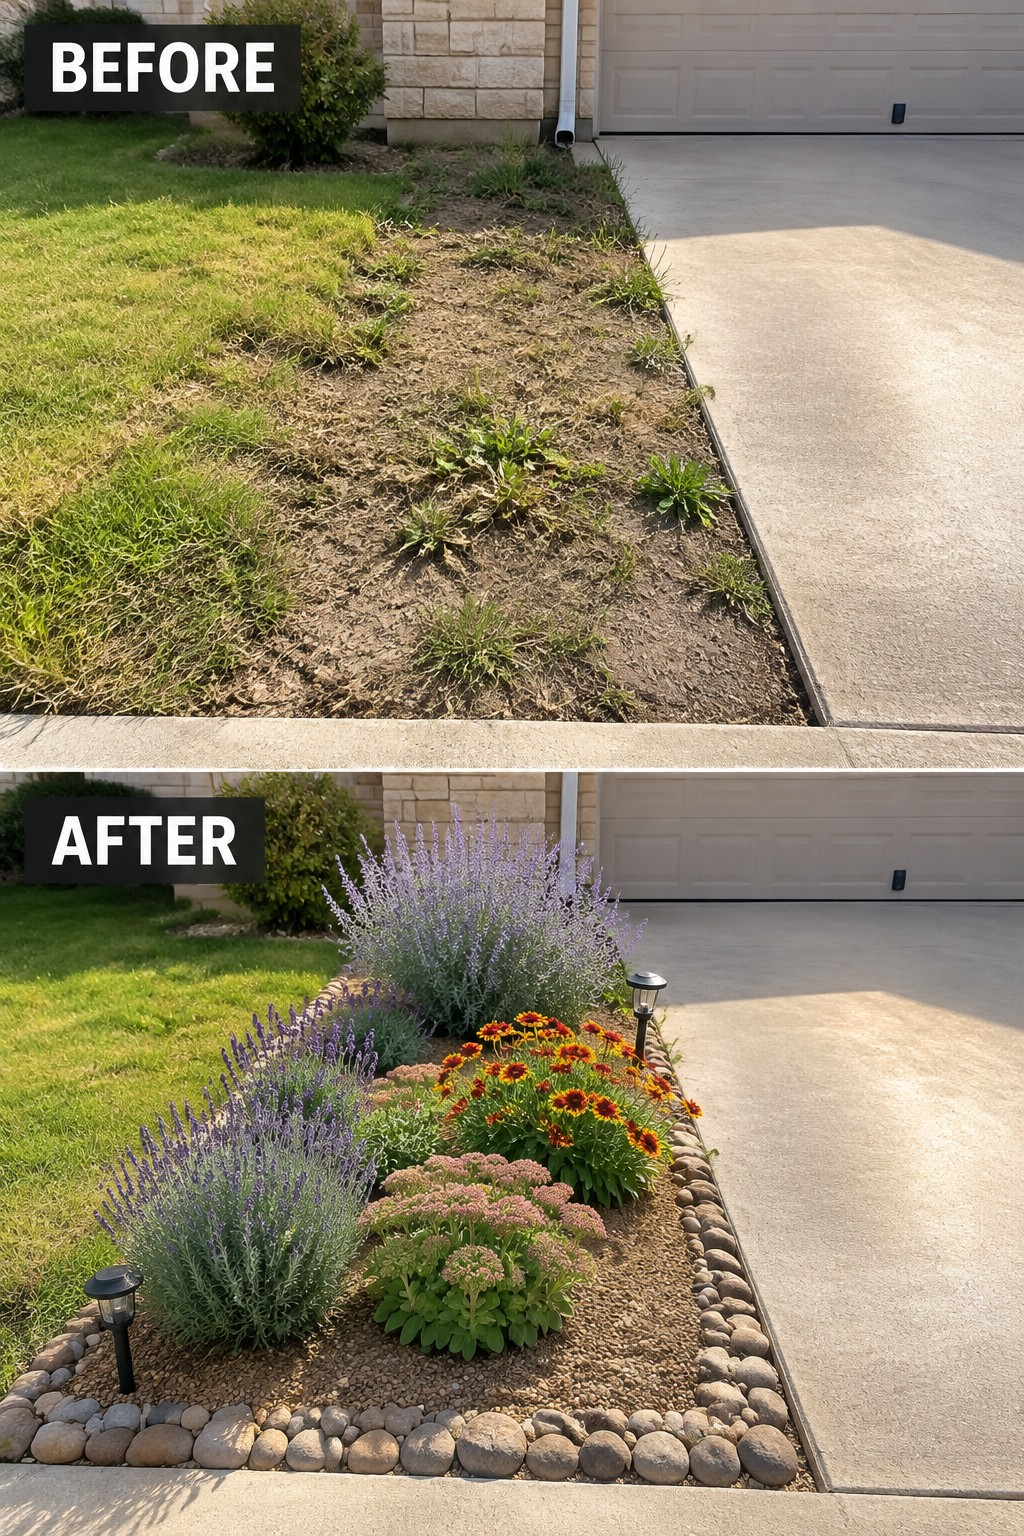
A narrow strip of weeds and bare dirt next to the driveway often ends up looking neglected. Adding a simple rock border and filling the space with a few plants and gravel turns the area into a clean, defined bed that feels intentional.
This idea works best along driveways or house foundations where space is tight. Clear the weeds first, set the rocks to hold the shape, then plant and cover the soil. It keeps the grass from creeping in and makes the side of the house look more finished without needing a lot of room.
Layer Shrubs And Ground Covers Along The Foundation
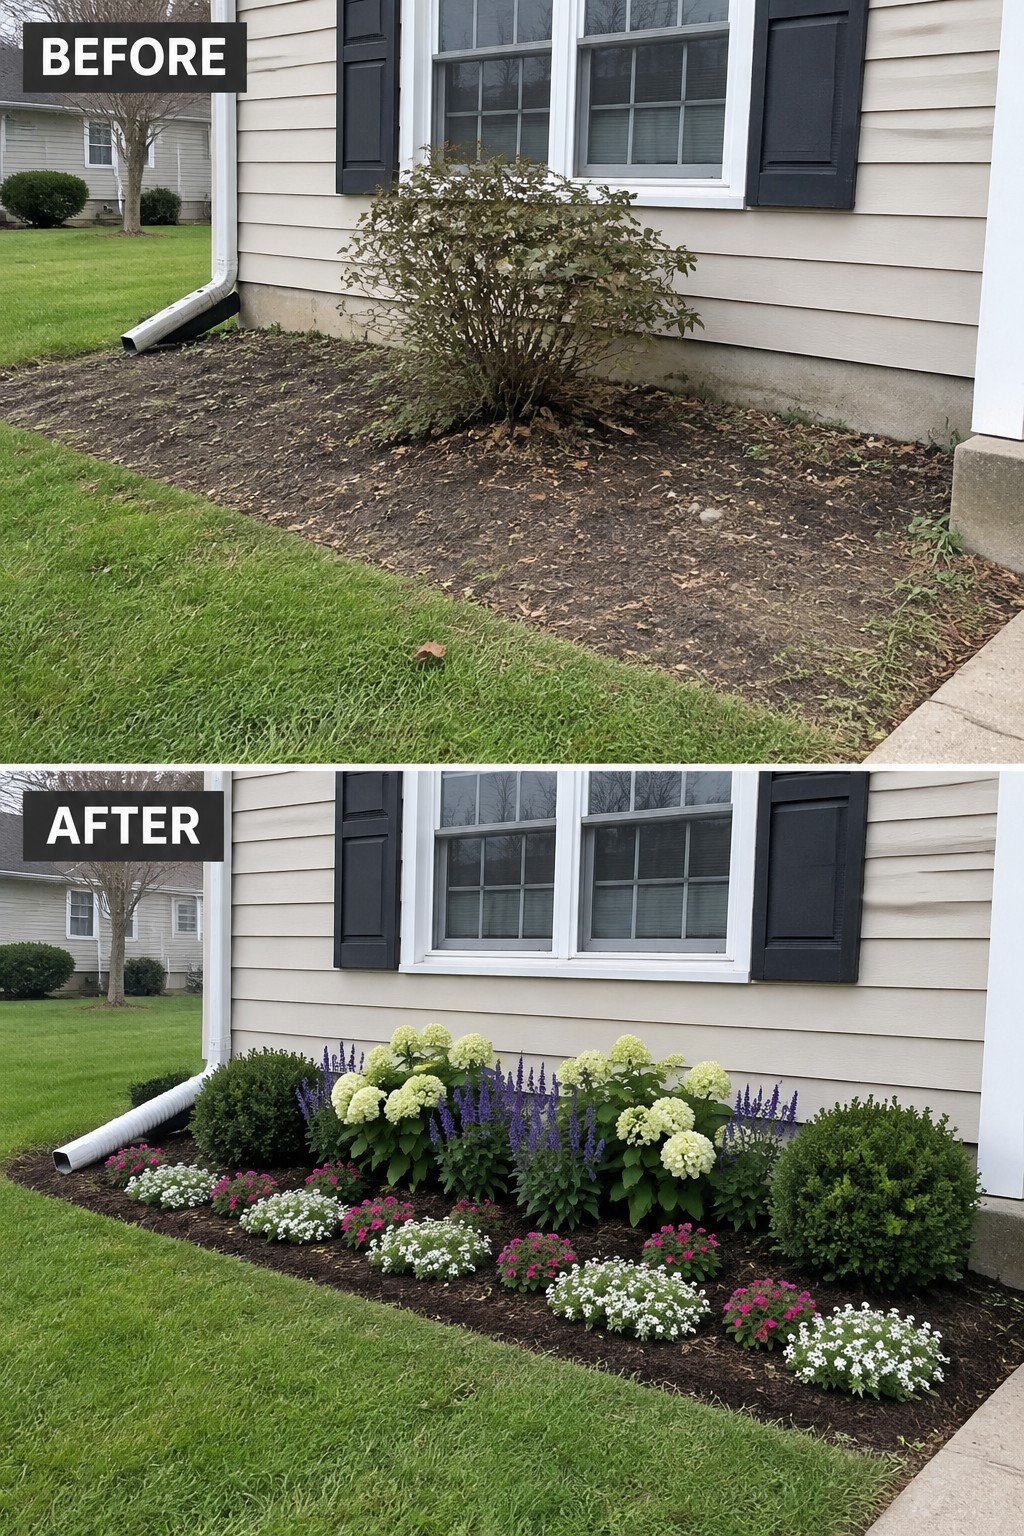
A bare strip of mulch and one overgrown shrub can make the whole front of a house look unfinished. Adding a defined bed with a mix of taller shrubs, mid-height perennials, and low ground covers gives the area purpose and makes the house feel settled.
This approach works best on simple ranch or two-story homes where the foundation sits right against the lawn. Start by clearing weeds and old mulch, then group plants by height so nothing blocks windows. Use the same mulch throughout to keep the bed looking intentional without needing constant upkeep.
Refresh A Sidewalk-Side Planting Strip

A narrow strip of weeds and bare soil next to a sidewalk is easy to ignore until you decide to give it a clear edge. Adding a simple border and fresh mulch turns that messy area into a planted bed that stays neat and contained.
This approach works well along paths or driveways where space is limited. Lay the edging first to hold everything in place, spread mulch to reduce weeds, then add flowers that suit your light and climate. The result feels finished even if the rest of the yard is still coming together.
Add Brick Edging To Define A Small Flower Bed

A bare patch of dirt next to the house can feel like wasted space until you give it a clear edge. Adding a simple brick border turns the area into a contained bed that holds mulch and plants in place, making the whole corner look intentional instead of neglected.
This idea works especially well in narrow side yards or under windows where a full garden is not practical. Lay the edging first so the shape stays tidy, then fill it with a mix of pots or direct plantings that match the light you have. The result stays low effort but looks finished.
Plant A Flower Border Across An Empty Front Yard Strip

A plain strip of mulch in front of the house often looks unfinished next to the siding and lawn. Adding a defined flower bed with a simple border and a mix of colorful annuals gives the foundation a cleaner line and makes the whole front feel more put together.
This works well on houses with a clear strip of ground between the siding and the lawn. Keep the bed narrow enough to reach from the walkway, use edging to hold the mulch in place, and choose a few repeating flower colors so it does not look scattered.
Add Structure To An Overgrown Backyard
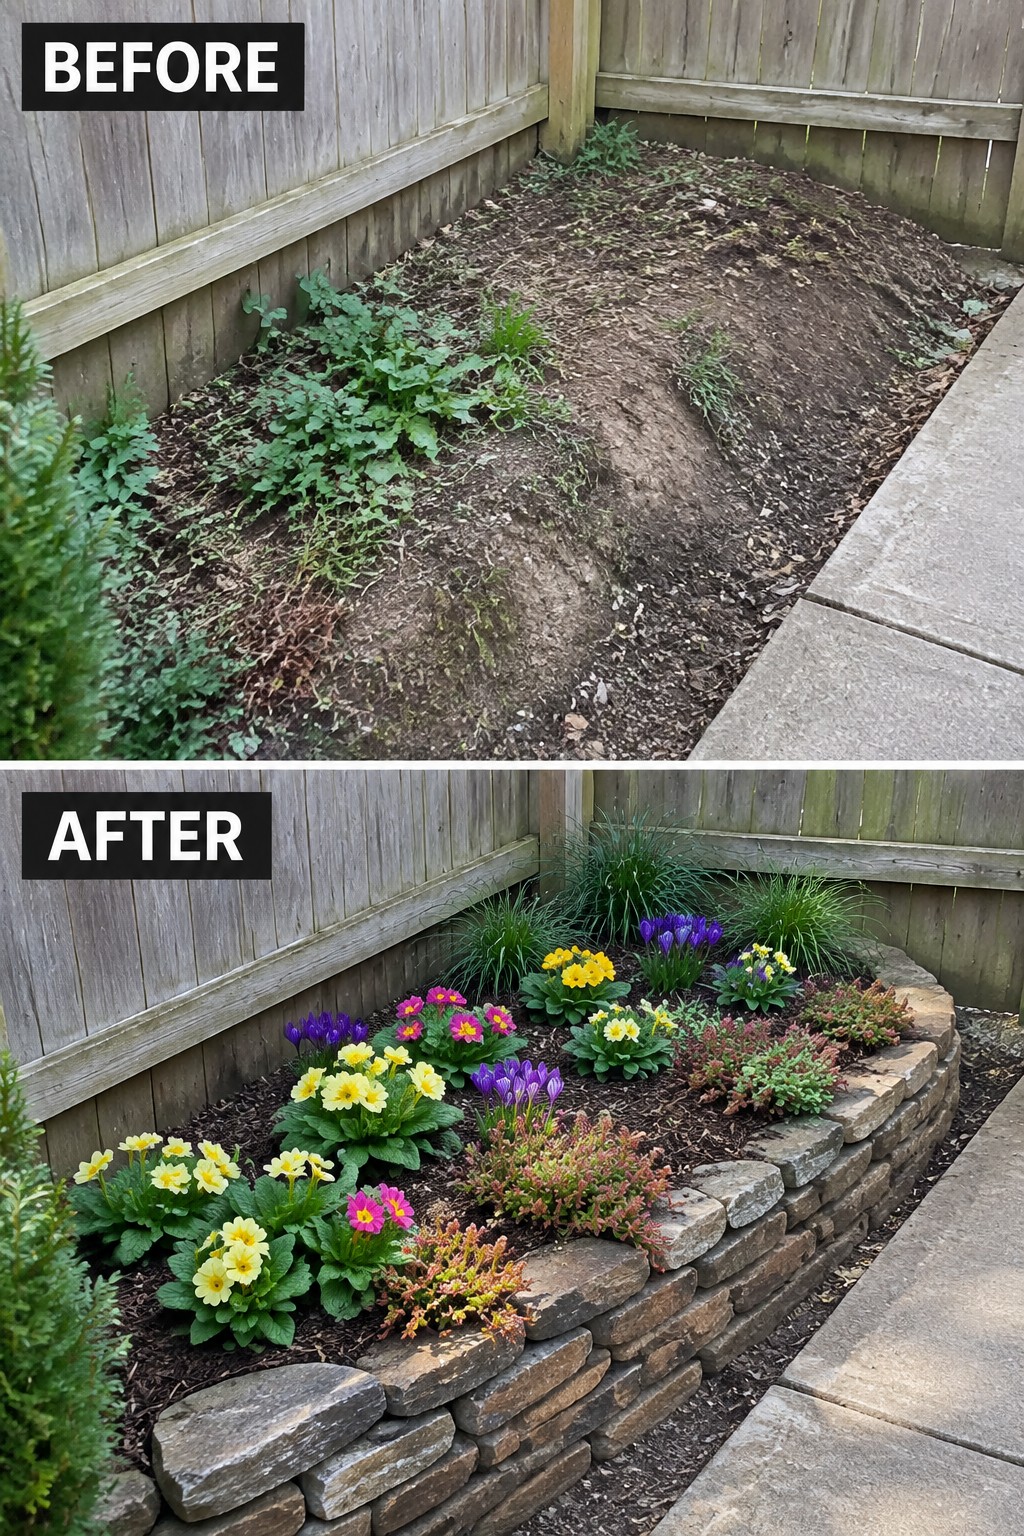
A strip of weeds and bare dirt along a fence often gets ignored until it starts to look messy. Adding a low stone border turns that same space into a clear garden bed that feels planned instead of neglected.
This idea works best in narrow side yards or along property lines where you want simple structure without a big project. Clear the area first, then set the edging to define the shape before adding mulch and plants. It keeps the bed looking tidy even as the plants fill in.
Turn A Weedy Lawn Edge Into A Flower Border

A straight brick edge and a simple row of flowers can turn a messy strip of weeds into something that looks planned. The before photo shows a wavy black border struggling to hold back grass and tall weeds right next to the driveway. The after shows a clean brick line, fresh mulch, and low flowers that keep the space looking neat without much extra work.
This approach works best along driveways or sidewalks where you want a clear separation between lawn and hard surface. Lay the edging first so the shape stays straight, then fill with mulch to cut down on weeding. Stick to plants that stay under two feet tall so they do not block the view or crowd the walkway.
Add Structure To A Sloped Yard
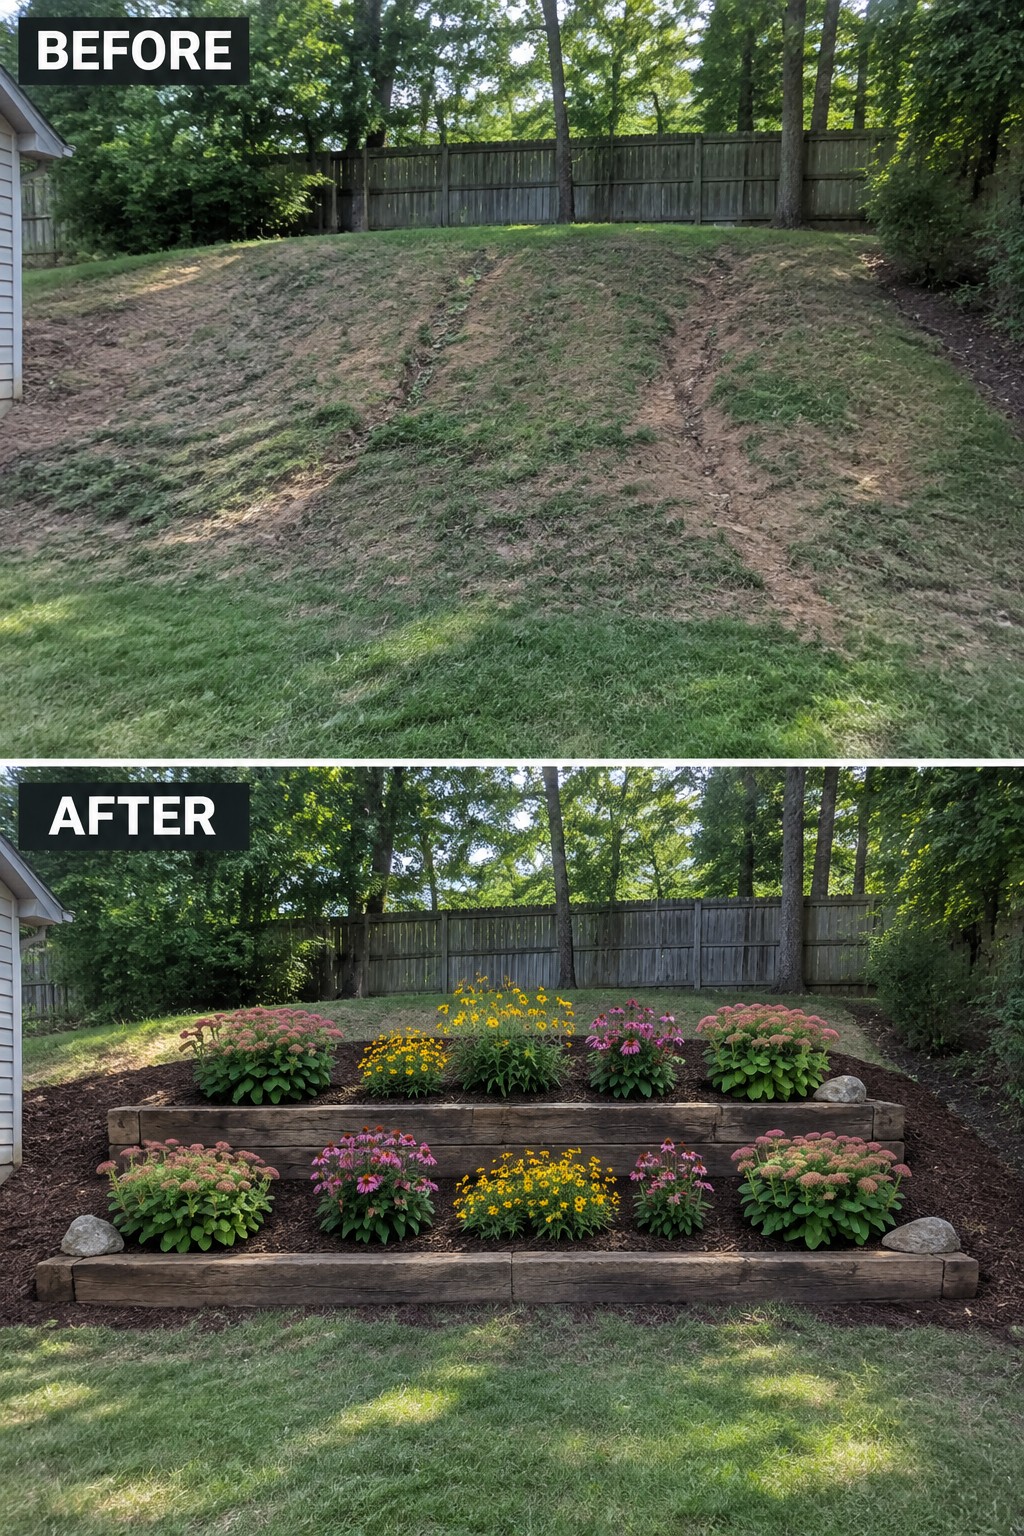
A bare slope like the one in the before photo usually turns into a weedy mess because nothing holds the soil in place. Adding two simple tiers of raised beds gives the area flat planting zones, stops erosion, and turns the whole slope into something you can actually maintain.
This idea works on any gentle backyard slope where you want more flowers without fighting the grade. Keep the beds low, use the same wood and mulch on both levels, and plant in groups so the beds look full from the start.
Define A Narrow Flower Bed With Stone Edging
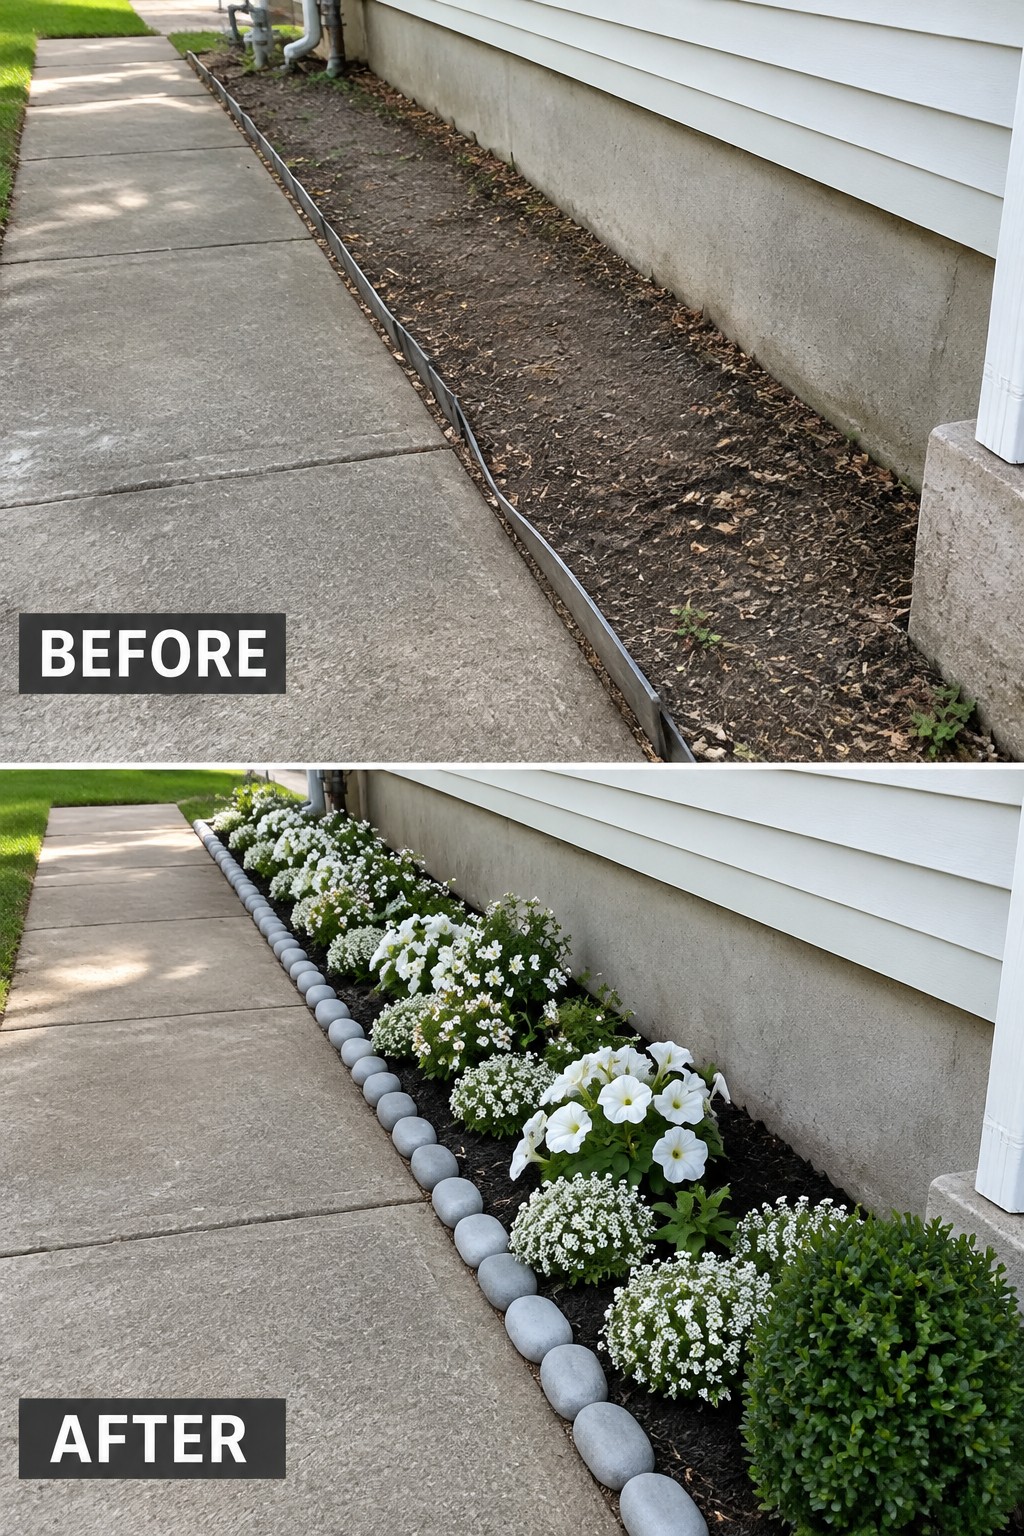
A thin strip of dirt next to a sidewalk often looks unfinished because it has no clear boundary. Adding a row of rounded stones gives the bed a solid edge and makes it easier to keep mulch and plants in place. The simple change turns a weedy gap into a planted border without needing a lot of width.
This approach works well along foundations or walkways where space is limited. Start by laying the edging stones first so the shape stays consistent, then fill the bed with compact flowers that can handle the sun exposure. The result stays neat even after a few seasons of growth.
Refresh An Overgrown Fence-Line Garden With Mulch

An overgrown strip next to a fence often looks worse the longer it sits. Clearing the weeds, laying down mulch, and adding a simple brick edge turns that same space into a planted border that stays neat with much less work.
This approach works well on narrow side yards or back fence lines where grass is hard to mow. Start with a thorough cleanup, then use the edging to keep mulch and plants contained. Hostas, ferns, and a few taller perennials give height without crowding the fence.
Build A Small Seasonal Flower Garden With Brick Borders
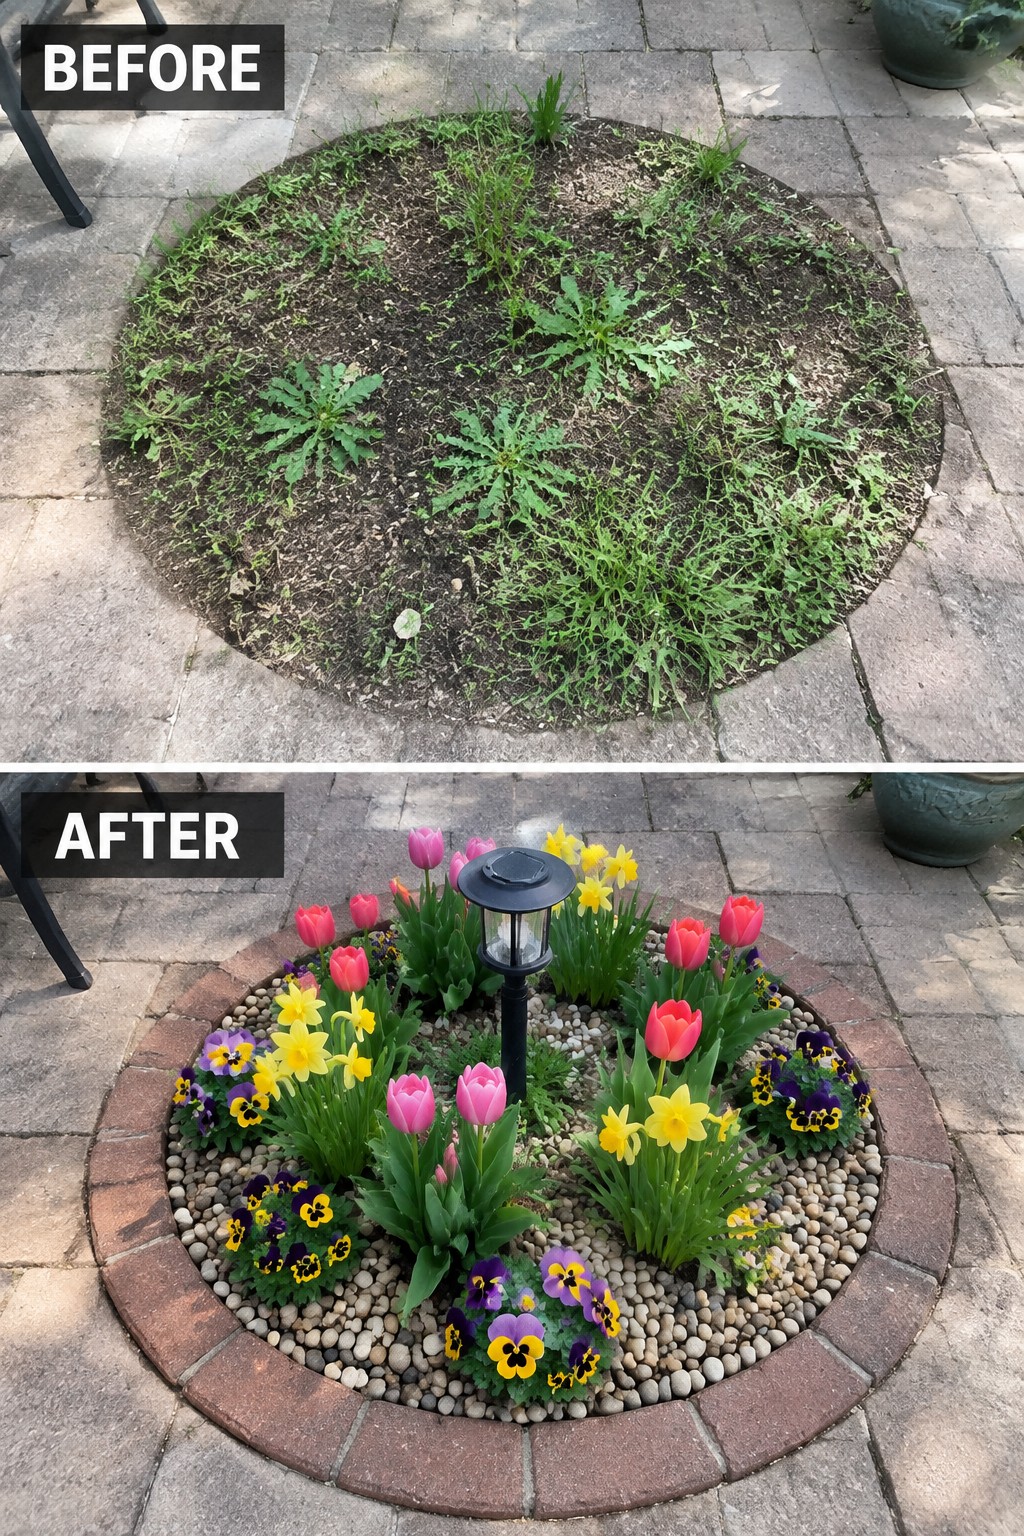
Clearing weeds from a bare patch first makes the rest of the project much easier. Adding a brick border, a layer of gravel, and a handful of seasonal flowers turns the same spot into something that looks intentional instead of neglected. The central light stays useful while the new edging keeps everything in place.
This approach works well in small paved areas where you want a bit of color without losing walking space. Start with a simple border that matches your existing patio, then fill in with plants that suit your climate. Keep the center open if you already have a light or small feature there.
Define Flower Beds With Gravel In Rocky Spots
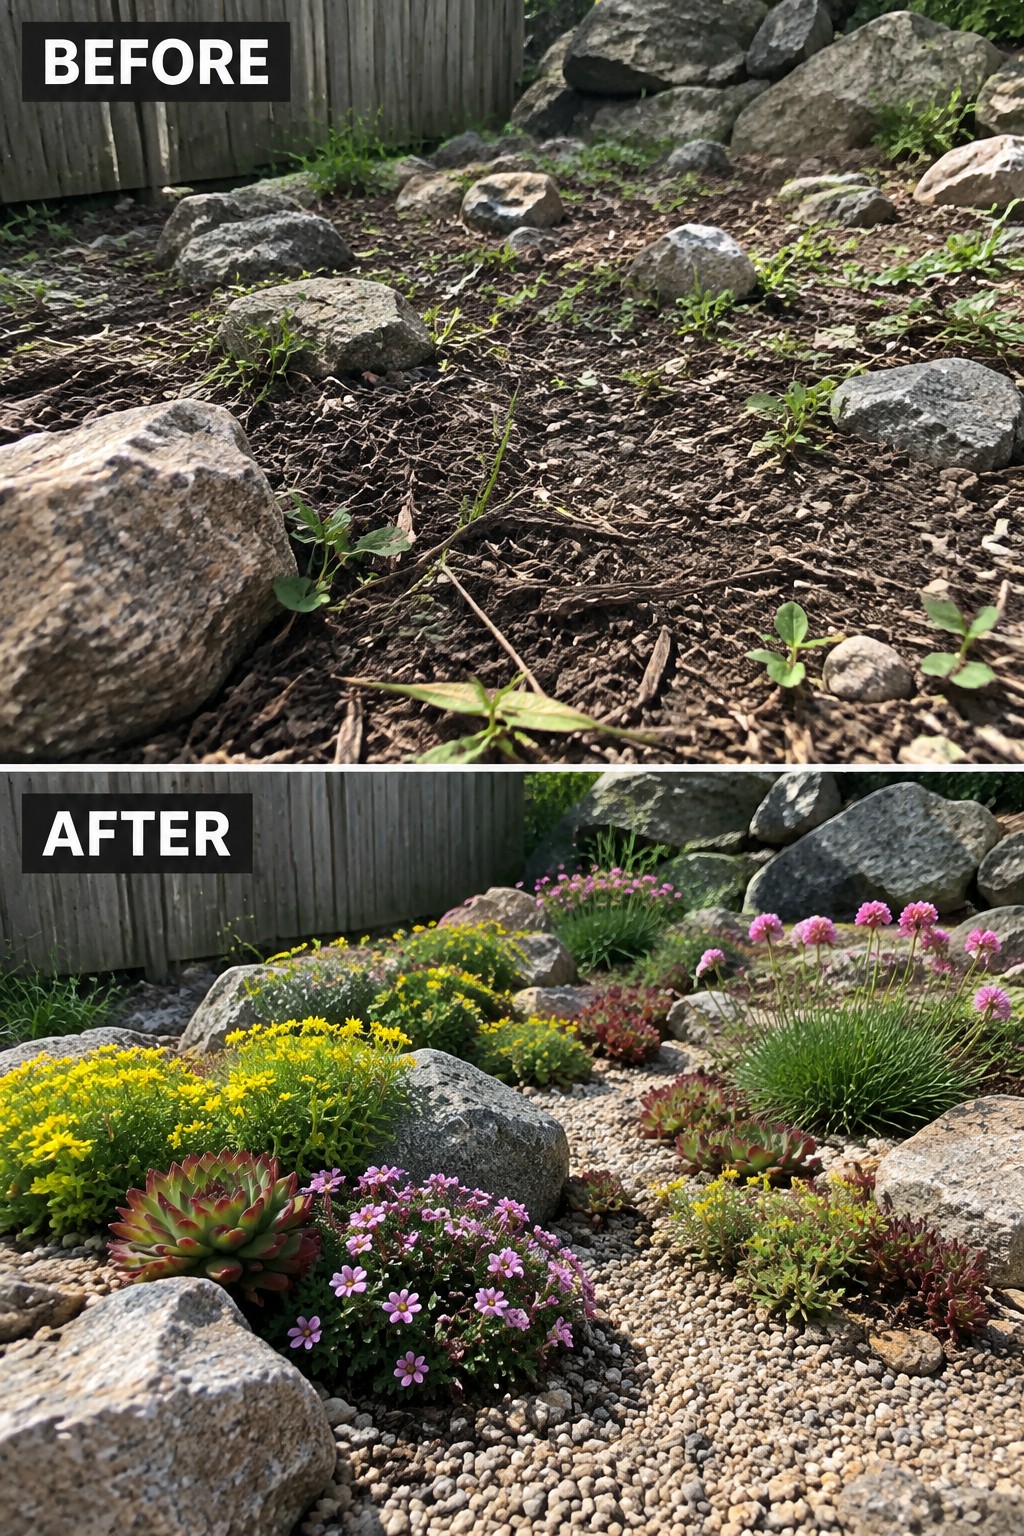
A rocky patch of dirt with scattered stones and weeds can look unfinished and hard to maintain. Adding gravel creates clean edges and a base that lets plants stand out, while keeping the existing rocks as part of the layout instead of fighting them.
This approach works well in side yards or back corners where soil is thin and rocks are already present. Start by clearing weeds, then spread gravel to form simple beds and tuck in low-maintenance plants that handle the conditions. It keeps the area looking intentional without needing major excavation.
Add Flower Boxes To A Balcony Railing

A balcony that is just concrete and metal can feel bare and unused. Mounting wooden flower boxes directly on the railing changes that fast by bringing in color and softness at eye level while leaving the floor open for walking or a small mat.
This idea works best on apartment balconies or small outdoor spaces where floor room is tight. Secure the boxes well so they stay safe in wind, pick plants that match the sun exposure, and keep the colors somewhat consistent so the railing looks intentional rather than crowded.
Build A Mulched Flower Bed In An Open Lawn Area

A flat stretch of lawn can feel unfinished when it just runs right up to the fence. Adding a simple stone border and filling the inside with mulch turns that same space into a clear planting area. The change gives the yard a finished edge without needing new structures or big construction.
This approach works well in small backyards where you want one main spot for flowers or shrubs. Start by laying out the shape with a hose or rope, then set the edging and add a few inches of mulch before planting. Keep the bed a manageable size so it stays easy to maintain over time.
Add A Flower Bed Beside Concrete Steps

A bare dirt strip next to entry steps often looks unfinished, especially when it sits right along a walkway. Filling that narrow space with a simple flower bed changes the whole feel of the front without any major construction. Mulch and a mix of bulbs and low plants turn the same spot into something that looks intentional and cared for.
This idea works best on homes where the steps sit close to the lawn or house. Keep the bed narrow so it does not block foot traffic, and choose plants that stay compact. Start with cleanup and mulch first, then add color with easy bulbs that return each year.
Add Edging To Define Tree Beds
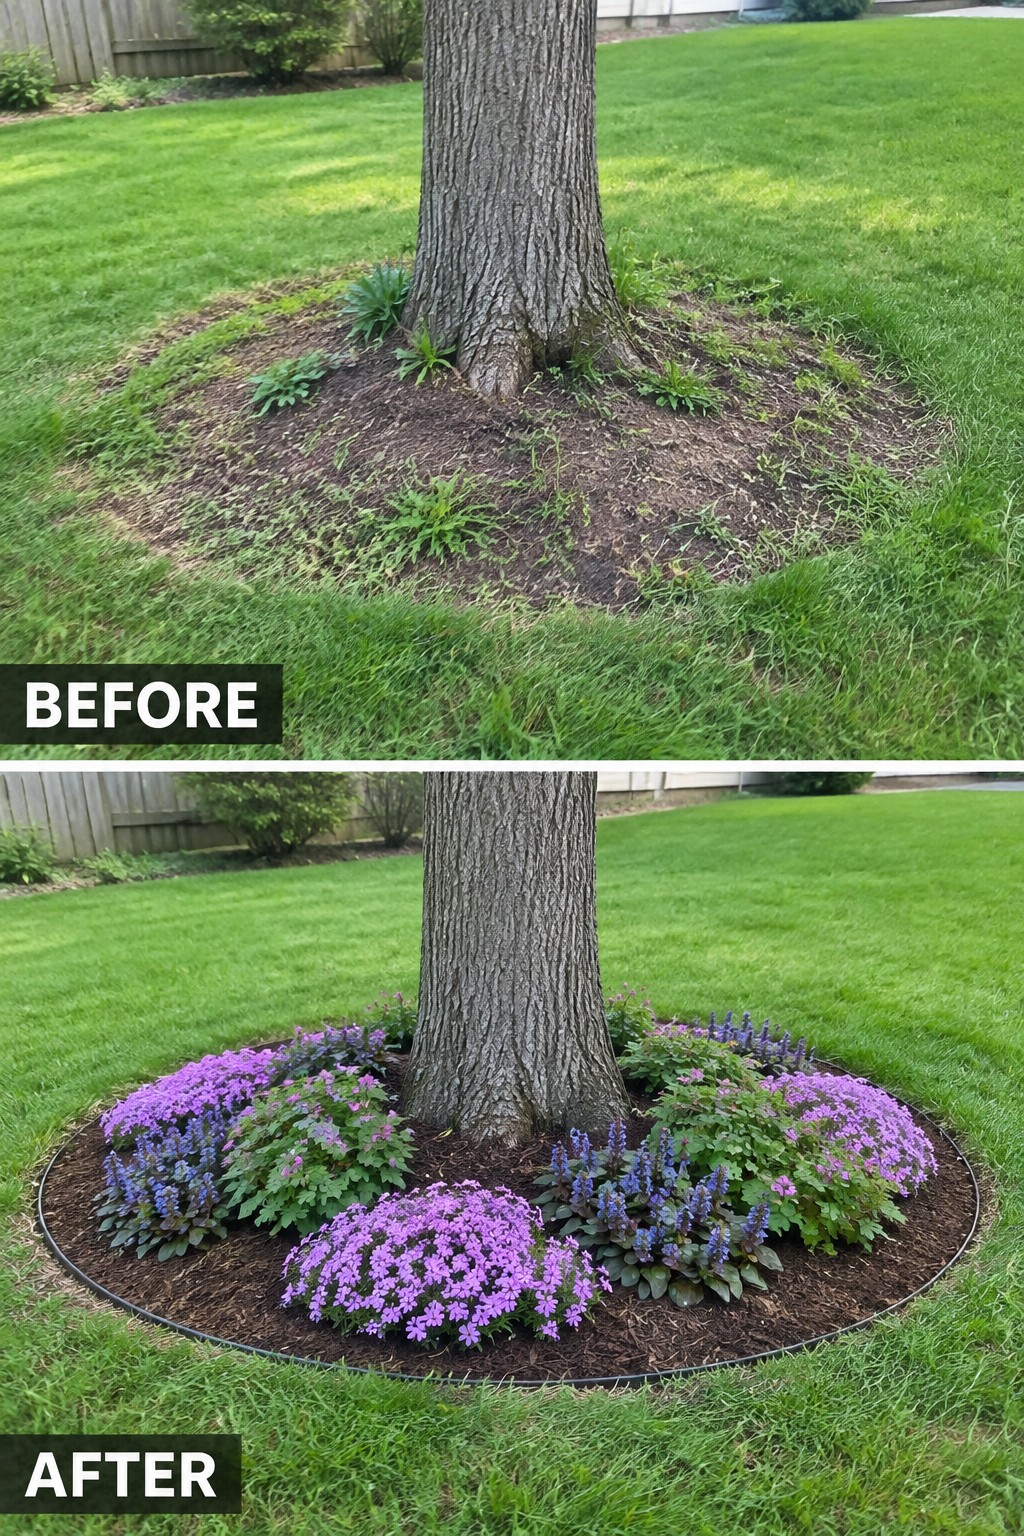
Many trees leave an awkward bare circle that fills with weeds and looks unfinished. A simple metal edge and fresh mulch turns that spot into a real planting bed that stays neat and keeps grass from creeping in.
This idea suits any yard with mature trees where you want structure without a lot of work. Make the ring wide enough for a few plants but still easy to mow around, and use mulch to hold moisture and cut down on weeding.
Turn An Old Pallet Into A Vertical Planter

A simple way to add planting space is to mount a pallet upright against a fence and fill the gaps with soil and flowers. The before photo shows an unused pallet just leaning in a bare corner. Once attached and planted, the same pallet becomes a compact vertical garden that brings color and height without spreading out across the ground.
This idea works best along fence lines or in tight yard corners where a full bed would feel cramped. Use a liner inside each level to hold the soil, and choose plants that handle the sun exposure in that spot. It keeps the project small and uses materials you may already have on hand.
Create A Layered Mailbox Flower Garden

The before photo shows a weedy patch with just a few scattered plants around the mailbox post. The after turns the same spot into a clean oval bed filled with rows of tall red flowers at the back, yellow blooms in the middle, and low blue flowers along the front edge, plus a simple rock accent by the post. This change makes the area look intentional instead of leftover space.
This approach works well along driveways or near the street where you want something neat without a lot of upkeep. Edge the bed first, add mulch for a finished look, and plant in height layers so the colors read from the road. It fits most homes with a basic lawn and helps connect the mailbox to the rest of the yard.
Add Layered Planting To A Narrow Foundation Bed
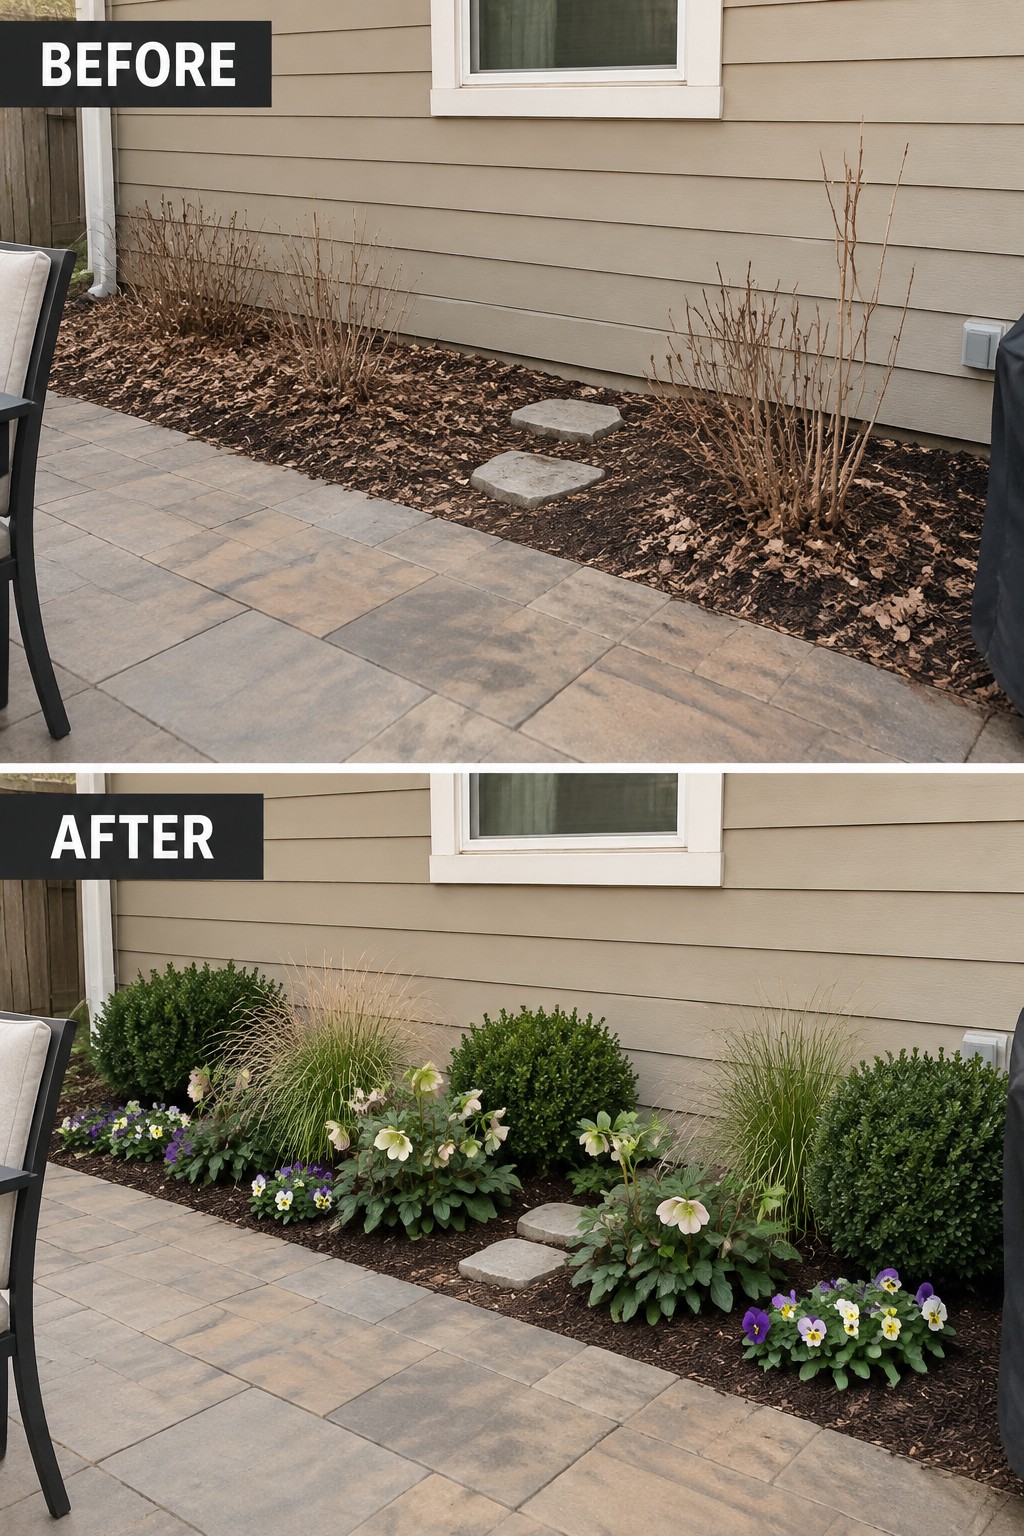
A narrow strip between the house and patio often ends up looking neglected when it only has a few struggling plants and mulch. In this case, clearing out the dead growth and adding a simple mix of evergreen shrubs, ornamental grasses, and seasonal flowers turned the space into something that feels intentional and full without crowding the walkway.
This approach works well on any home where the foundation bed is long and thin. Start with a few larger shrubs to create structure, then fill in with mid-size perennials and low ground cover for color. Keep the tallest plants toward the back so they do not block windows, and choose varieties that can handle the sun exposure in your yard.
Refresh A Circular Garden With Rock Edging
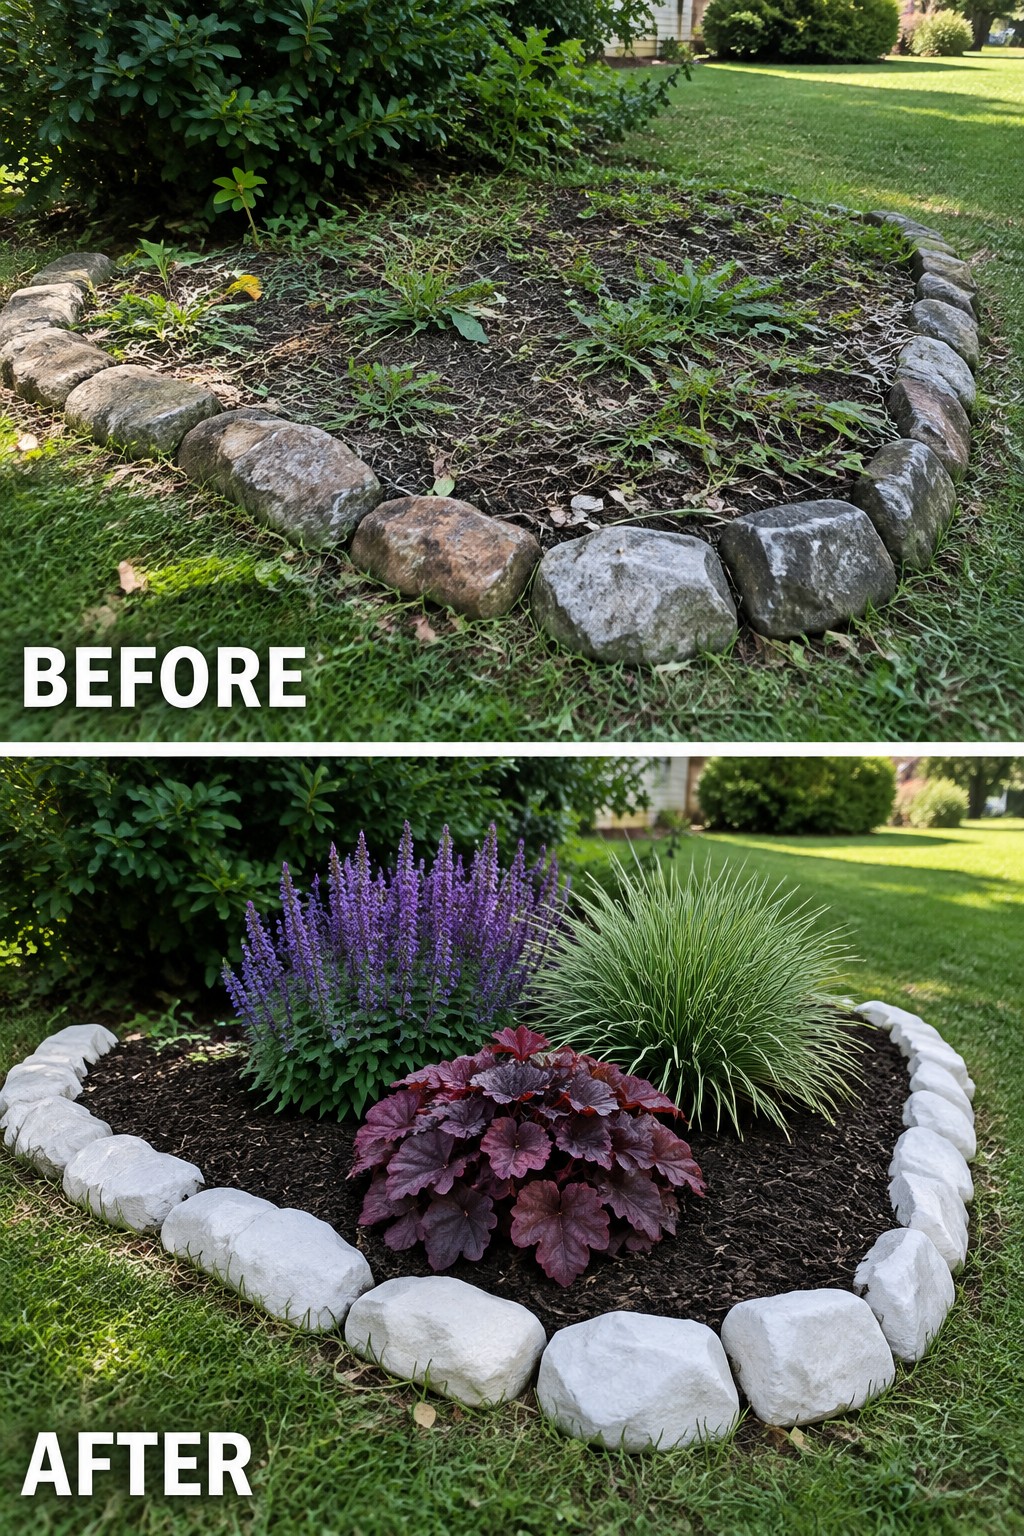
A weedy circle of dirt looks messy no matter what you do with it later. Once the rocks were straightened and the bed was cleared and mulched, the same border suddenly gave the plants a place to stand out instead of getting lost in the grass and debris.
This approach works best in small front or side yards where you want a tidy look without a big overhaul. Start by fixing the edge first, then choose two or three plants that stay in scale with the space. The rocks already do the heavy work of keeping the bed looking finished, so you do not need many extras.
Frequently Asked Questions
Q: How do I choose plants that will actually grow well together? A: Match the flowers to the amount of sun your spot gets each day. Mix in a few taller plants at the back and shorter ones up front so nothing gets shaded out. This keeps the bed looking full without constant rearranging.
Q: What if the ground feels too hard to dig right away? A: Soak the area with water the night before you start. The soil loosens up and makes turning it over much easier on your back. You can finish the whole bed in a few hours once it softens.
Q: How do I keep weeds from taking over after I plant? A: Lay down a thin layer of mulch right after planting and pull any sprouts by hand while they are small. Check the bed once a week at first until the flowers fill in and shade the ground.
