

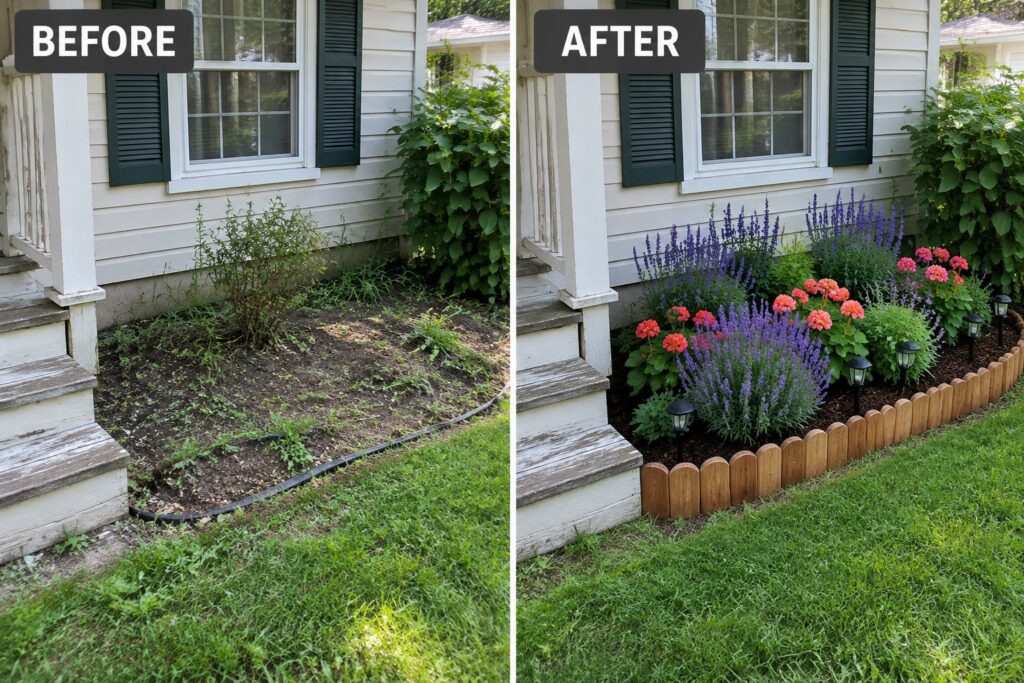
I often notice how flower beds start to lose their shape after a season or two, especially when the edges blur into the lawn.
Adding a simple wood border helps keep the soil in place and gives the plants a clearer spot to grow without constant trimming.
It feels satisfying to see the lines stay straight even after rain.
Some of these wood edging ideas use branches or logs that blend in naturally over time.
I would probably try the layered log style first because it seems sturdy and uses materials that weather nicely.
Create Defined Flower Beds With Wood Edging
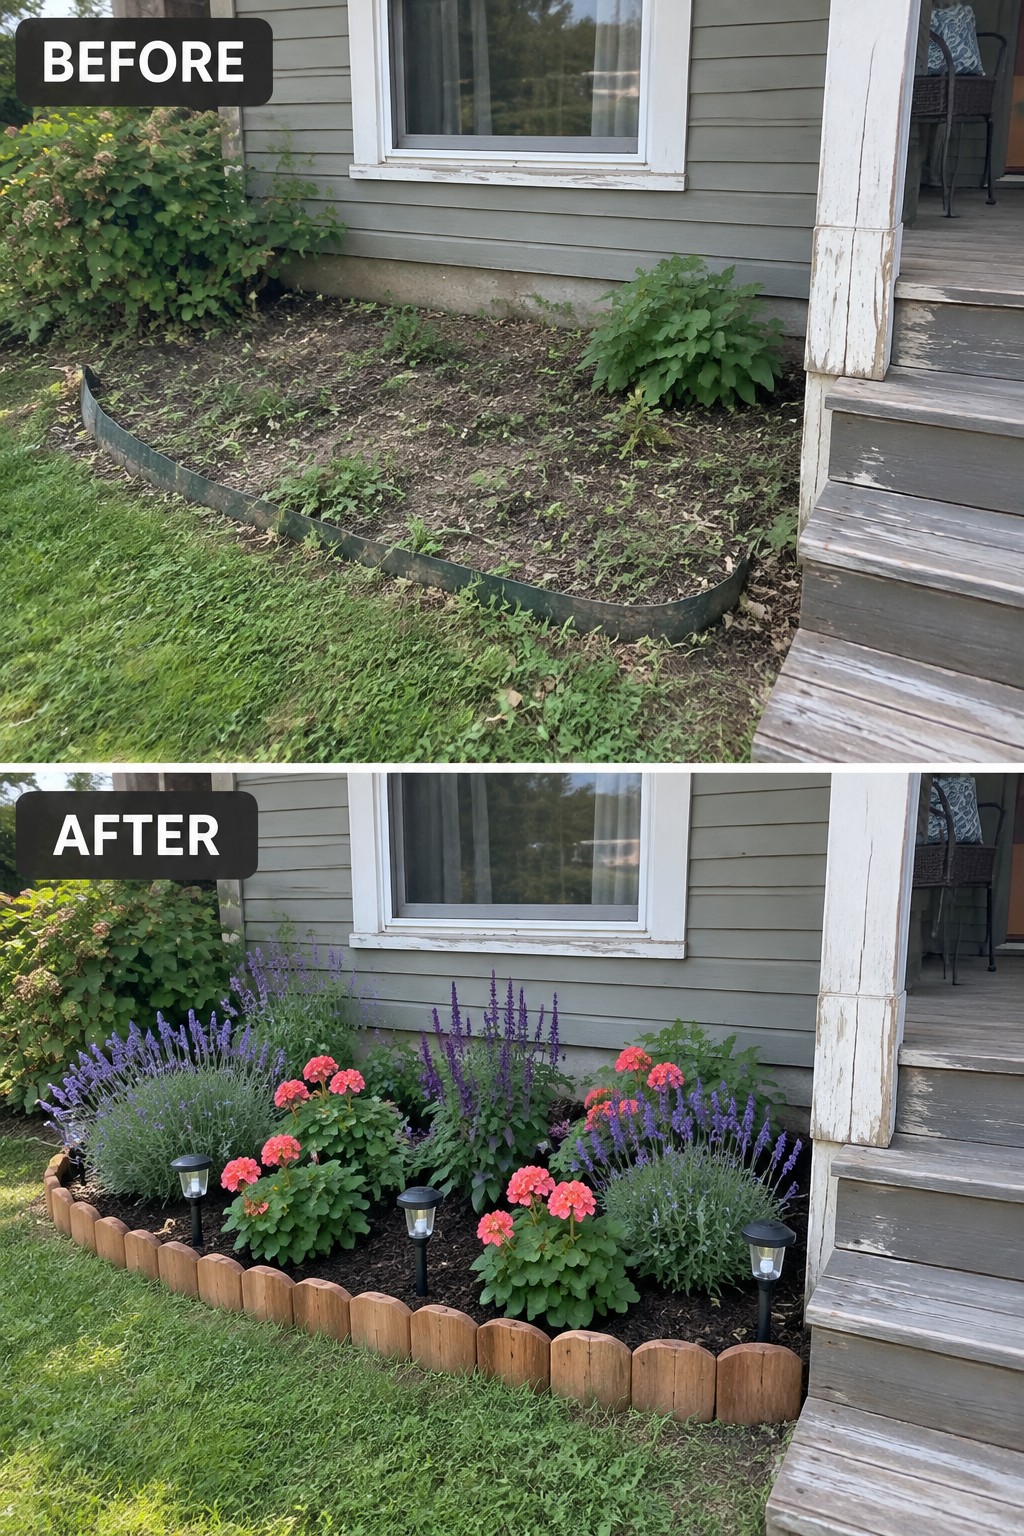
A simple wood border turns a weedy strip of dirt along the house into a real garden bed. The main change is swapping thin plastic edging for short logs that hold the soil and mulch in place, giving the planting area clear shape.
This works well on narrow foundation strips or beside decks where you want planting without a big project. Clear the weeds first, set the edging in a gentle curve, then fill with mulch and a few sturdy perennials. The result stays neat even when the plants are still young.
Add Wood Edging To Define A Narrow Border

A long, weedy strip next to the house often looks messy because there is no clear edge. Adding a simple wood border turns that same space into a proper flower bed. The wood keeps the mulch in place and gives the planting area a finished look without needing a lot of extra work.
This approach works well along foundations or walkways where the space is tight. Start by clearing the weeds, then set the boards at a slight height so water drains away from the house. Fill with soil and mulch, and choose plants that stay in scale with the narrow width.
Add Raised Wood Beds To A Sloped Yard

An overgrown slope often turns into a maintenance headache because grass and weeds grow unevenly and are hard to manage. The before photo shows that exact problem with a weedy hill running along the fence line. Adding raised beds made from natural wood gives the slope clear structure and turns it into usable planting space.
This idea works best on yards where the ground drops away and regular lawn care becomes difficult. Follow the slope with the beds, keep the wood edging low enough to hold soil in place, and fill them with a simple mix of flowers and grasses. The result is easier to maintain and looks more deliberate than trying to tame the hill as open ground.
Define Tree Beds With Natural Log Edging
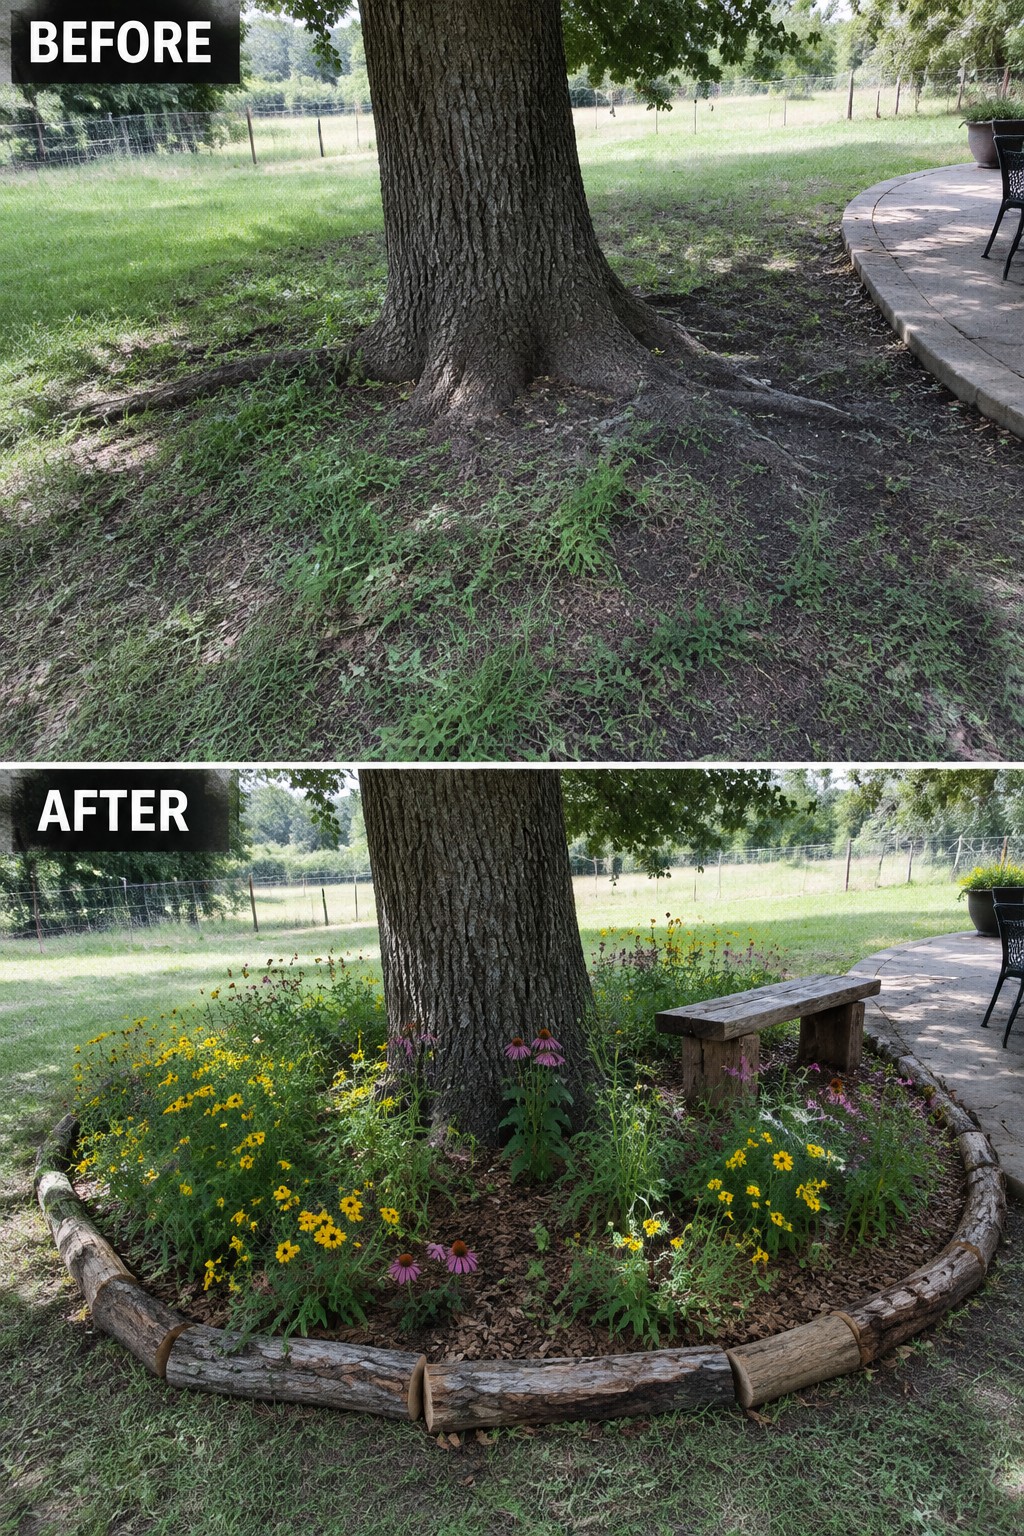
Adding a simple border around a big tree can turn a weedy patch into a real flower bed. The logs hold the mulch in place and give the planting area a clear shape that stays neat even when the rest of the yard is just grass.
This idea works best in open yards where trees sit away from the house. Lay the logs in a loose curve, add a layer of mulch inside, and plant shade-tolerant flowers. It keeps the tree roots from getting stepped on and makes the bed easy to maintain without fancy materials.
Define Flower Beds With Raised Wood Edging

Adding a raised wood border turns a loose gravel patch into a clear planting area. The before photo shows plants scattered without any real edge, while the after keeps everything contained inside a simple timber frame that also holds the mulch and lets the lighting run along the front.
This approach works best along a driveway or front walk where the bed needs to look deliberate rather than accidental. Build the frame first, then group shrubs instead of spacing them out, and add lighting only after the planting is done so the bed stays the main feature.
Define A Path Border With Natural Wood Edging
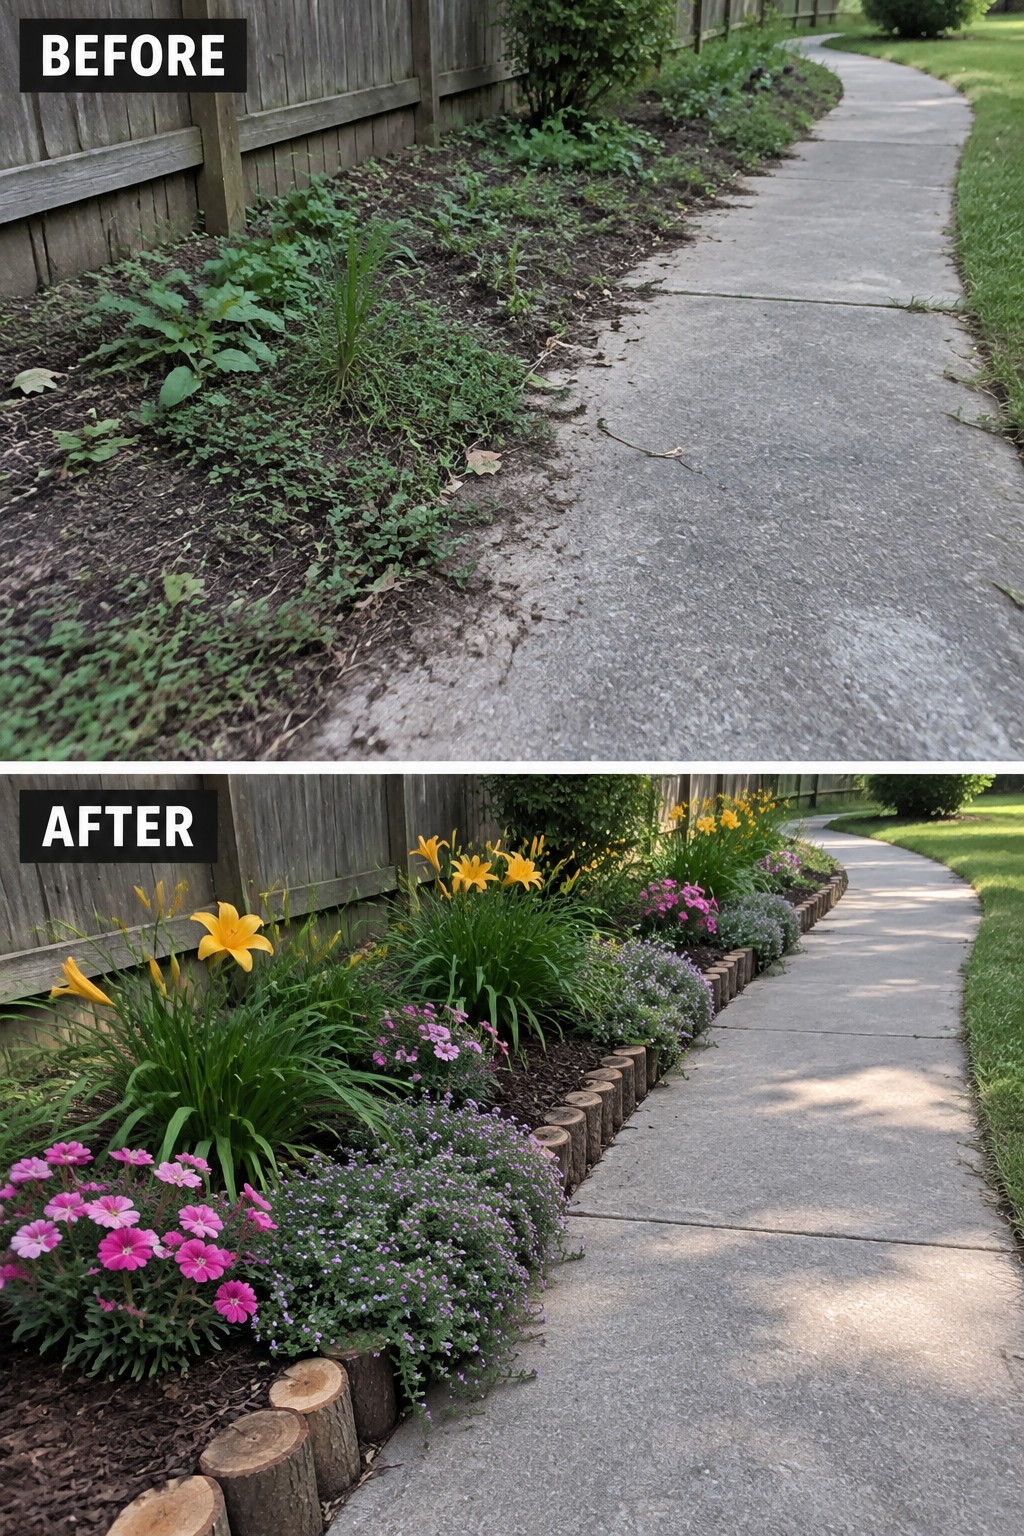
An overgrown strip of weeds along a path often looks worse than it is. Clearing the mess first and then adding a simple row of cut logs creates a clean edge that holds mulch and plants in place. The wood gives the border shape without needing fancy materials or a big budget.
This approach works best along sidewalks, fences, or driveways where you want low upkeep and clear lines. Use straight or slightly curved logs to match the path, keep the bed width reasonable so plants do not crowd the walkway, and choose a few reliable perennials that fill in quickly.
Frame Flower Beds With Natural Wood Edging

The before photo shows a long bed with flimsy black plastic edging that had started to shift and look unkempt. Replacing it with a low wood border gave the bed a solid outline and let the plants sit in a cleaner, more defined space.
This idea works best in yards where the lawn and garden areas run together and need better separation. Clear out weeds and old edging first, then lay the wood pieces along the curve of the bed. It keeps the project small and lets the planting do the rest of the work.
Define A Bare Front Bed With Natural Wood Edging

A bare patch of dirt right in front of the porch looks unfinished and draws attention for the wrong reasons. Adding a simple woven wood border gives the space a clear shape, turns the soil into a proper bed, and makes room for flowers without any fancy hardscaping.
This approach works best on small front yards or along porch steps where you want something neat but not overly formal. Start with the edging first so the bed has boundaries, then fill it with mulch and plants that suit your light conditions. The wood keeps everything contained and gives the planting a finished look even when the flowers are still filling in.
Create Tiered Beds On A Sloped Yard
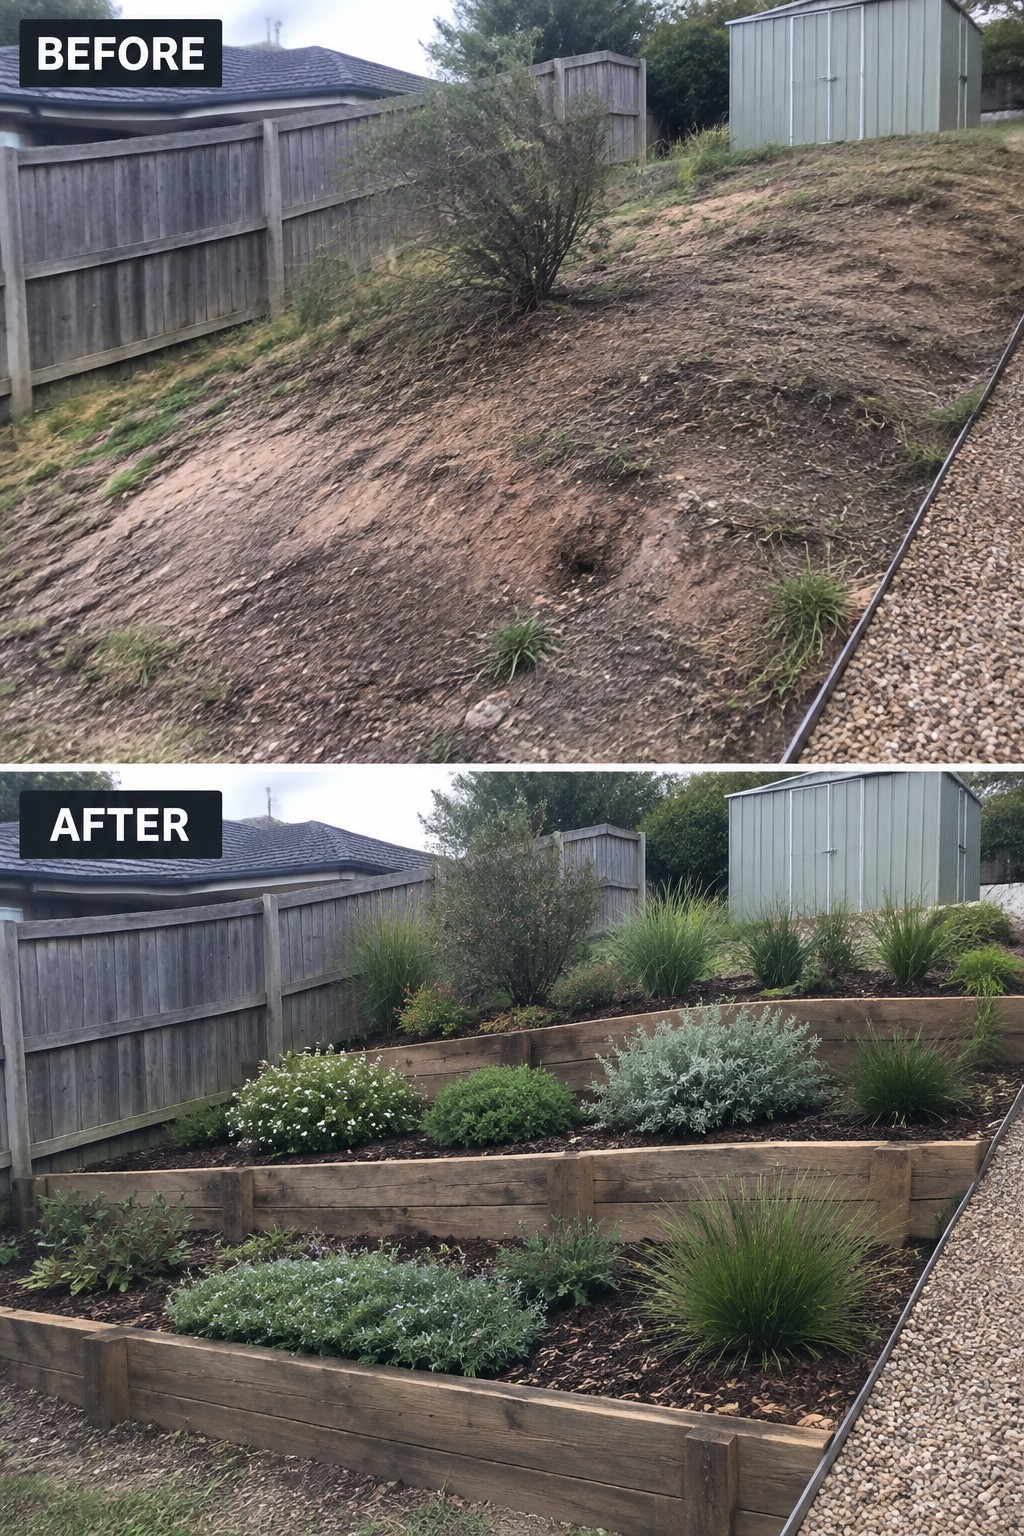
A bare slope often stays empty because it is hard to plant and harder to keep tidy. Simple wood edging changes that by turning the hill into a series of level beds that hold soil and plants in place.
This idea works best on moderate slopes where full retaining walls feel too heavy. Use rot-resistant lumber, set each tier level, and backfill with soil and mulch before planting. The same approach can turn a weedy bank into usable garden space without major grading.
Define Curbside Flower Beds With Wood Edging

A simple wood border turns a loose patch of plants into a clear garden bed. The before photo shows grass and soil blending together along the curb, while the after adds short wooden edging that holds the shape and keeps the mulch in place.
This approach works best along sidewalks or front lawns where the bed needs a firm line. Put the edging in first, then plant and mulch so the border stays neat without constant trimming.
Turn A Messy Border Into A Defined Flower Bed

A narrow strip of overgrown plants next to a patio often looks worse than no planting at all. Adding a simple wood border turns that same space into a contained bed that feels intentional. The wood raises the soil slightly, keeps mulch in place, and gives the plants a clear boundary so they no longer spill onto the paving.
This approach works well along patios, driveways, or house foundations where you want planting without a lot of hardscaping. Keep the bed narrow enough to reach across for weeding, and choose wood that can handle ground contact. Once the edging is in, you can add a mix of heights and textures without the whole area looking chaotic.
Frame An Overgrown Front Bed With Stacked Wood Edging

An overgrown front bed can quickly make the whole house look neglected. The simplest fix is often adding a clear edge first. Here the messy weeds and sprawl were replaced with a low stacked wood border that lifts the bed and keeps everything contained. Mulch inside the frame finishes the job and makes the plants look intentional instead of accidental.
This approach works well along the front of a house where you want a tidy look without a big budget. Start by cleaning out the worst growth, then lay the wood to follow the shape you actually want. Keep the bed narrow enough to reach across for weeding, and stick to a few larger shrubs plus smaller fillers so the planting stays easy to maintain.
Shape A Stone-House Entry Bed With Wood Edging

The bare dirt strip beside the walkway turned into a planted bed once the wood edging went in. The scalloped border gives the area a finished edge, holds the mulch, and lets the boxwoods and flowers sit neatly against the lawn.
This idea works best along a front path or foundation where the bed needs a clear shape. Mark a gentle curve first, set the edging, then add plants and mulch. It suits homes with stone or brick fronts and keeps the yard looking tidy without much ongoing work.
Add Natural Wood Edging To Shape A Driveway Border
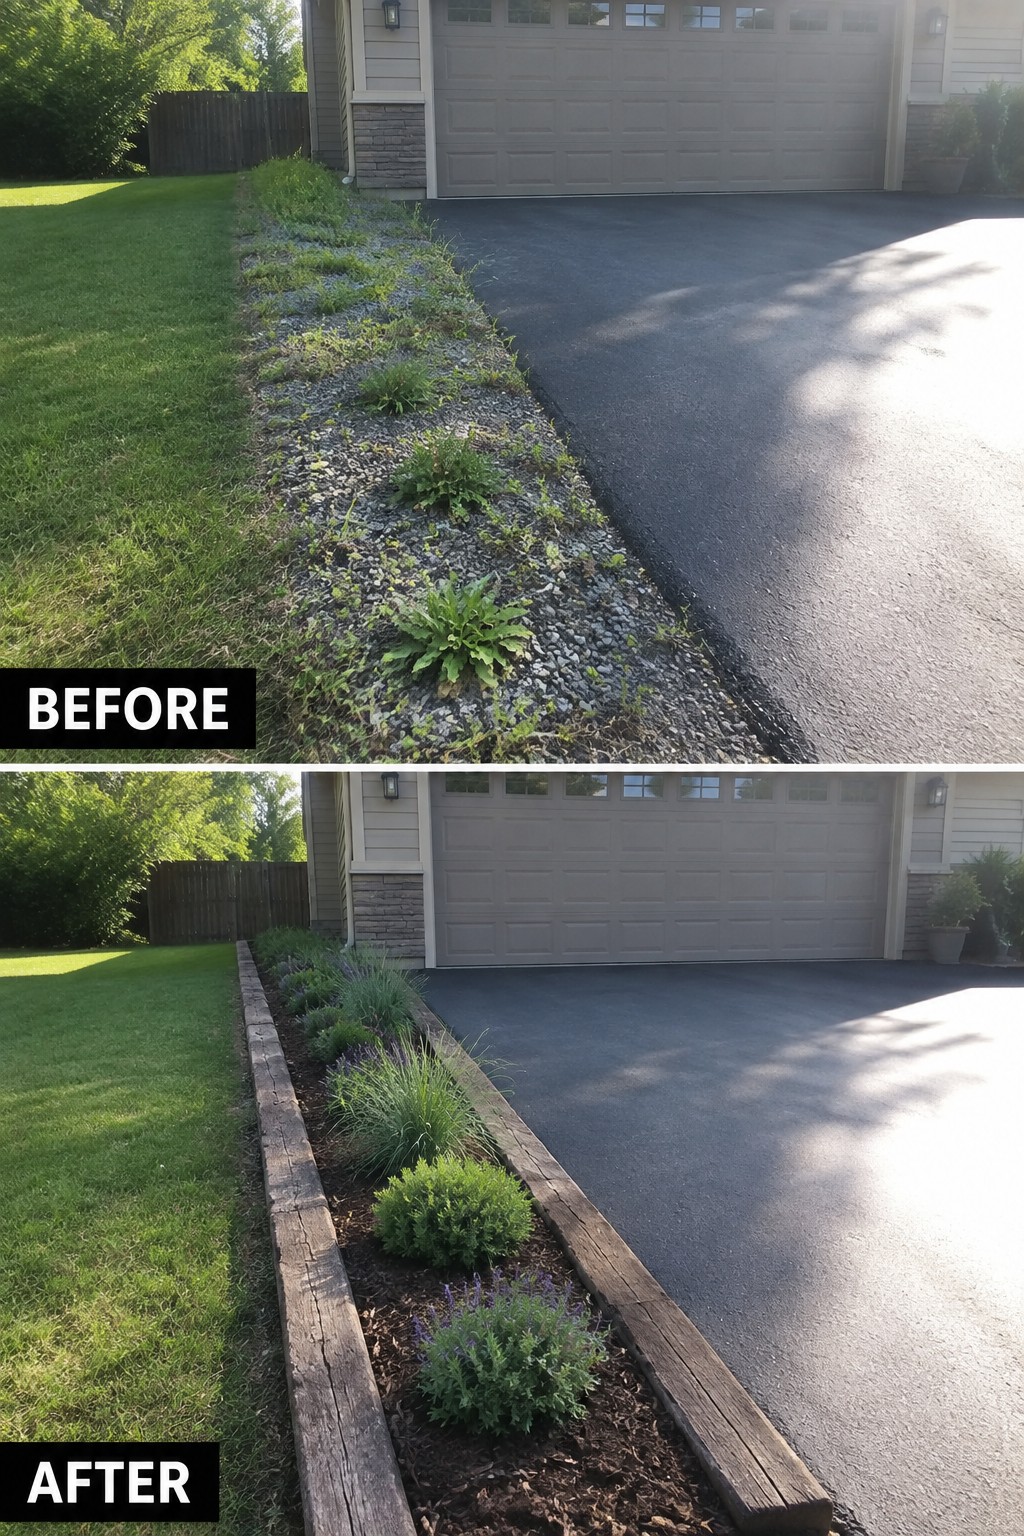
A weedy gravel strip next to a driveway often looks messy because it has no clear edge. Adding simple wood borders turns that same strip into a contained garden bed. The wood holds the mulch in place and gives the planting area a straight, finished line that separates it from both the lawn and the pavement.
This idea works best along driveways, sidewalks, or house foundations where you want low upkeep without losing the planted look. Lay the wood first to set the shape, then add mulch and a few shrubs or perennials that suit the light in that spot. The edging keeps grass from creeping in and makes the whole area easier to maintain over time.
Define Flower Beds With Simple Wood Edging

A plain strip of grass next to the sidewalk does not do much on its own. Adding a low wood border turns that same space into a clear planting area that stays neat and separate from the lawn. The mulch and plants then fill the bed without spilling onto the path or the road.
This idea works best along curbs, driveways, or sidewalk edges where you want color but still need to keep the lawn easy to mow. Lay the wood first so the shape stays consistent, then add a few inches of mulch before planting. Keep the bed narrow enough that you can reach everything from the sidewalk or the grass.
Use Natural Wood Edging To Define A Sloped Bed

A rocky slope with weeds and loose stones is difficult to keep tidy. Placing a row of short wooden logs along the edge gives the area a clear boundary. Soil and plants stay contained while the gravel path remains open and easy to walk.
This idea suits homes with uneven ground or existing rock features. Clear the worst of the growth first, then set the logs to follow the slope. The wood softens the look without needing a full retaining wall. It also makes future planting and weeding much simpler.
Use Natural Wood Edging To Shape Garden Beds

An overgrown strip of weeds and bare soil next to a shed rarely produces much. Building a low wood frame around the same space turns it into a contained raised bed where soil stays put and plants have a better chance to grow.
This approach works well along fences or house walls where you need clear boundaries. Clear the weeds first, then add the wood edging and mulch to keep things tidy. It keeps the bed manageable without requiring a big budget or complicated materials.
Create A Defined Flower Bed With Natural Wood Edging

A low spot that turned into a mud puddle can become a proper garden bed once you add a simple wood border. The edging stops the soil from washing out and gives the planting area a clear shape that holds mulch and water in place.
This works best in small yards or corners where drainage is an issue. Put the edging in first, then fill with soil and plants suited to the light and moisture. The border keeps everything looking finished even before the flowers fill out.
Add Natural Wood Edging To Clean Up A Pond Border

A pond edge that runs straight into bare soil and weeds always looks unfinished. Laying a single length of natural wood along the curve creates a clear boundary, keeps the mulch from sliding into the water, and gives you a simple planting shelf for flowers and grasses right at the waterline.
This idea works best on small to medium water features where you want an organic material that blends with the garden rather than plastic or metal edging. Clear the overgrowth first, set the wood so it sits slightly above the soil line, then mulch and plant behind it. The wood will weather naturally and the whole border will stay tidy with very little upkeep.
Define Flower Beds With Natural Wood Edging

The bare dirt next to the steps looked unfinished and hard to keep tidy. Adding a simple wood frame created a clear planting area that holds mulch and flowers in place while giving the whole front entry a more organized look.
This idea works best along walkways, porch edges, or small side yards where you need structure without taking up much space. Keep the bed width practical for weeding and choose straight boards that match the scale of nearby decking or steps.
Create A Wood-Edged Flower Bed Beside Steps

A bare patch of mulch next to the house often looks unfinished, even when a few plants are scattered around. Adding a simple wood frame gives the bed a clear shape and makes the planting look more deliberate right away.
This idea works best in small front beds or along foundation walls where you want structure without a big project. Use straight, weather-treated boards to keep the edges straight, then fill the bed with a mix of ferns and leafy plants so the whole area feels full but not crowded.
Add Wood Edging To Define Garden Beds

The main improvement came from installing a simple wooden border that curves around the whole planting area. Once that edge was in place, the scattered plants and weeds became actual beds instead of a messy patch.
This works best in yards where the garden has lost its shape over time. Clear out the worst growth first, then set the edging before you add mulch and plant. It keeps the beds looking intentional even when the plants are still small.
Frequently Asked Questions
Q: How do I stop the edging from moving after I install it?
A: Press each piece firmly into the soil and pack dirt tightly on both sides. Water the area once to settle everything in place. Check after the first rain and adjust if needed.
Q: Should I peel the bark off the wood first?
A: Leave the bark on for a more rustic feel. It will eventually fall off on its own anyway.
Q: What happens if roots grow into the wood over time?
A: The wood breaks down slowly and feeds the soil. Your plants will keep growing fine around it.
