

Getting new planting areas ready usually means looking closely at the ground first and deciding how the beds will sit in the overall yard.
I have noticed that skipping the early clearing and edging steps often leaves the whole space looking scattered even after new plants go in.
In my yard the sections that improved the most always started with better soil turning and a simple shape that matched how we actually walk through the garden.
Taking those first layers of work seriously helps the beds stay neat without constant fixes later on.
A few of the steps are easy to test on a small patch first.
Define New Flower Beds With Mulch After Clearing Grass
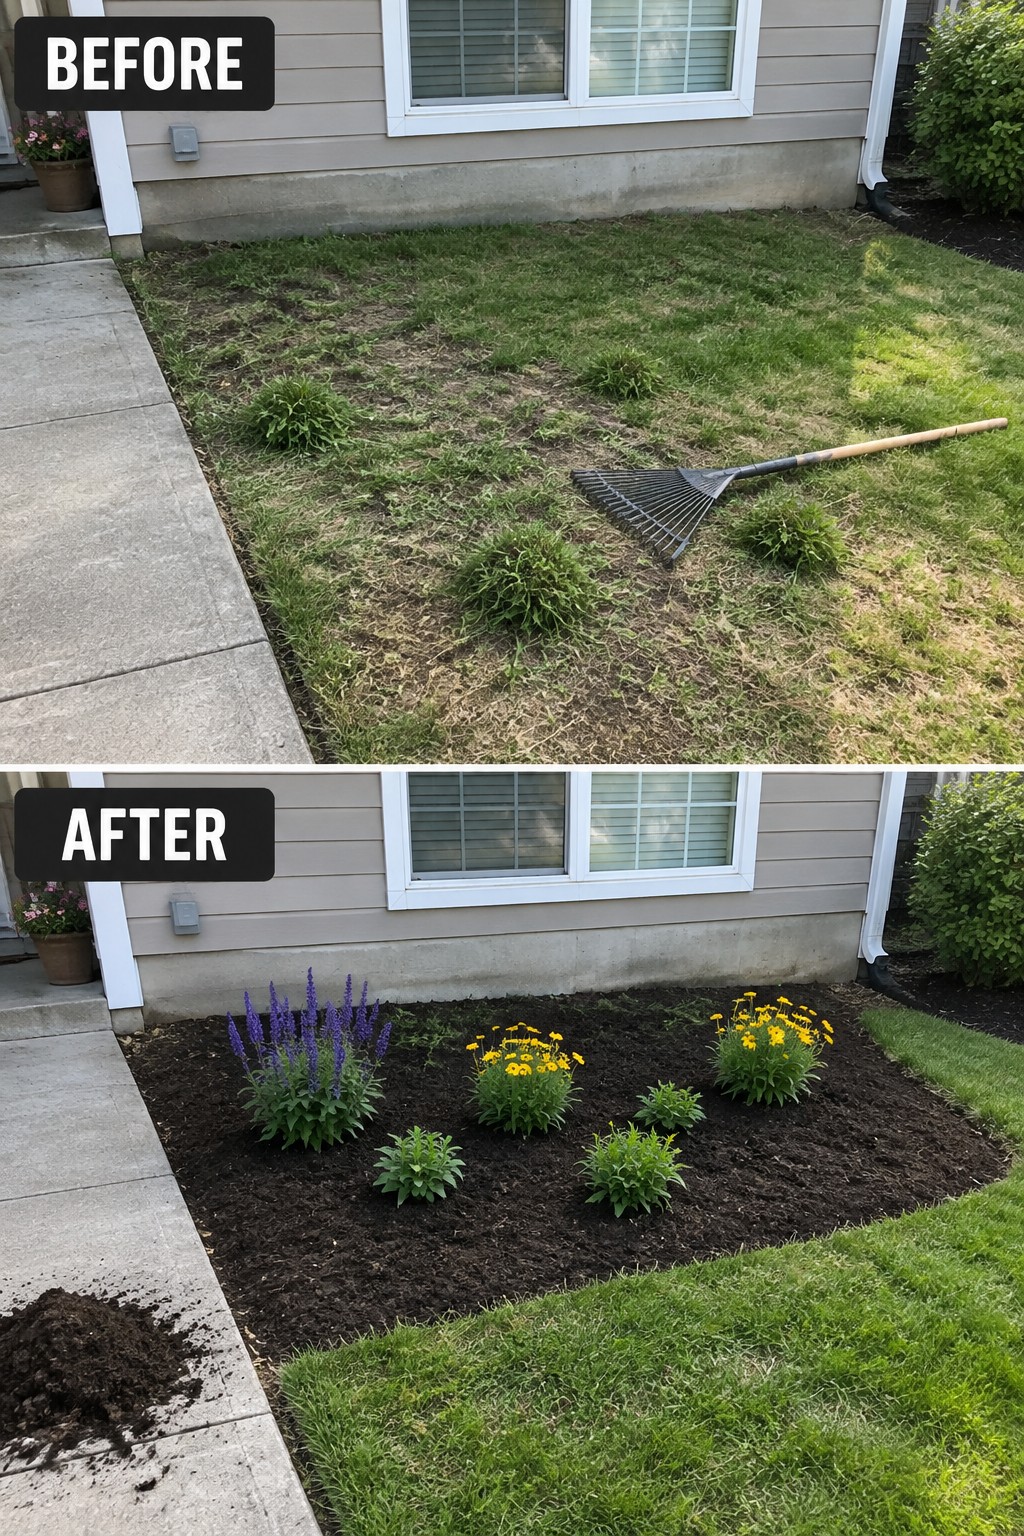
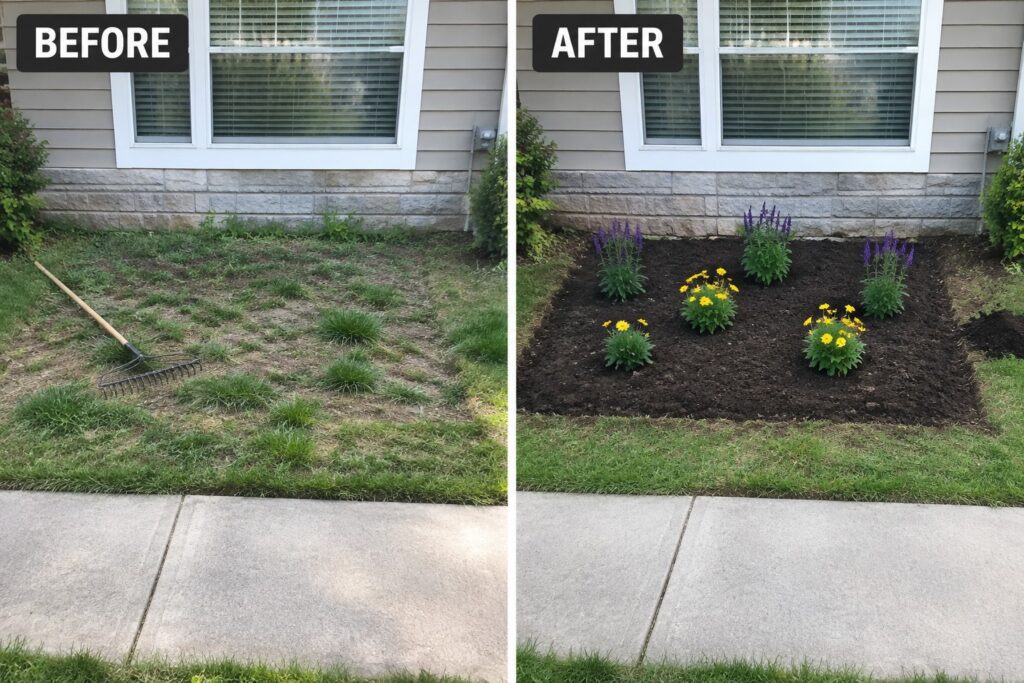
Clearing the patchy, weedy lawn first makes room for actual planting beds instead of fighting through existing growth. A layer of dark mulch then pulls the new beds together and gives them a settled look right away while holding moisture and blocking weeds.
This method suits narrow strips along a house or any spot where you want a few flower groups without redoing the whole yard. Keep the bed shapes simple, spread the mulch evenly a few inches deep, and leave enough space between plants so they can fill in without crowding.
Clear Hard Soil And Mulch Before Planting
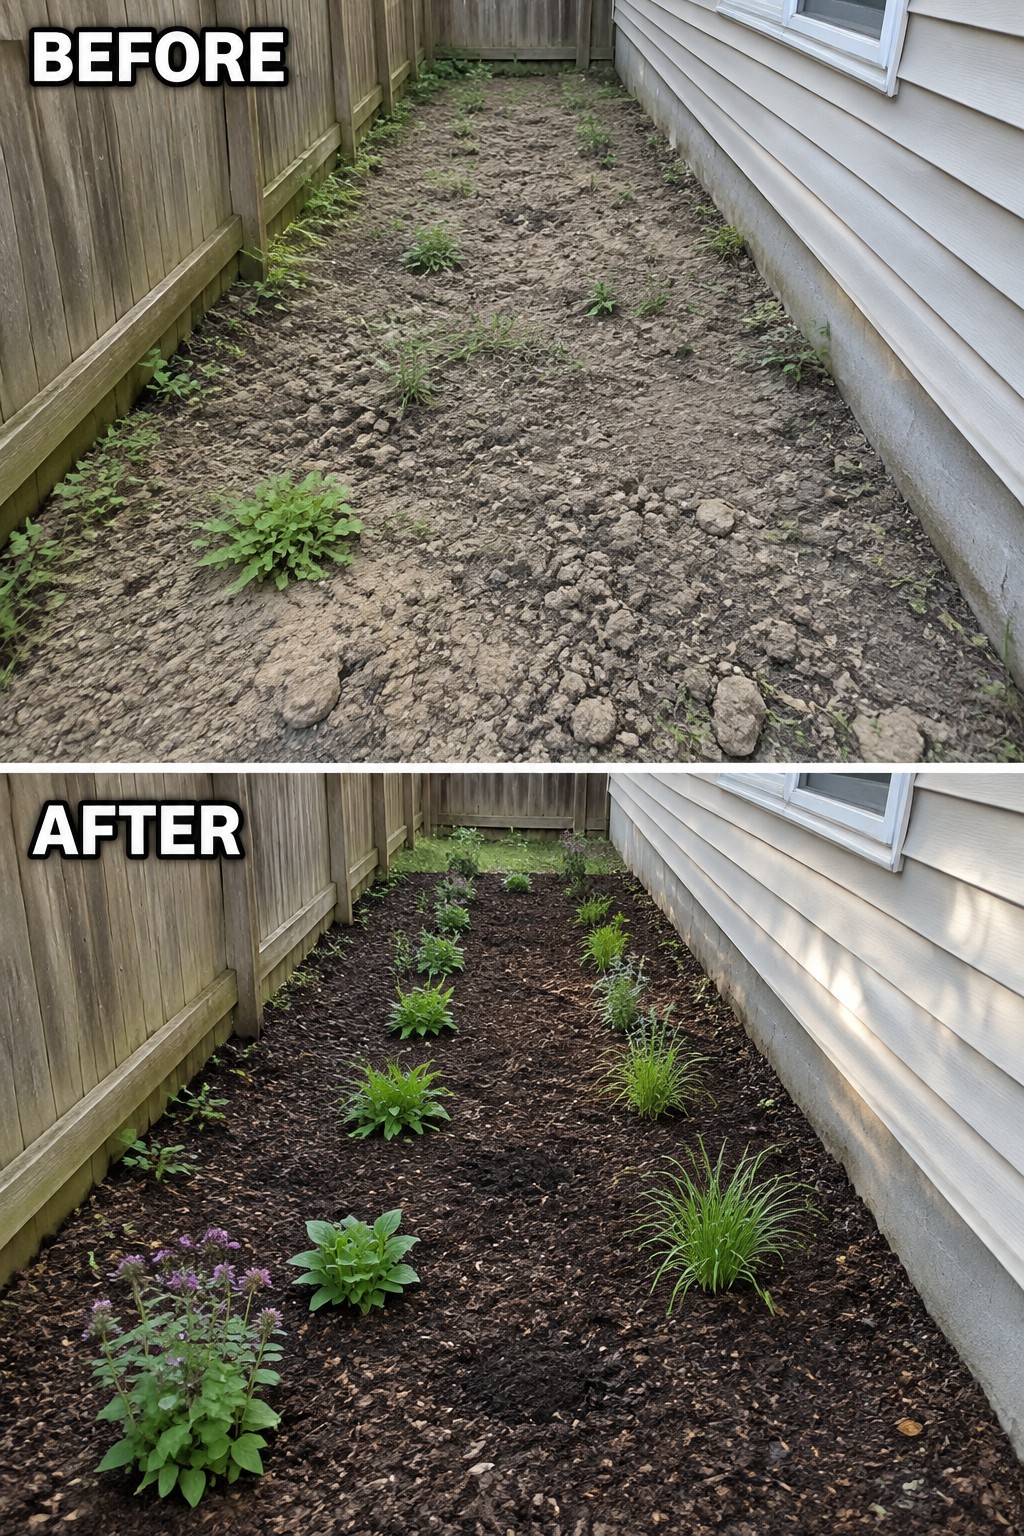
One of the most useful steps when starting a new flower bed is dealing with the ground first. The before photo shows dry compacted soil with almost no growth. After the area was cleared and covered with mulch the same narrow strip between the fence and house became a defined planting space that actually looks ready for plants.
This works well along side yards or tight spots where the soil has been ignored for years. Remove the weeds and loosen the top layer before you mulch so the bed stays cleaner and the new plants have a better start. It also makes future weeding much easier once everything is in the ground.
Add A Raised Bed To Replace A Narrow Grass Strip

A long strip of patchy grass next to the house often ends up looking messy because it is hard to mow and water evenly. Building a simple raised bed turns that awkward space into a contained planting area that stays neat with far less work. The wood edging gives the bed a clear shape while the mulch keeps weeds down and helps the soil hold moisture.
This approach works well along sidewalks or foundation walls where grass struggles. Keep the bed width narrow enough for easy reach from one side and choose plants that stay in scale with the space. Once the bed is in place you can add seasonal color without worrying about the lawn creeping back in.
Use Edging To Shape New Flower Beds
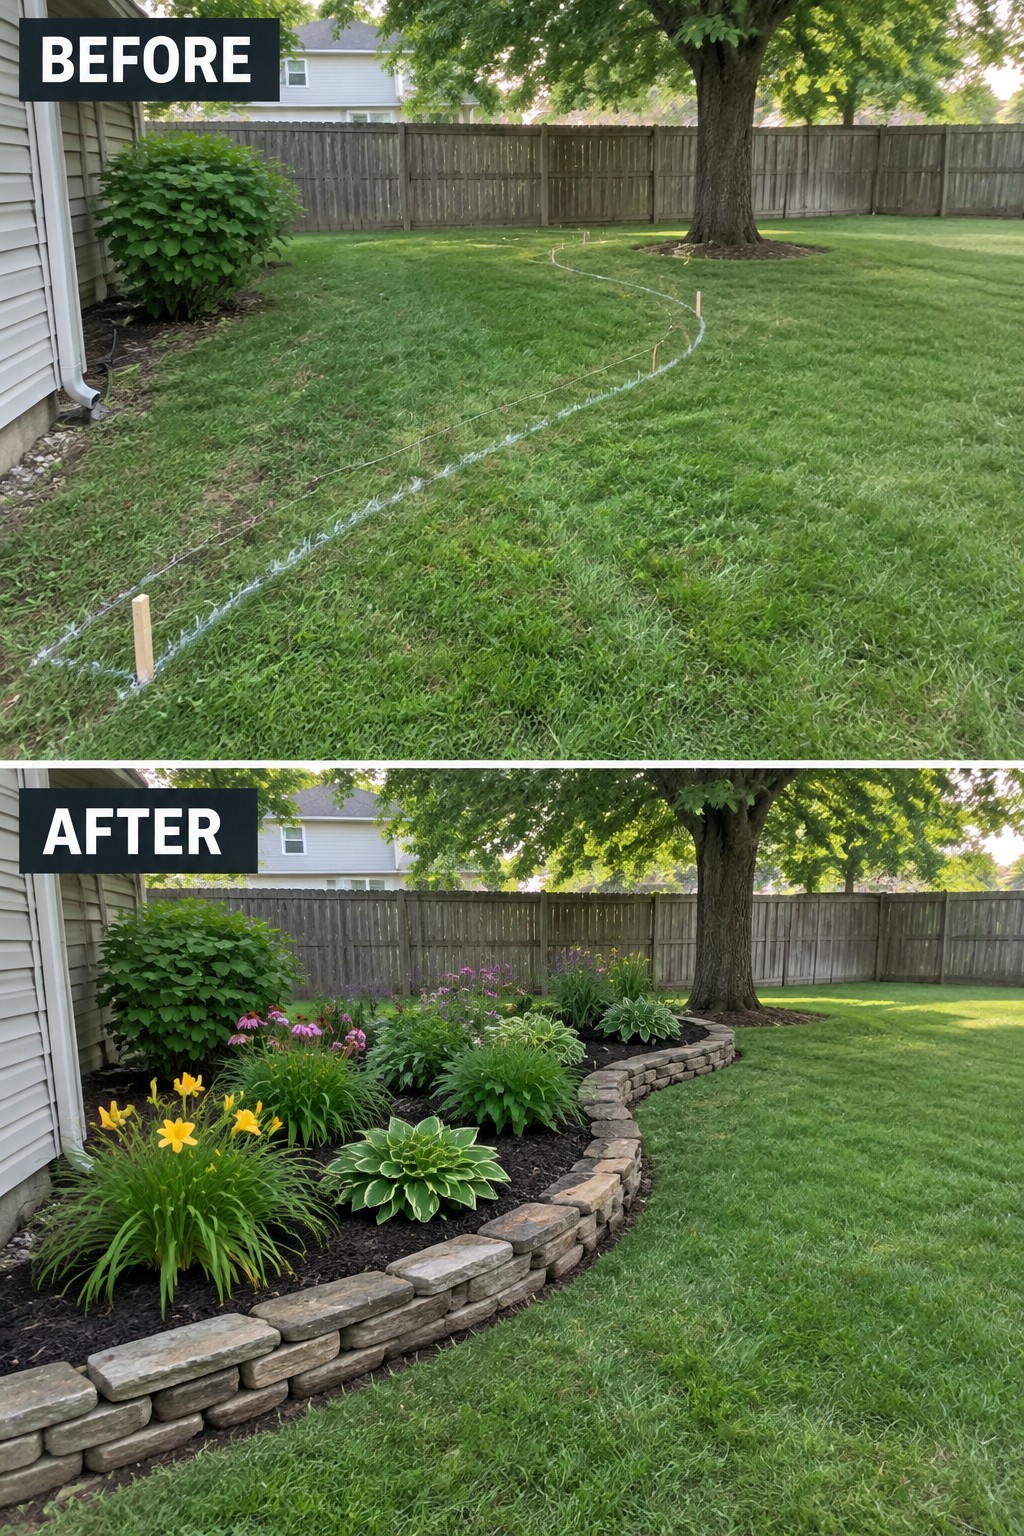
One practical way to give a large lawn more purpose is to add a clear border that marks off new planting space. The curved stone edging here turns an open stretch of grass into a defined bed that holds mulch and a mix of perennials without looking scattered.
This idea works best in yards that still have plenty of lawn left after the beds are added. Mark the shape first with a hose or rope, then choose edging that fits your budget and the style of your house. Keep the bed width easy to reach for weeding and watering so it stays manageable over time.
Clear The Grass Before Adding A New Flower Bed

Removing the grass first makes a big difference when you want a clean start for new plants. In this case, a section of lawn was taken out and replaced with soil and mulch so the young plants could go in without fighting the turf right away.
This step works in any yard where you plan to add planting space. Mark the area, take up the sod, and lay down mulch once the plants are in. It keeps weeds down and gives the bed a finished look from the beginning.
Install Irrigation Before Planting New Flower Beds

One of the most practical steps when starting new planting beds is to run irrigation first. The cracked, dry ground in the before photo shows how hard it can be for young plants to get established. After the change, drip lines sit right in the soil rows, so each plant gets water at the root level without extra work.
This works best in long, narrow spaces like fence lines or side yards. Put the tubing down once the beds are shaped, then plant. It keeps things simple and gives new beds a much better chance from the start.
Define Narrow Borders With Edging And Mulch

A long strip of grass and weeds along a driveway or fence often looks messy because it has no clear edge. Adding a simple metal border and a layer of mulch turns that same space into a planting bed that stays contained and easy to maintain.
This approach works best in tight areas where a full garden would feel too wide. Cut back the overgrowth, install edging to hold the line, spread mulch to block weeds, and add a few clumps of grass or shrubs. The result feels planned without needing much space or upkeep.
Add A Retaining Wall To Shape Sloped Beds
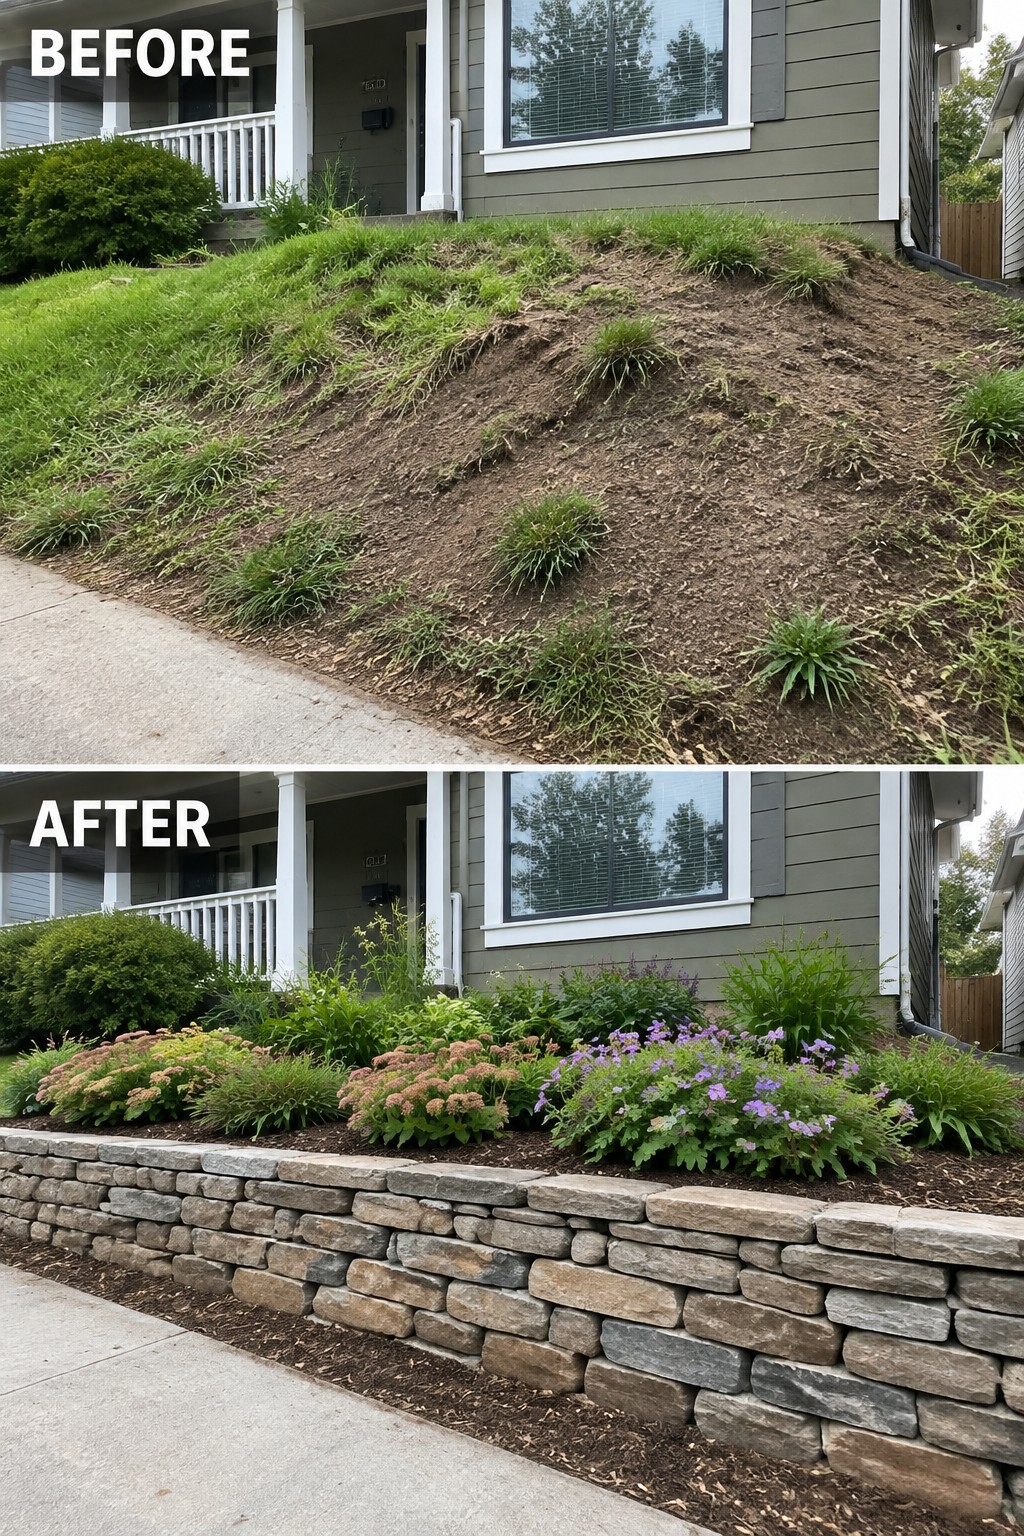
A bare, weedy slope is hard to mow and even harder to plant. Adding a low retaining wall turns the hill into level beds that hold soil in place and give you clean planting space right along the front of the house.
This works best on gentle slopes where you want defined borders without bringing in heavy equipment. Check local rules for wall height first, then pick stone or block that matches the house. Once the wall is in, mulch the beds and choose plants that can handle the sun exposure. The result is a yard that looks intentional and stays easier to care for over time.
Replace Failing Grass With A Mulched Planting Bed

A wet, patchy strip of lawn next to a fence is often better turned into a planting bed than left to struggle. Removing the turf and adding a wide mulched bed lets water drain properly while giving perennials room to grow without constant mowing or soggy feet.
This idea works best along property lines or house edges where grass gets too much shade or poor drainage. Clear the area first, add compost if the soil is heavy, then mulch thickly so new plants can settle without fighting weeds right away.
Create Defined Flower Beds With Mulch

The main change here is how the bed went from scattered plants in bare dirt to a single clean area covered in dark mulch. Grouping the flowers in clusters and keeping the edges straight makes the whole strip look like a real garden bed instead of random growth along the fence. The mulch pulls everything together and keeps the soil from looking patchy.
This approach works well along fences or house foundations where you want a simple border without a lot of hardscaping. Clear the weeds first, lay down a thin layer of mulch, and plant in groups of three or five instead of spacing everything out evenly. It keeps the bed looking neat even when the plants are still young.
Clear Overgrowth Before Adding Mulch To New Beds

The biggest difference here comes from starting with a full cleanup. The before photo shows a patch of weeds, exposed roots, and loose soil with no real shape. Once that was removed, the bed could be edged, covered with mulch, and planted in a way that actually holds together instead of looking scattered.
This approach works best in any spot where you want a planting area to feel intentional rather than accidental. Clear everything first, lay down a simple border, then mulch heavily so the new plants have room to grow without constant weeding. It keeps small beds looking neat and makes future maintenance much easier.
Add Structure To An Overgrown Border

The main change here is clearing out the weeds and bare patches first, then laying out plants in a simple grid with fresh mulch. This turns a messy strip into something that looks intentional instead of accidental. The defined rows and consistent mulch make the bed feel planned instead of just filled in.
This approach works especially well along fences or property lines where space is narrow. Focus on removing the old growth completely before you plant, then space new perennials so they can fill in without crowding. It keeps the bed looking neat even before everything matures.
Plant Bulbs In Rows To Give A New Bed Quick Structure

A bare strip of dirt next to the house does not need fancy features right away. Planting bulbs in even rows gives the bed shape and purpose from the start, turning empty soil into something that will fill in with color later.
This approach works well along foundations or walkways where you want low plants that return each year. Space the bulbs evenly, cover them lightly, and add a thin layer of mulch to keep the rows clear. It is an easy first step that keeps the bed looking intentional while you decide what else to add later.
Define Bare Soil With Mulched Garden Beds

A strip of bare dirt along a fence often ends up looking like leftover space. Laying down mulch and setting young plants in simple rows turns that same area into a clear, intentional border that keeps the lawn edge neat and gives the plants room to grow.
This approach works best along fences, property lines, or house foundations where you want structure without adding paths or hardscaping. Clear the weeds first, spread mulch thick enough to hold back new growth, and space the plants so they can fill in over a season or two. It keeps the bed looking finished even while the plants are still small.
Clear Overgrowth Before Creating New Garden Beds

One of the most practical steps when dealing with a neglected strip along a fence is to remove the old tangled growth first. Clearing everything back to bare soil lets you lay down a clean base of gravel and set plants in a way that actually holds together over time.
This idea works especially well in narrow side yards or along walkways where you want low maintenance. Start with a simple gravel layer, add a few larger rocks for weight, and choose plants that stay compact like agaves and grasses. The result feels planned instead of leftover.
Add Defined Beds And A Path To An Overgrown Yard

The yard shifted from a wide, uneven stretch of grass to a space with a clear walkway and planted borders on both sides. Adding a stone path set in gravel and creating mulched beds gave the area shape and made it feel more usable instead of just open lawn.
This idea works best in backyards or side yards that feel shapeless after years of neglect. Mark the path first so it leads somewhere useful, then build the beds along the edges before adding plants. It keeps mowing simple and stops the grass from creeping back into planted areas.
Define A Flower Bed With Planting And Lighting
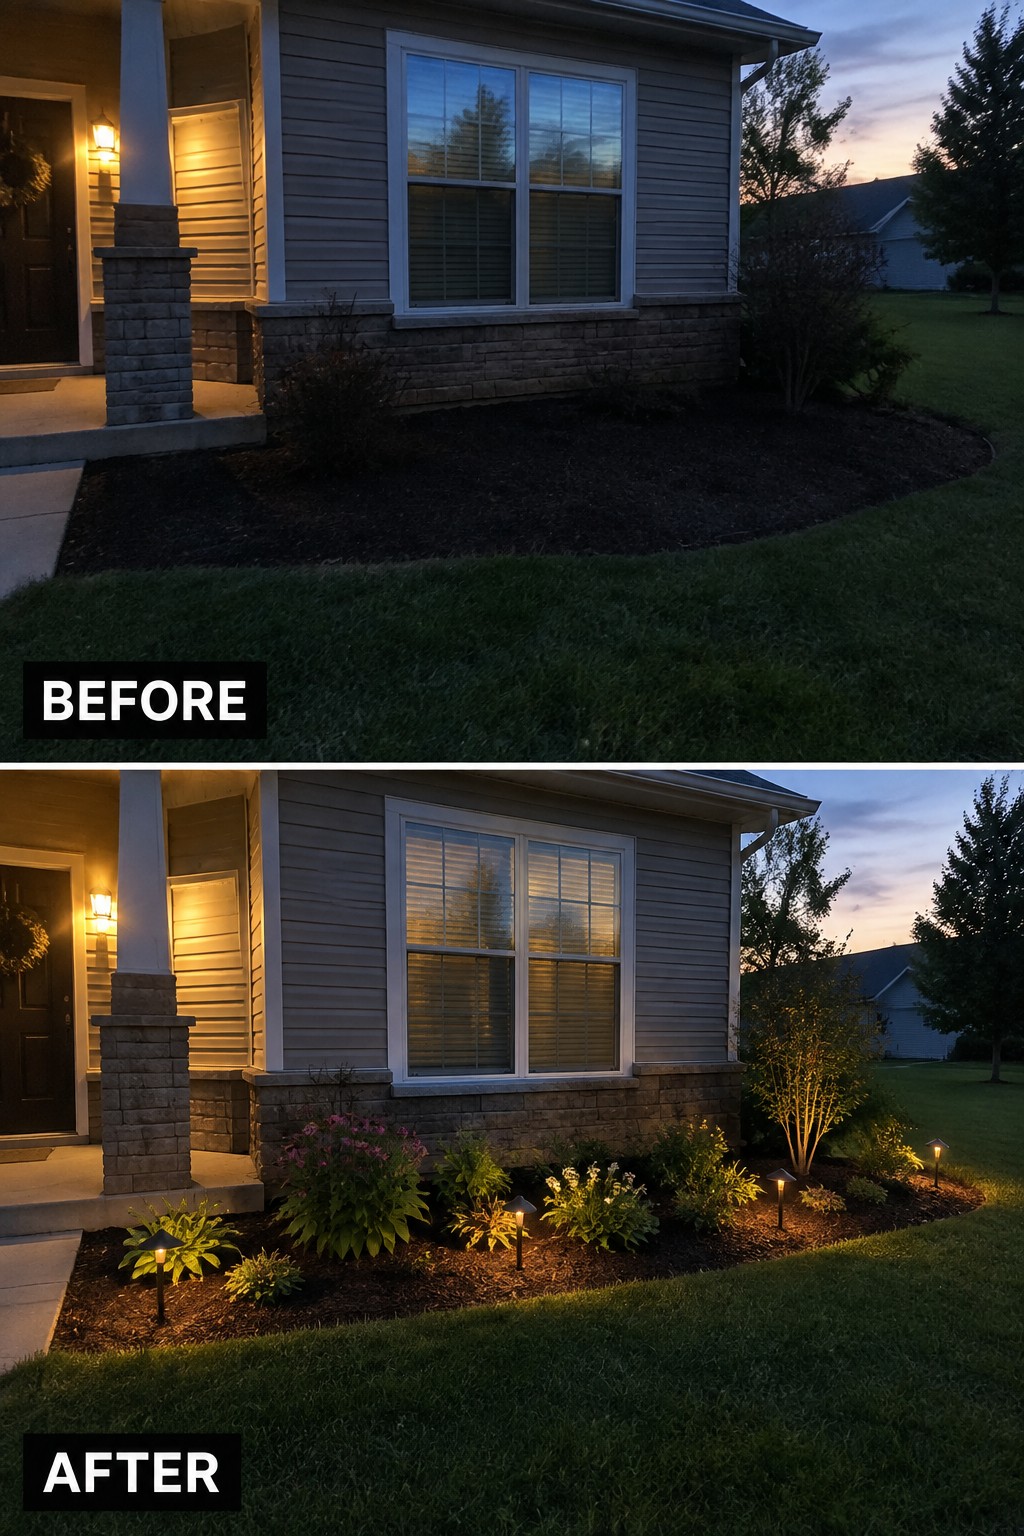
A bare mulch bed along the front of a house often looks like something is missing. Adding a row of shrubs, flowers, and a few low lights gives the space clear shape and makes the whole front look more finished without any major construction.
This idea suits homes with a simple foundation bed that already has mulch in place. Pick plants that match the light conditions in your yard, keep the number of varieties small, and place the lights along the front edge so they mark the new bed at night.
Turn The Curb Strip Into A Defined Planting Bed
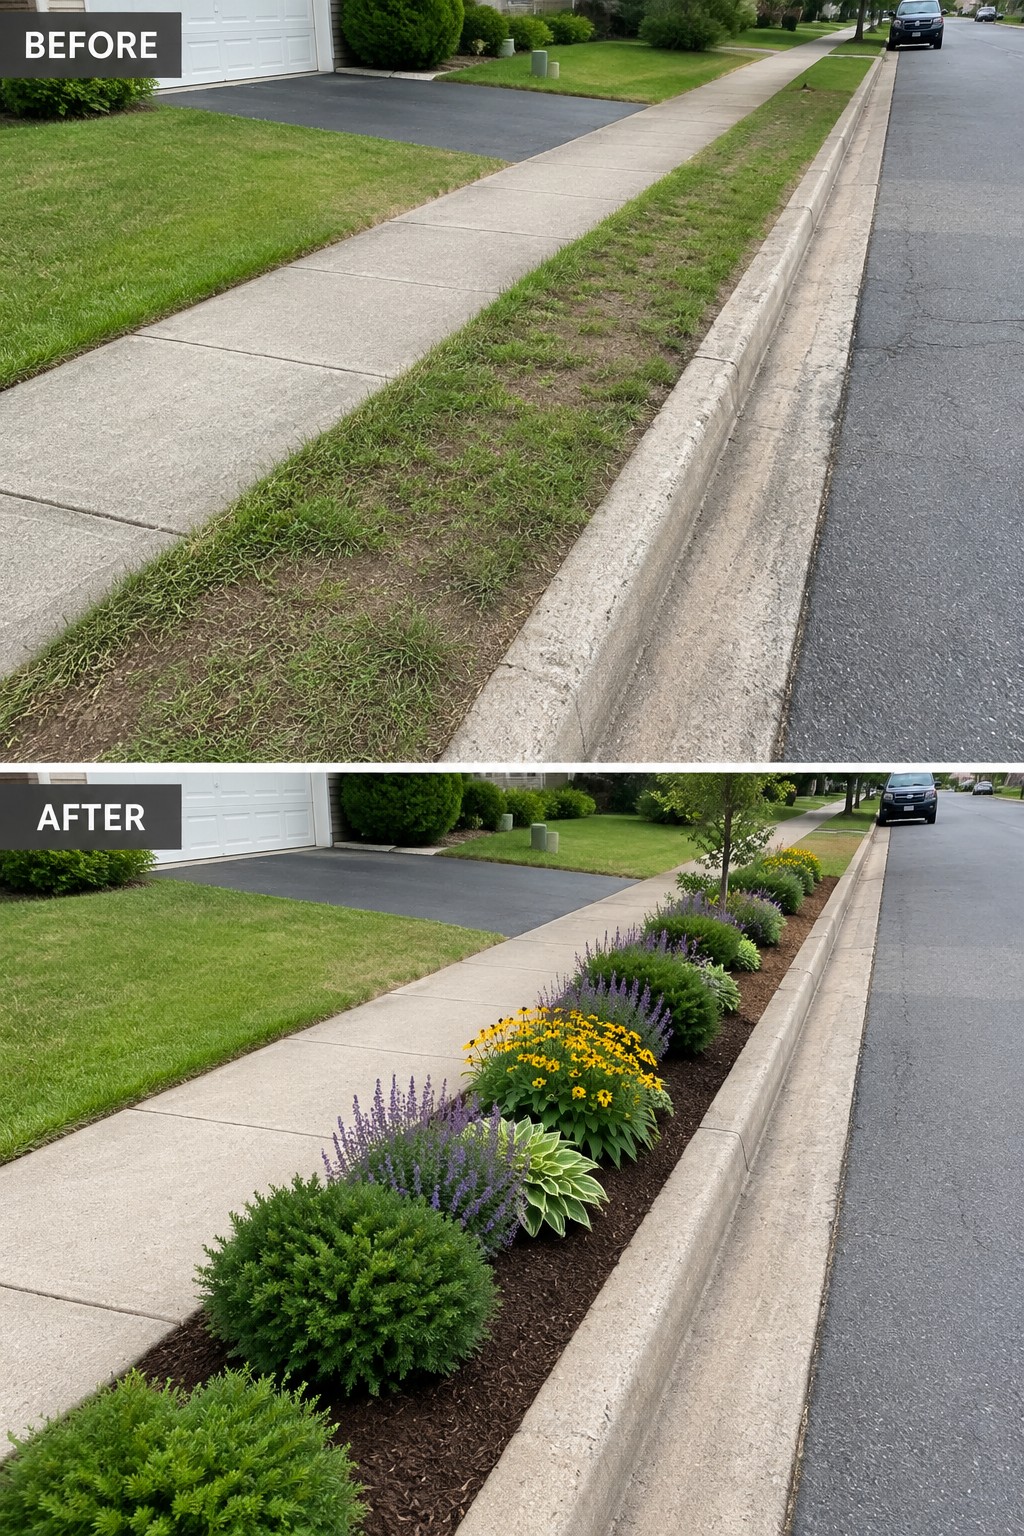
The main change here is turning a weedy, uneven grass strip along the curb into a proper planting bed. Clearing the old growth first, then adding a clean edge and fresh mulch, gives the area structure and makes the whole front yard look more deliberate instead of just leftover space.
This idea works especially well on narrow roadside strips that get mowed but never really planted. Keep the bed simple with a mix of low shrubs and a few flowering plants, and use mulch to hold everything in place and cut down on weeds. It stays practical as long as you choose plants that tolerate the sun and occasional salt or road spray.
Define Narrow Side Yards With Planted Beds

A narrow strip of dirt between the house and fence often gets ignored because it feels too tight for anything useful. In this case, the space went from bare soil and exposed tree roots to a clean mulched bed filled with shade-tolerant plants like hostas and ferns. The mulch instantly makes the area look intentional while protecting the roots and keeping weeds down.
This approach works well on any side yard or foundation line where space is limited. Choose plants that handle shade and dry soil, then keep the bed a consistent width so it feels like one connected border rather than scattered patches. The result is a finished look without crowding the walkway or requiring constant upkeep.
Add Edging To Create A Defined Planting Bed

A large lawn can feel unfinished when it has random bare patches. Adding a simple edged bed turns that empty spot into something intentional and easier to care for. The stone border and fresh mulch give the area clear shape while the plants fill it in without taking over the whole yard.
This idea works best in open lawns where you want a focal point but do not need a full garden overhaul. Outline the bed first with edging that suits your style, then mulch and plant. Keep the size practical so mowing stays simple and the bed does not crowd the remaining grass.
Add Edging To Define New Planting Beds
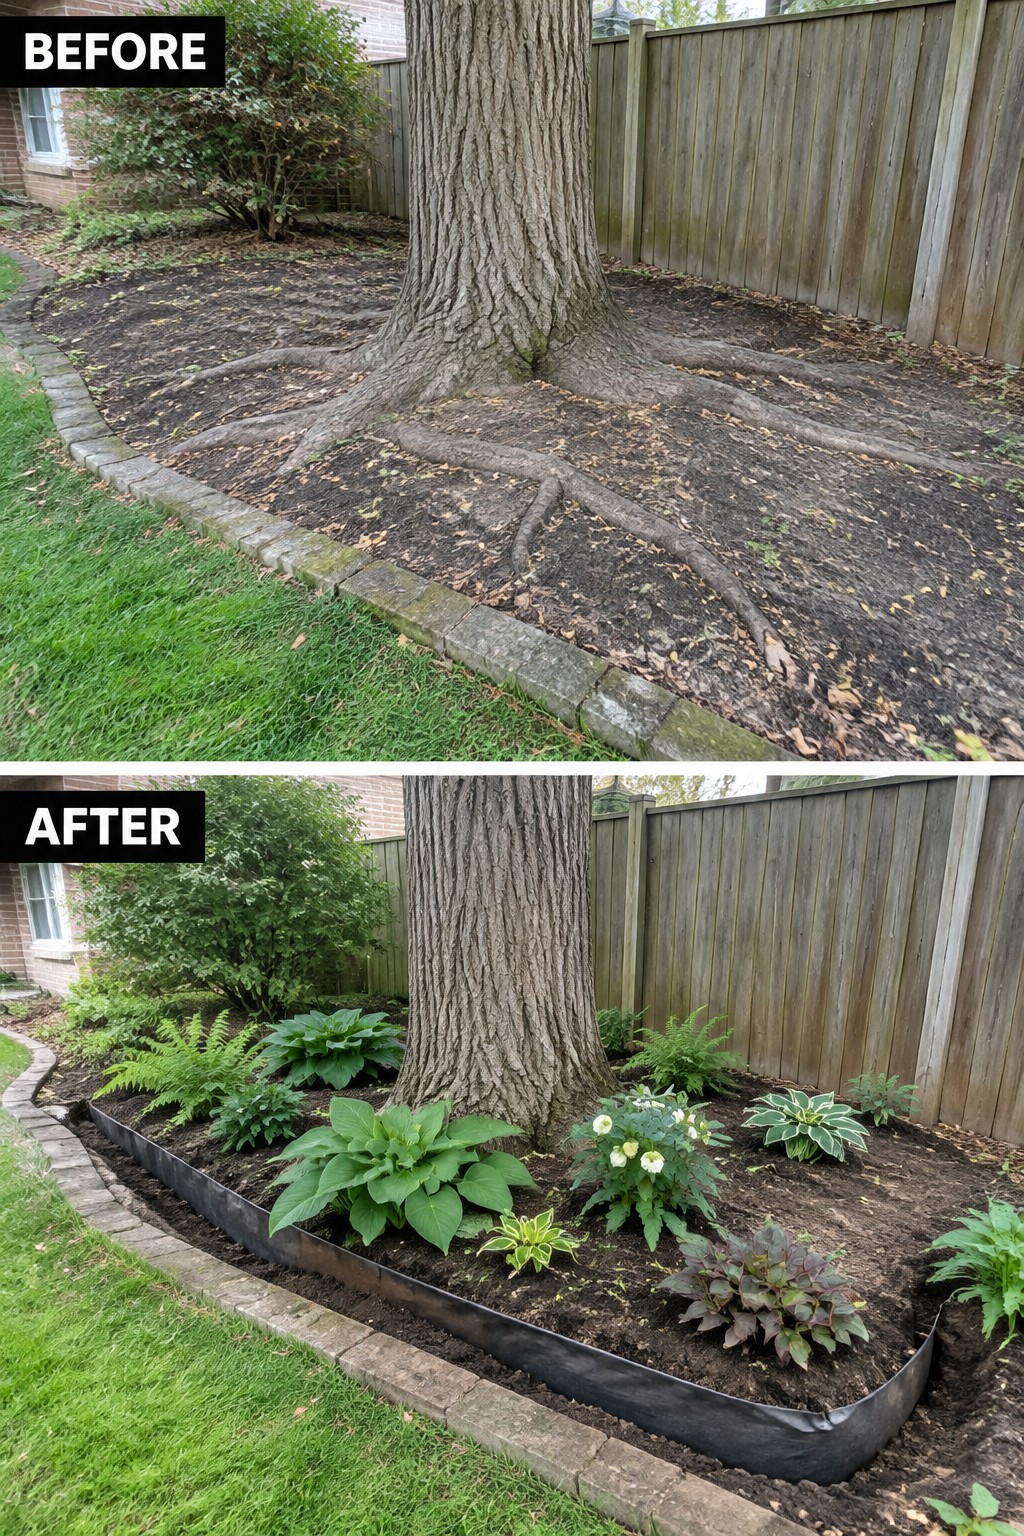
The biggest change here is how the area around the tree went from scattered roots and loose soil to a contained bed with a clear edge. That simple border keeps the soil in place, gives the plants room to grow, and stops the lawn from creeping in. It turns an awkward spot into something that looks intentional instead of leftover.
This approach works well when you are starting fresh beds near trees or along a fence. Lay the edging first so you know the shape and size before you plant. It keeps everything looking neat even when the plants are still small, and it makes future weeding and mulching much easier.
Frequently Asked Questions
Q: Do I need to dig deep or is a shallow turn enough for new beds?
A: Turn the soil about a foot deep to loosen it up for roots. Mix in compost as you go so nutrients reach where plants need them. A shallow scrape won’t cut it for most flowers.
Q: How do I handle heavy clay soil without hauling in tons of new dirt?
A: Work in plenty of organic matter like leaves or manure to break up the clay over time. You can also add some sand if it’s really sticky but start small. Raised beds help too if the clay stays stubborn.
Q: When should I add mulch after getting everything planted?
A: Spread mulch right after planting to lock in moisture and stop weeds. Aim for two or three inches but keep it away from plant stems. This step makes the bed look finished and cuts down on work.
