


I have always noticed that cottage style flower beds gain their charm from the way plants are stacked in height and bloom time rather than scattered in single rows.
When a bed lacks that structure it can end up looking flat even after adding flowers.
In my own yard I would test the layered approach by placing taller perennials at the back first and then filling forward with shorter varieties.
This method lets the space develop interest gradually without needing a full overhaul right away.
Small shifts like these often make the biggest difference in how cared for a garden feels.
Define Flower Beds With Layered Cottage Planting
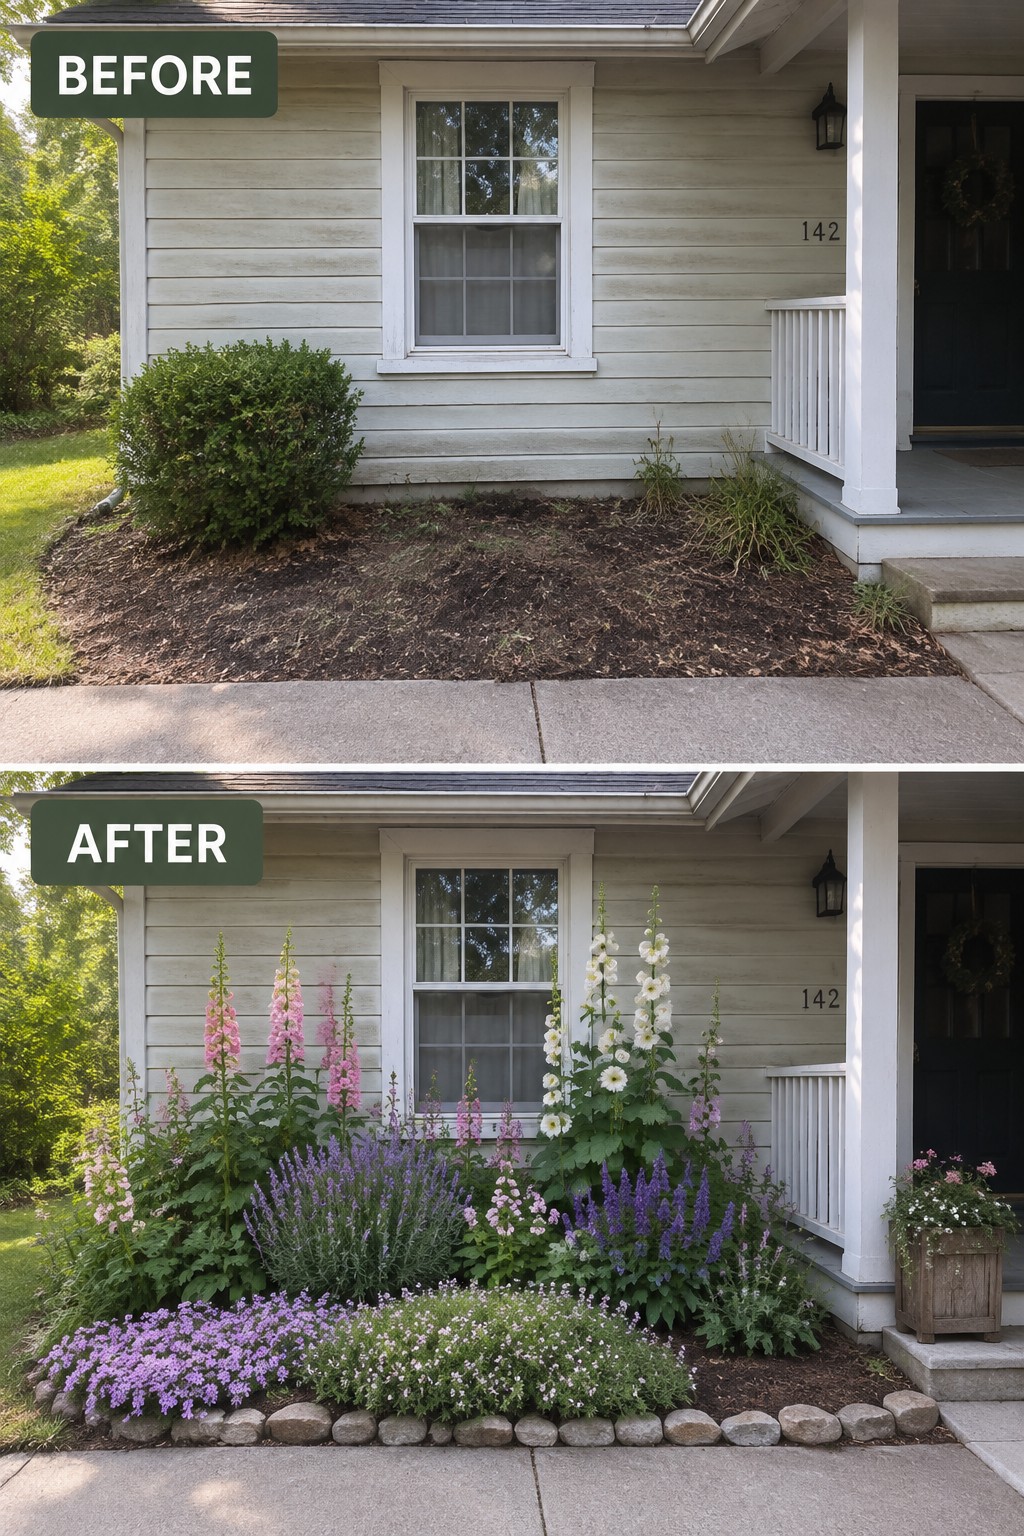
A bare strip of mulch along the front of a house often looks unfinished even after a quick cleanup. Adding defined beds with layered planting changes that quickly. The after photo shows how flowers planted in groups of different heights fill the space and give the whole foundation a softer, more welcoming look.
This idea works best on smaller yards or older homes where you want some color without crowding the walkway. Clear the area first, add a simple stone edge to keep the bed shape clear, then plant taller flowers toward the house and lower ones along the front. The layers make the planting feel full even in a narrow space.
Layer Plants Along A Narrow Side Yard

A narrow strip between the house and fence often gets ignored, leaving just bare dirt and weeds. Adding layers of planting turns that overlooked space into a real garden walk. The stepping stone path and gravel keep the walkway clear while the mix of taller ferns, medium hostas, and lower flowers fills the beds without crowding the route.
This idea works well on any tight side passage or foundation line where you want softness without blocking access. Start with a simple path and mulch to give the area structure, then build upward with plants of different heights. It suits older homes with cottage style and keeps maintenance reasonable since everything stays within reach.
Add Layered Planting To A Bare Front Bed

The empty dirt strip under the window made the front of the house look unfinished. Adding a window box and filling the bed with plants in different heights gave the area clear structure and a softer look against the house.
This idea works best along a simple foundation where you want color and shape without a big overhaul. Clean the bed first, then place taller plants toward the back, medium ones in the middle, and low growers along the edge so each layer stays visible. It suits smaller front yards especially well since the planting does the work of making the space feel complete.
Add Defined Cottage Flower Beds Along The Front
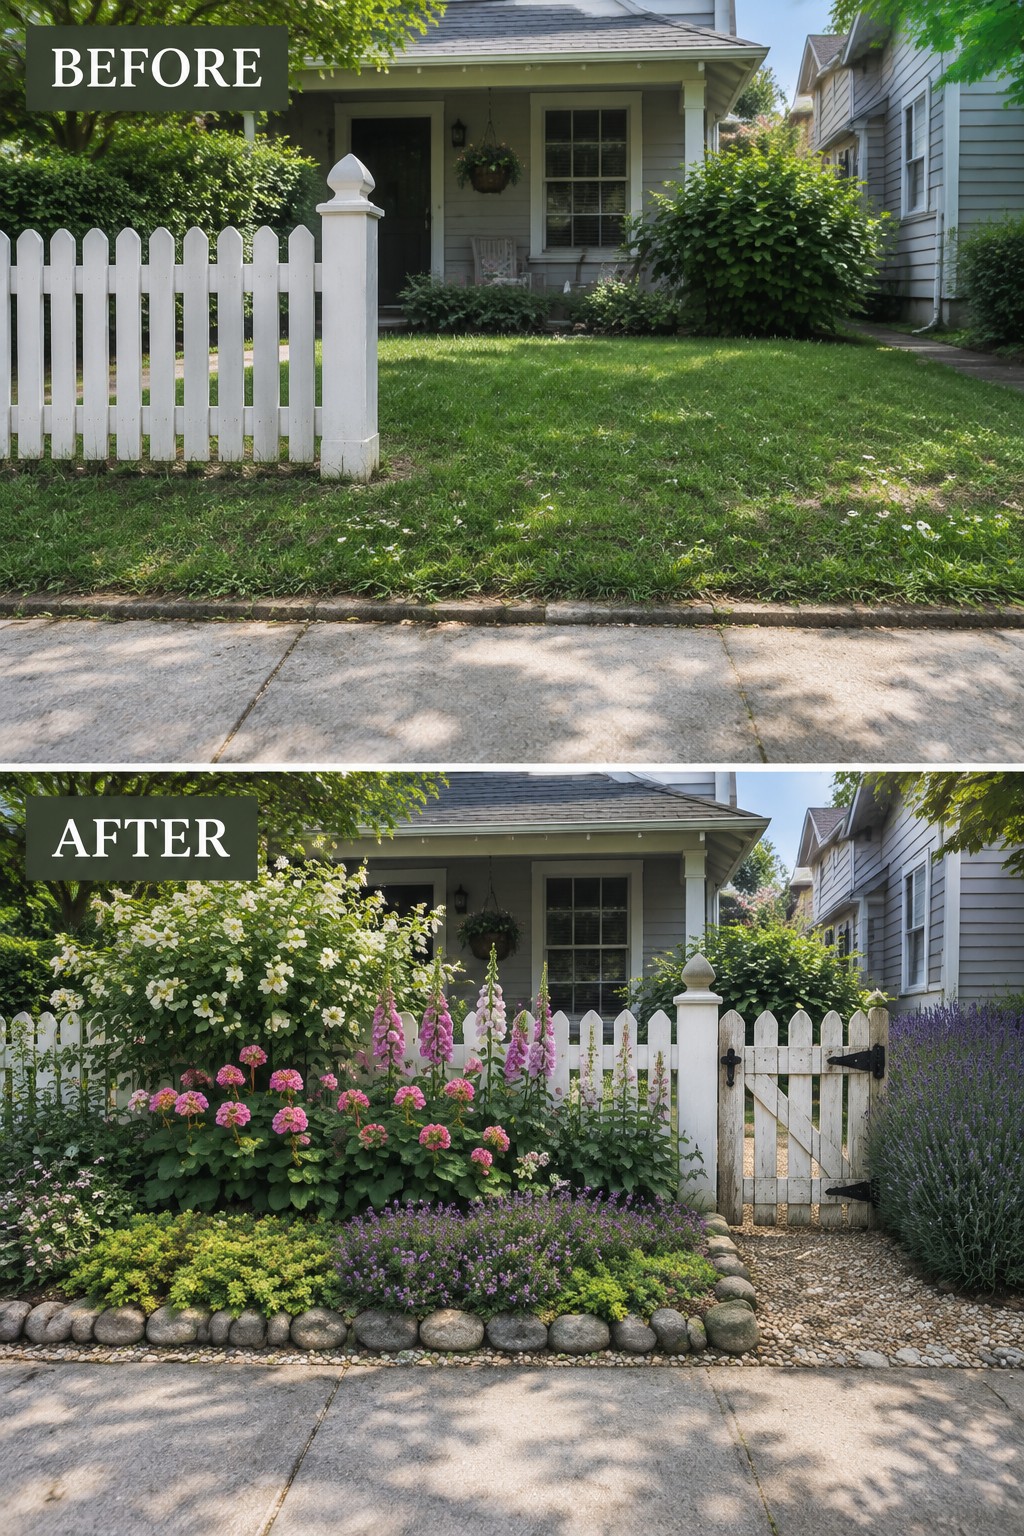
A plain stretch of lawn can look unfinished when it runs straight up to the fence with nothing in between. Adding a rock edge and filling the new beds with plants of varying heights gives the yard a clear structure and a softer, more welcoming feel without losing the open grass.
This approach works best on smaller front yards where you want color and texture but still need room to walk and mow. Start by marking out the bed shape with edging so it stays neat over time, then layer taller flowers toward the back and shorter ones in front. It suits older homes especially well because it keeps the look relaxed rather than overly manicured.
Add Retaining Walls To Shape A Sloped Yard

A bare, weedy slope is hard to plant and harder to maintain. The retaining walls turn that problem into a series of flat beds that hold soil in place and give plants a clear place to grow. The stonework stops the ground from sliding and creates the structure needed for layered planting.
This approach works well on any noticeable slope in front or back of the house. Start with the lowest wall first, then work upward so each bed can drain properly. Keep the plant choices simple at first, focusing on height differences rather than too many colors, and the beds will stay neat with far less weeding.
Layer Plants To Fill A Narrow Foundation Bed
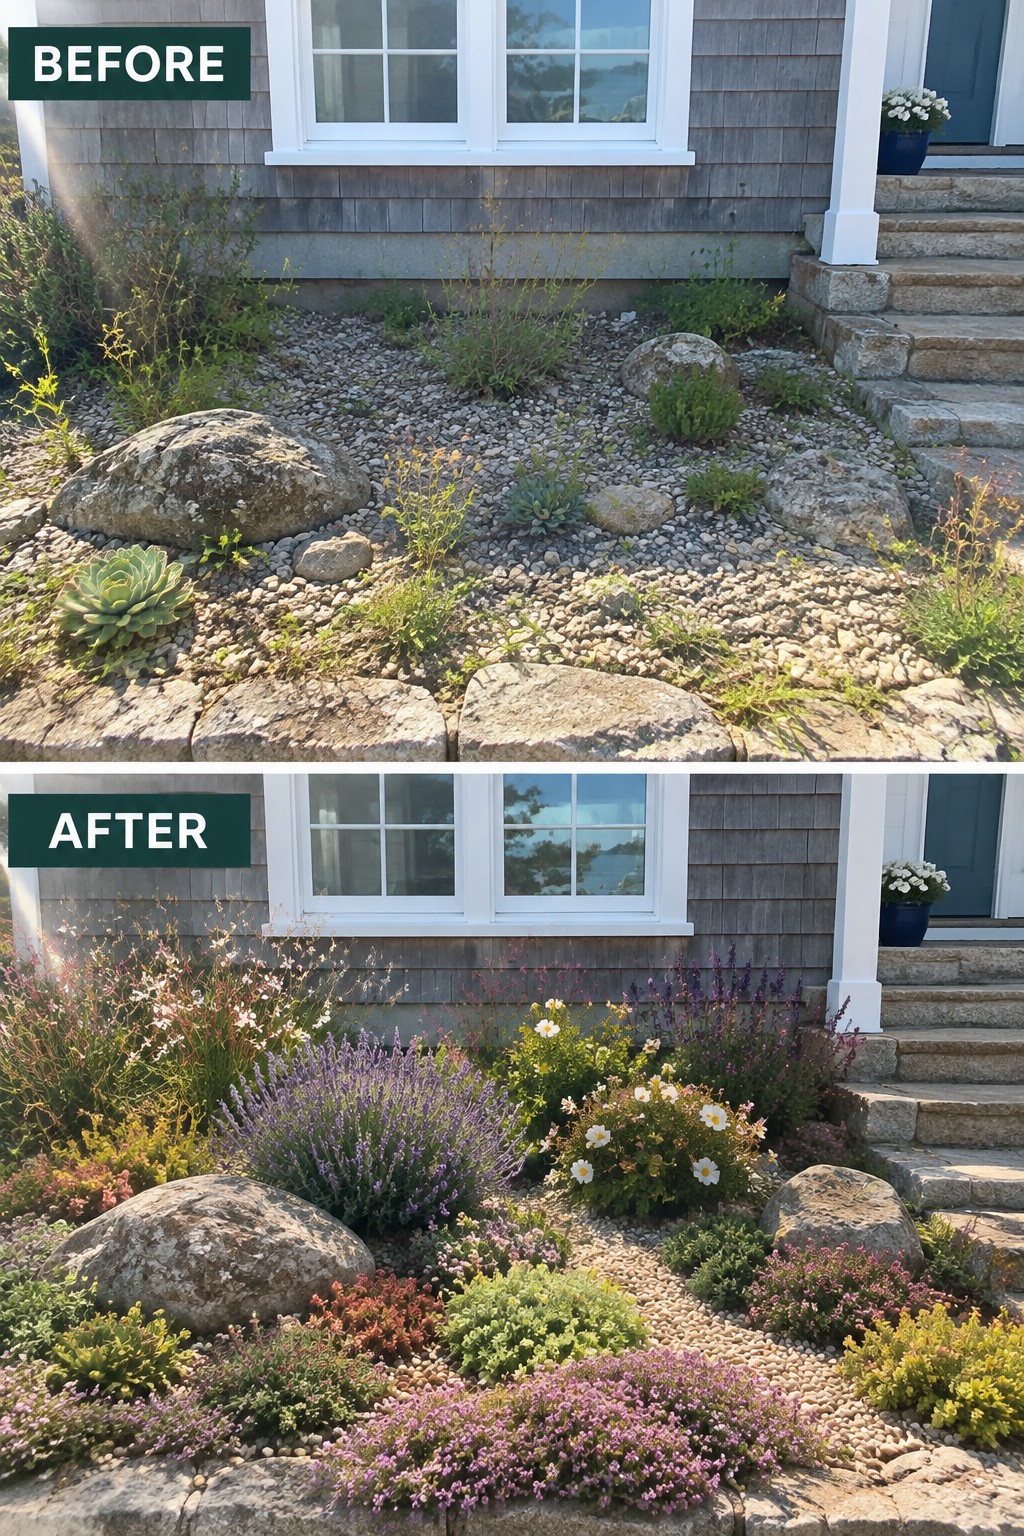
The before photo shows a thin strip of gravel and rocks with scattered plants that never quite came together. In the after, the same space holds a clear mix of heights and textures, from low ground cover up through mid-size shrubs and taller perennials. The rocks stayed in place, but the added layers of planting made the bed look full instead of patchy.
This approach works well along the front of a house where space is limited. Start with a few low plants along the edge, add mid-height shrubs or perennials behind them, and tuck in one or two taller pieces near the wall. Keep the plant list simple and repeat a few colors so the bed feels planned rather than crowded.
Layer Planting Along A Garden Path
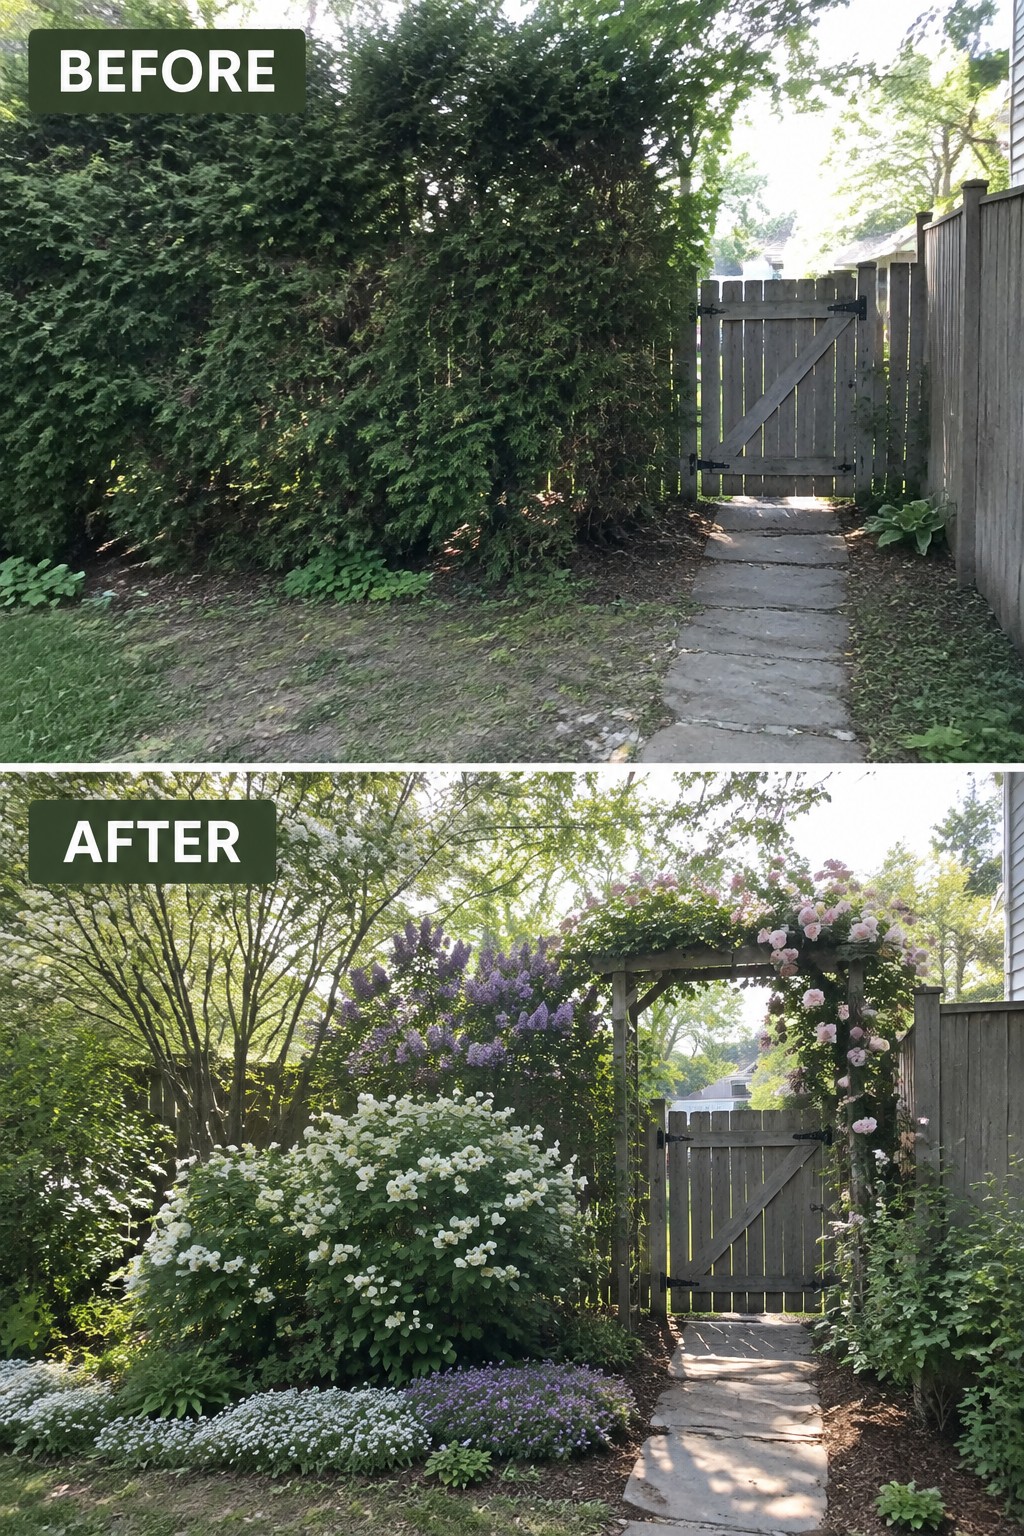
One simple way to improve a tired garden edge is to replace one heavy row of shrubs with several layers of plants at different heights. The before photo shows how a single overgrown hedge can crowd the path and leave the ground bare. After the change, low white flowers sit in front, midsize purple blooms fill the middle, and taller accents rise behind them to create a softer, fuller look.
This works best along side paths or fence lines where you want color but still need room to walk. Start by cutting back the largest plants, then group flowers and shrubs in threes or fives so the layers feel natural. Add mulch between the plants to keep the beds looking tidy and to help new growth fill in.
Create A Layered Cottage Flower Bed Along The Driveway

A bare dirt strip next to the house often gets ignored, but it can become one of the easiest places to add cottage charm. The main change here was turning that empty edge into a full border using layers of plants with different heights and bloom times, plus a simple rock edge to hold the shape.
This approach works best on narrow spaces between the house and a driveway or walk. Keep taller plants toward the back, fill the middle with mid-height flowers, and let low growers spill over the front. It softens the foundation, adds color through the seasons, and keeps the bed looking planned instead of scattered.
Use A Trellis To Anchor Layered Planting In A Small Courtyard

A bare courtyard wall and plain paving can feel flat and unused. Adding a simple wooden trellis with a climbing plant like clematis gives the space a clear focal point, then filling in around the base with pots and low beds at different heights creates the layered look that makes cottage gardens feel full without crowding the floor.
This approach works well in tight paved areas where digging beds is not practical. Place the trellis against the wall first, choose one or two repeating flower colors, and step plants down from tall to low so the eye moves naturally across the space. String lights strung above the trellis add a bit of warmth once the planting is in place.
Define A Walkway With Layered Flower Beds

The biggest change here is how the messy grass edges were cleaned up and replaced with clear beds. Stone borders now hold the planting in place, and the flowers are stacked in layers from low ground cover to taller spikes. That simple structure makes the whole path feel intentional instead of neglected.
This approach works well on any straight walkway that needs more interest. Start by laying out the bed lines with a hose or string, then add the edging before you plant. Mix heights and repeat a few colors so the beds look full without crowding the path. It keeps the focus on the front door while giving you room to add more plants later.
Use Layered Planting In Cottage Flower Beds

The main change here was swapping a single concrete trough full of weedy growth for two wooden raised beds. By adding simple trellises at the back and placing taller flowers behind shorter ones, the planting gained height and order without looking crowded.
This approach works well along a front walk or porch steps where space is narrow. Start with the tallest plants on a support, then fill in mid-height blooms, and finish with low edging plants. It keeps the bed looking full even when some flowers finish blooming, and the wood frames help contain the soil so the whole area stays neat.
Layer Plants To Fill A Bare Front Bed

The front bed was mostly bare mulch with one lone shrub sitting in the middle. Layering plants in different heights filled the space and gave the window and entry a much softer frame. Low flowers along the edge, mid size shrubs behind them, and a few taller pieces near the house created the depth that was missing.
This works best on simple foundation beds where the house already has clean lines. Keep the tallest plants toward the back so they do not block windows, then step down in height toward the lawn. A stone or brick edge helps keep the bed looking tidy and stops grass from creeping in.
Add Edging To Shape A Flower Bed
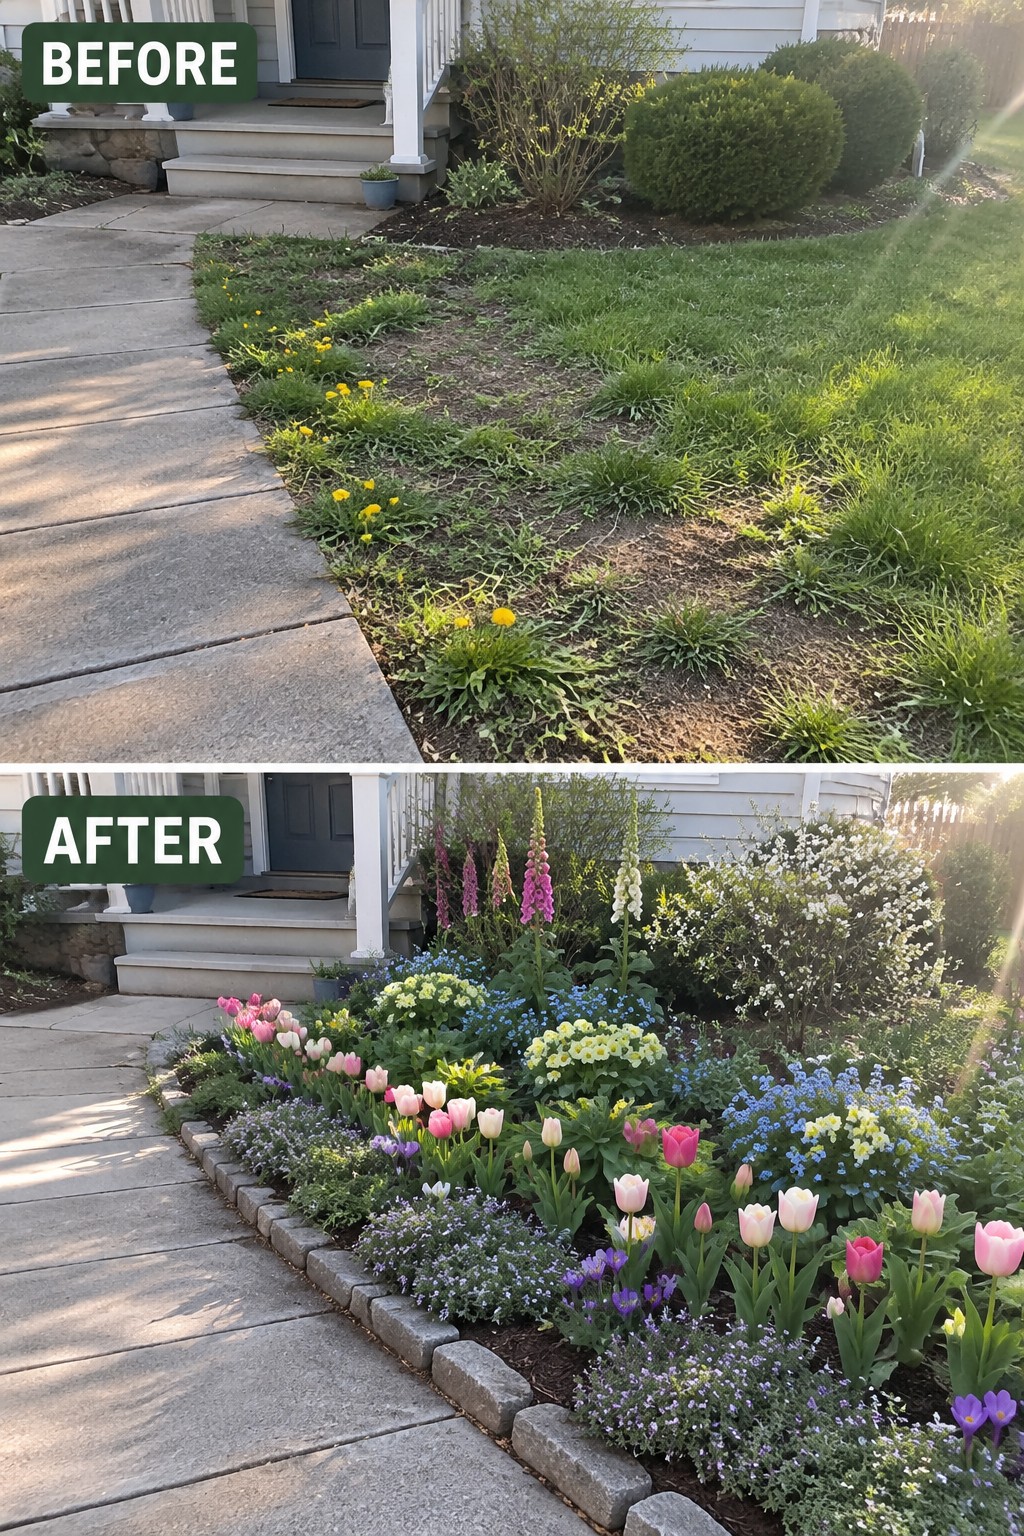
The main change was turning a weedy, patchy strip along the sidewalk into a real flower bed. A simple stone border gave the space a clear edge, which kept the grass from spreading and made the planting look intentional instead of scattered.
This works best in narrow front yard strips where you want color without losing a tidy walkway. Lay the edging first so the bed has a firm shape, then fill it with layers of plants that stay in bounds. It suits older homes with straight concrete paths that need a bit more structure to feel finished.
Create A Layered Flower Bed Around A Tree

A bare stretch of mulch under a large tree often looks unfinished and flat. Adding layers of plants in different heights and textures fills the space and gives it a cottage garden feel. The simple stone path makes the bed feel intentional rather than just planted in a circle.
This approach works best in yards that already have mature trees and need planting structure. Start with shade-tolerant foliage plants at the front, add mid-height perennials, and finish with a few taller bloomers near the trunk. Keep the path narrow so the focus stays on the plants rather than the hardscaping.
Create Defined Beds With Layered Planting

The change here comes from turning a bare, sandy stretch into a clear flower bed with stone edging and plants arranged in layers. Low growers sit at the front, mid-height blooms fill the middle, and taller shrubs and flowers rise closer to the house. That simple structure makes the whole entry feel settled instead of empty.
This idea works best on narrow foundation strips where you need to add interest without blocking windows or paths. Start with solid edging so the bed holds its shape, then choose a few plant heights and repeat colors instead of trying to fill every inch at once. It keeps the look full but still easy to maintain.
Add Layered Planting To Refresh A Border
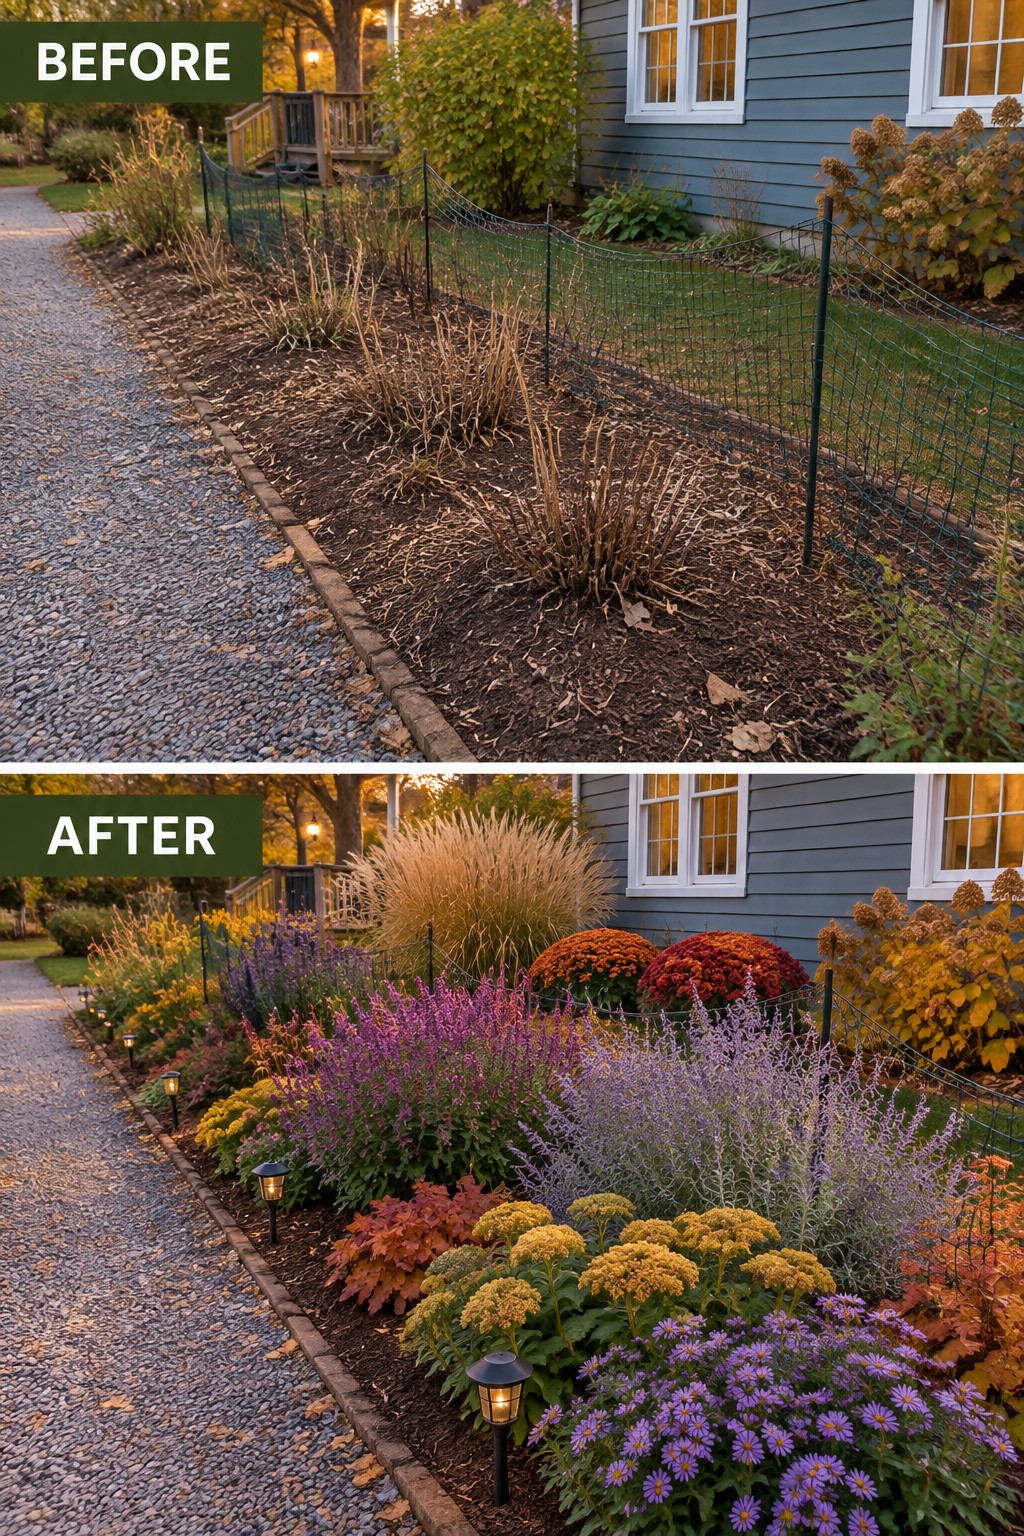
The before photo shows a narrow strip of bare dirt and dead stems running beside the path. The after version fills that same space with tall grasses at the back, mid-height perennials in the middle, and low flowers along the front edge. The layers give the border real depth and make the whole side of the house feel tended.
This idea works especially well on long, thin beds next to paths or foundations where you do not have much width to work with. Choose one or two tall plants for the back row, then repeat a few mid-size flowers and finish with low growers that spill slightly over the edge. Keep the mix simple so the bed stays easy to care for year after year.
Create A Layered Cottage Flower Bed

A bare patch covered with a tarp can feel like wasted space right next to the house. Replacing that cover with flowers planted in layers turns the same spot into a soft border that leads the eye from low ground covers up to taller blooms. The shift from flat mulch to a mix of heights and colors makes the whole front feel more finished without any hardscaping.
This approach works best along a walkway, porch, or foundation where you want color but still need room to walk. Start with early bulbs at the front, mid-height perennials behind them, and a few taller accents at the back. Keep the bed narrow enough to reach across for weeding, and repeat a few colors so it reads as one bed rather than a random mix.
Create Defined Flower Beds With Layered Planting

A plain stretch of lawn in front of the house can feel unfinished even when the grass looks fine. Adding a clear border of layered plants changes that quickly. The taller climber on the lamp post gives height, the mid-level white flowers fill the middle, and the low silvery foliage keeps everything grounded along the walk. That single change turns empty space into a cottage style bed without touching the house itself.
This approach works best on smaller front yards where you want curb appeal but do not need a full redesign. Start with one vertical element like a post or simple trellis, then add two or three plant heights that bloom at different times. Keep the color simple so the layers show up clearly instead of competing. The result feels planned without looking crowded.
Frame Your Front Door With A Layered Cottage Flower Bed

A bare patch of soil next to the door can feel unfinished. Adding a defined bed with plants in different heights turns the same spot into something much more welcoming. The after version shows low growers in front, mid height herbs in the middle, and taller flowers on a simple trellis at the back, all edged with mulch for a clean look.
This approach works best in small front areas where you want structure without crowding the path. Choose plants that stay in scale with your door, repeat a few colors or textures, and mix useful herbs with flowers so the bed stays interesting through the seasons. Start with the tallest layer at the back and work forward so nothing blocks the entry.
Create Layered Flower Beds Along A Retaining Wall
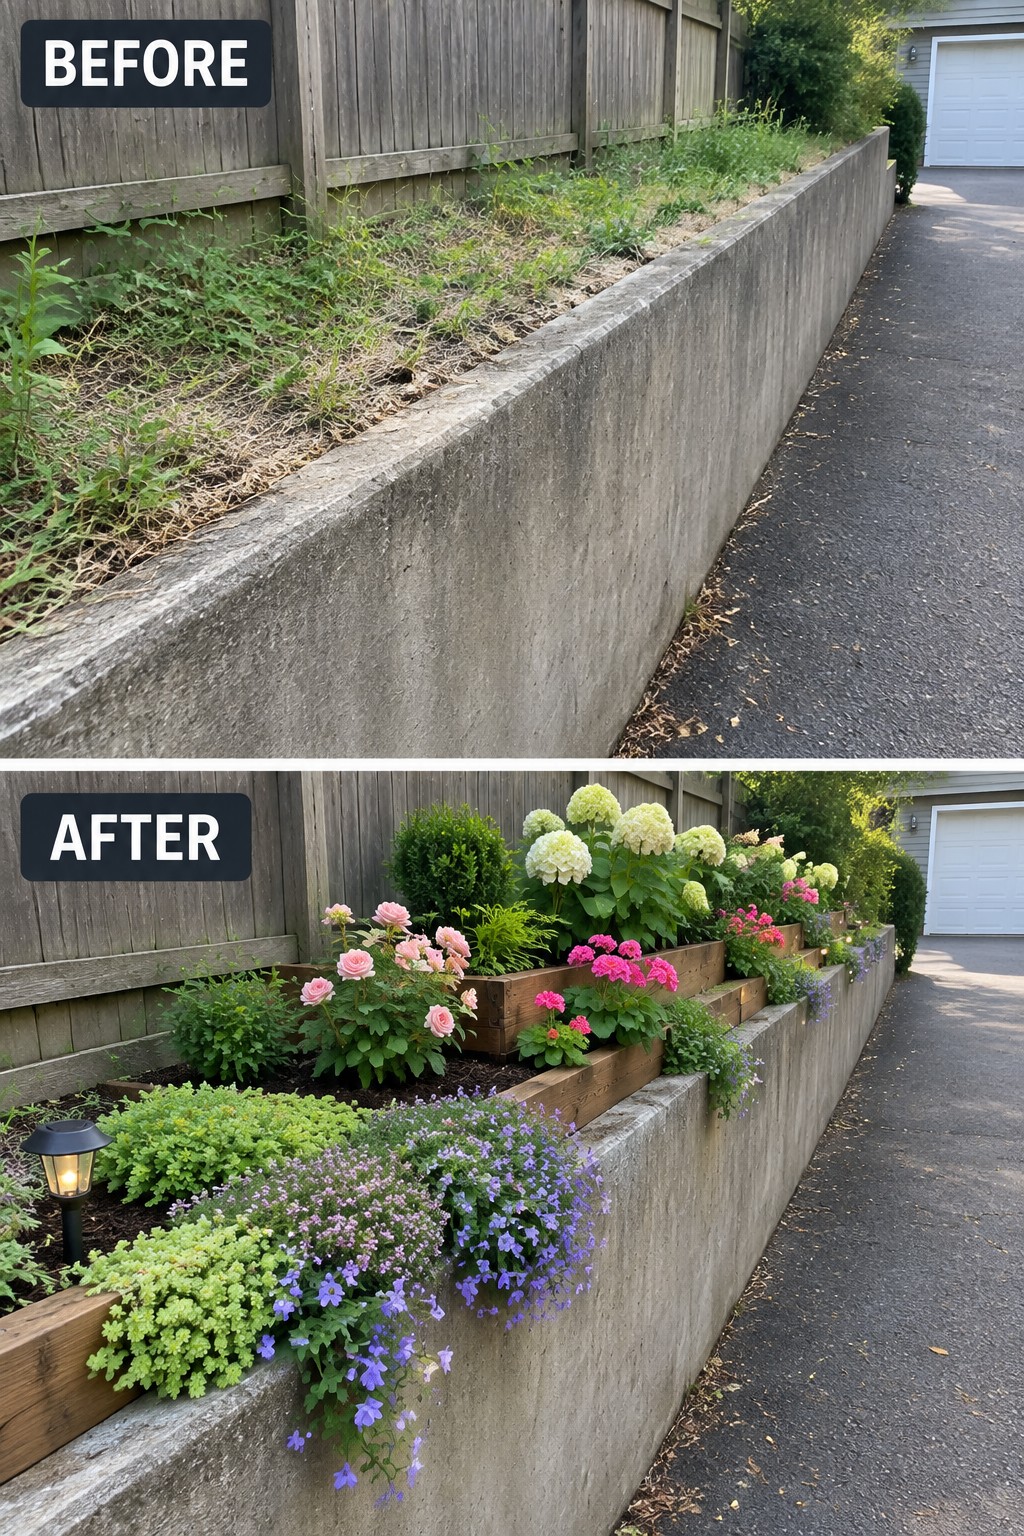
A weedy slope behind a plain concrete wall can feel like wasted space. Adding tiered wooden planters gives the area clear structure and turns it into a proper garden bed. The height changes let you plant in layers, with taller shrubs and flowers toward the back and lower spreading plants spilling over the front edge.
This approach works well on narrow side yards or along driveways where flat ground is limited. Start with sturdy planters that follow the slope, then fill them with a mix of heights and textures so the bed feels full without looking crowded. Keep the front edge clear enough for walking and maintenance.
Add Climbing Roses Along A Fence

A bare fence often leaves the edge of a yard feeling unfinished. Here the fence changed from plain wood with weeds at the base to a row of climbing roses trained on simple trellises, with a full flower border planted in front. The vertical roses add height and color while the lower plants create depth and keep the bed from looking flat.
This works best along backyard fences that run the length of the property. Put up a few trellises first, choose repeat-blooming climbers, and fill the bed with a mix of mid-height perennials and low edging plants. Mulch the soil to keep the look tidy while everything grows in.
Shape A Bare Slope Into A Cottage Rockery

A bare dirt slope next to the sidewalk does nothing but erode and look unfinished. Adding rocks to hold the grade and planting in layers turns the same space into a garden that feels settled and full without needing constant upkeep.
This approach suits homes with side slopes or narrow borders where a flat lawn never worked well. Lay the rocks first to create simple terraces and paths, then fill in with low plants along the front edge and taller ones higher up so the slope stays easy to walk past and maintain over time.
Create Cottage Flower Beds With Layered Planting

A bare garden bed can feel like wasted space until you add plants in layers. The empty soil gains real structure once taller flowers go in the back, mid-height blooms fill the center, and shorter plants edge the front. A simple mulched path down the middle keeps the bed easy to tend and gives the whole area a finished look.
This works best in modest yards where you want color without crowding the space. Choose perennials that bloom at different times so the bed stays lively from spring through fall, and keep the tallest plants against a fence or wall for support. Start with the bones of the bed first, then add layers as the season allows.
Frequently Asked Questions
Q: My flower bed already has some old shrubs. How do I layer cottage plants around them?
A: Work around the shrubs by tucking shorter blooms in front and climbers behind if the shrubs can support them. Choose plants that like the same light and soil as what is already there. This way you build depth without starting over.
Q: How often do I need to divide plants to keep the layers looking full?
A: Check every couple of years and split crowded clumps in spring or fall. Focus on the middle layer first since it fills in quickest. The front and back stay neat longer with less work.
Q: What if winter kills off some of my layered flowers?
A: Replace the lost spots with hardy perennials that come back strong. Leave seed heads on a few plants so they self sow and fill gaps naturally. You get new volunteers without buying more.
