

When the ground in a garden stays bare or uneven the whole space can look scattered even if the plants themselves are healthy.
Adding a layer of mulch brings the beds together and reduces the time spent fighting weeds that pop up after every rain.
I have noticed in my own yard that this one step makes the layout feel more intentional without adding any new structures.
Some setups work better than others depending on how much sun or foot traffic the area gets.
A few of the approaches described here seem worth testing in different corners to see what holds up best over time.
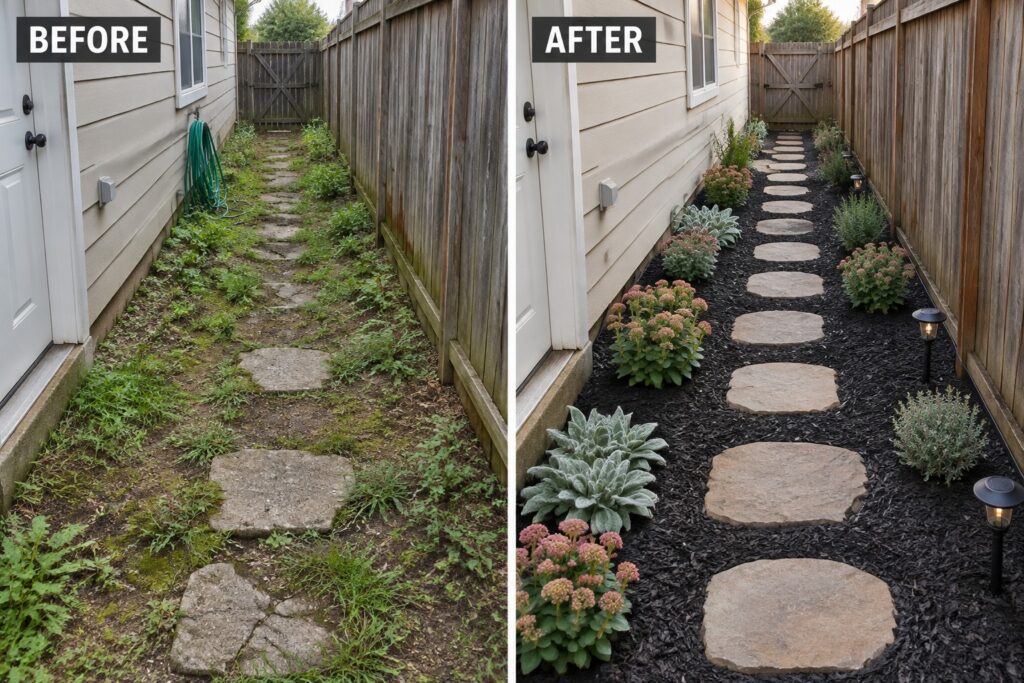
Use Mulch To Clean Up A Narrow Side Path

A narrow side yard often turns into a weedy strip that no one wants to walk through. Clearing the overgrowth and laying down a thick layer of dark mulch instantly makes the space look cared for. The stone path stays in place but now reads as intentional instead of forgotten, and low plants along the edges keep the look simple without crowding the walkway.
This approach works well on any tight space between a house wall and a fence. Start by removing the tall weeds, then add mulch deep enough to block new growth. A few repeated plants and a handful of solar lights are enough to finish the job without making the area feel busy.
Mulch Gives Foundation Beds A Clean, Finished Look

The front beds here went from bare dirt and scattered plants to a much tidier strip along the house. A layer of mulch covers the soil, which pulls the whole area together and makes the shrubs and flowers stand out.
This works especially well along a house foundation where you want simple structure. Clear out the weeds first, then spread mulch around the plants you already have. It keeps the beds looking neat with very little extra effort.
Use Mulch To Define Garden Beds

An overgrown border can quickly look neglected when plants spread without clear edges and old fabric starts to show. In this case the shift came from cleaning out the excess growth, adding a simple metal border, and covering the soil with a fresh layer of mulch. The result feels much more intentional without needing a complete plant overhaul.
This idea works best along fences or around trees where you already have established shrubs and perennials. Focus first on removing weeds and any visible fabric, then plant in loose groups before mulching. It keeps the bed looking neat through the seasons and cuts down on weeding later.
Use Mulch To Create Clean Beds Around Trees
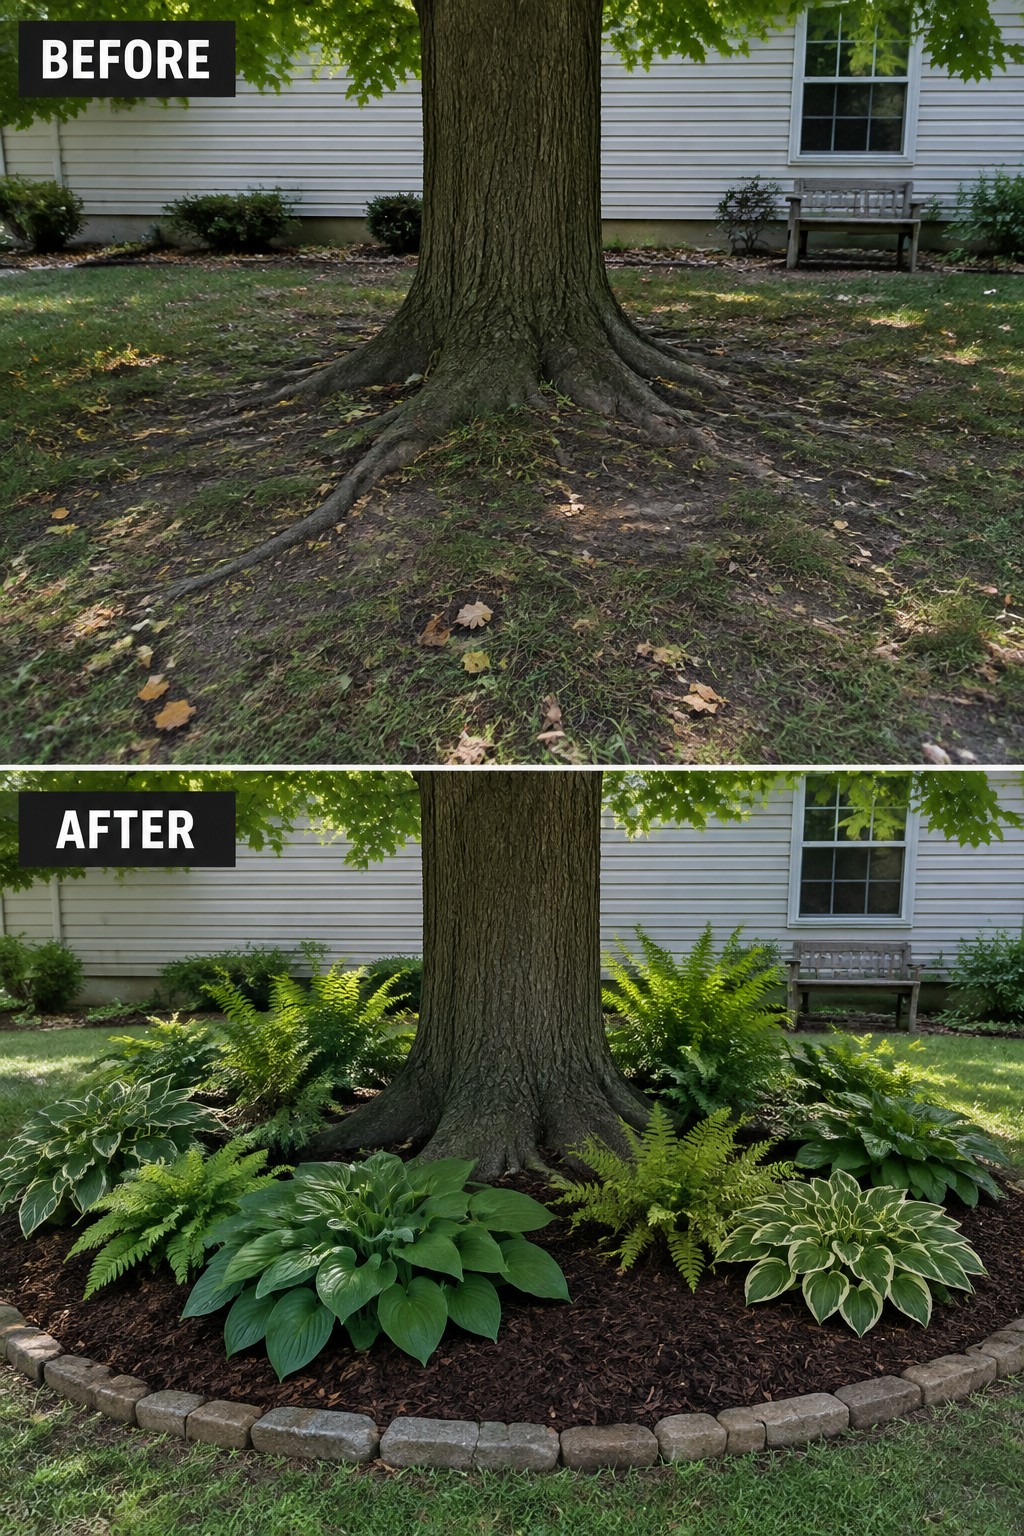
The space under this tree went from bare dirt and scattered weeds to a simple ring of dark mulch edged with stone. The mulch pulls the area together and gives the tree a clear base without covering the roots too deeply.
This idea suits yards with mature trees where grass struggles to grow. Clear the ground first, spread mulch in a wide circle, and add a few shade plants like hostas or ferns. The result looks intentional and keeps maintenance low.
Turn A Sloped Yard Into Terraced Garden Beds
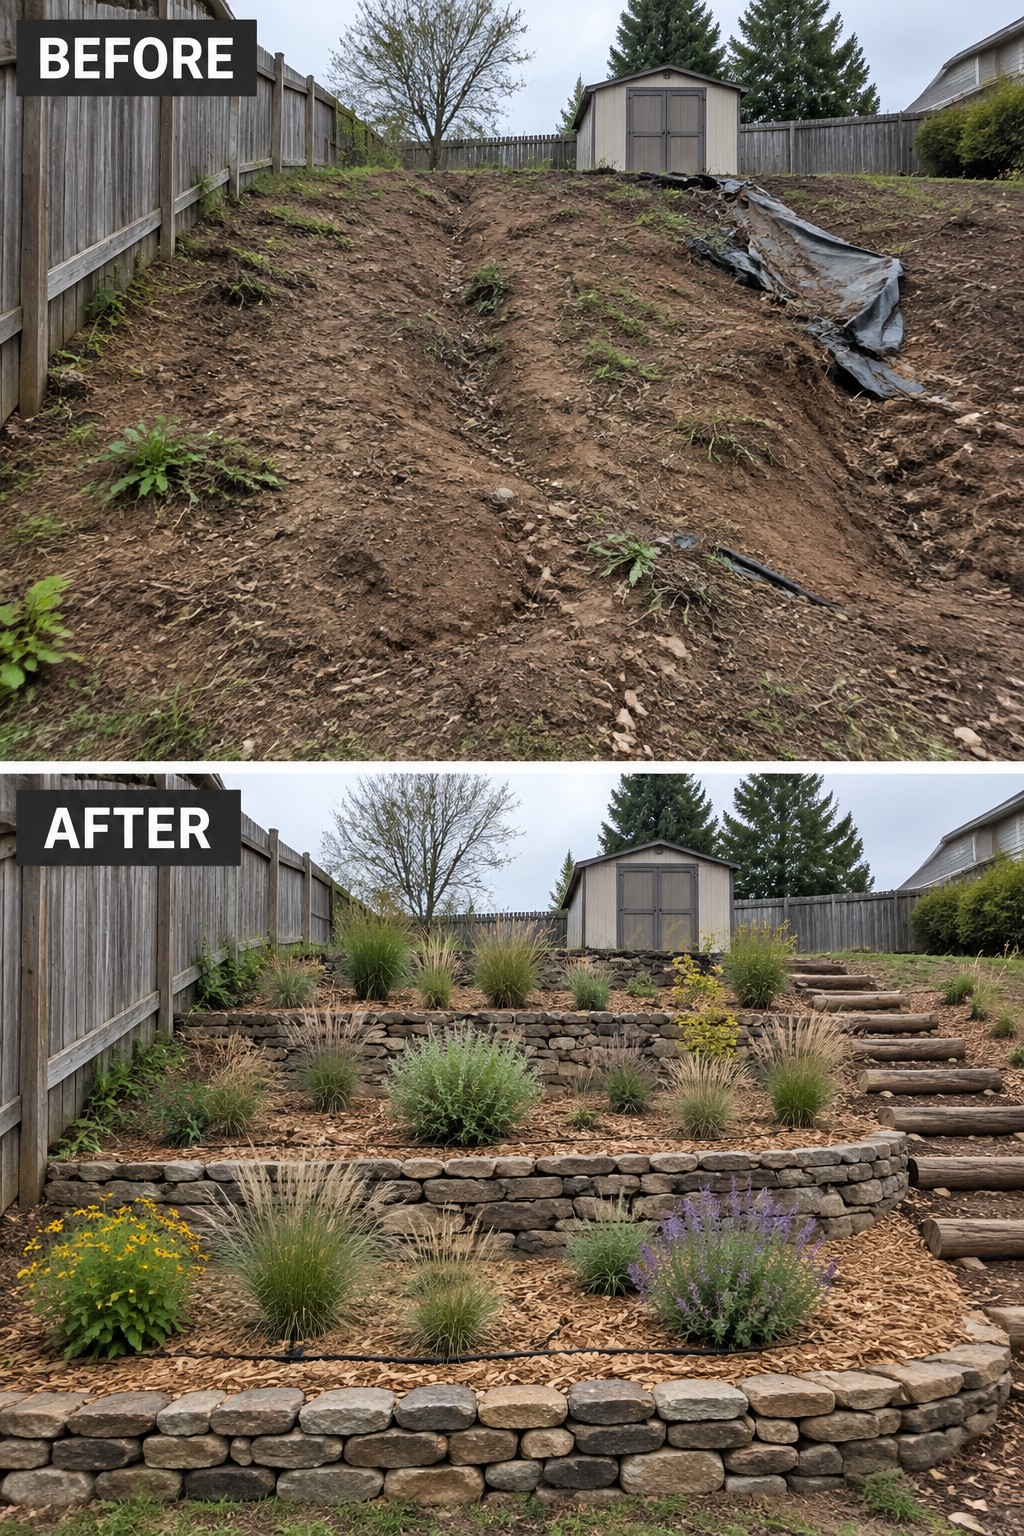
A bare dirt slope is hard to plant and easy to lose to erosion. Adding low retaining walls creates flat beds that hold soil in place, and mulch then covers the ground to keep weeds down while giving the area a finished look. The change from loose dirt to defined beds with clean mulch edges makes the whole yard feel more usable and easier to maintain.
This approach works well on moderate slopes where you want planting space without major grading. Start with the walls to set the levels, then spread mulch thick enough to suppress growth underneath. It suits homes with backyards that drop away from the house, and it keeps the focus on simple structure rather than lots of new features.
Use Mulch To Define A Narrow Poolside Strip

The before photo shows a weedy strip of dirt between the pool deck and the fence. It looks neglected and hard to keep under control. In the after photo, the same narrow space has been cleared, covered with mulch, and planted with a few larger pots and clumps of grass. The mulch gives the area a finished edge and makes the whole side of the pool feel more intentional.
This idea works well when you have a long, skinny border next to hardscaping. Start by pulling out the weeds and laying down a decent layer of mulch. Then add a few bigger plants or pots so the bed does not look too flat. It keeps the area tidy without needing a full garden redesign.
Use Mulch Beds To Frame A Concrete Entry
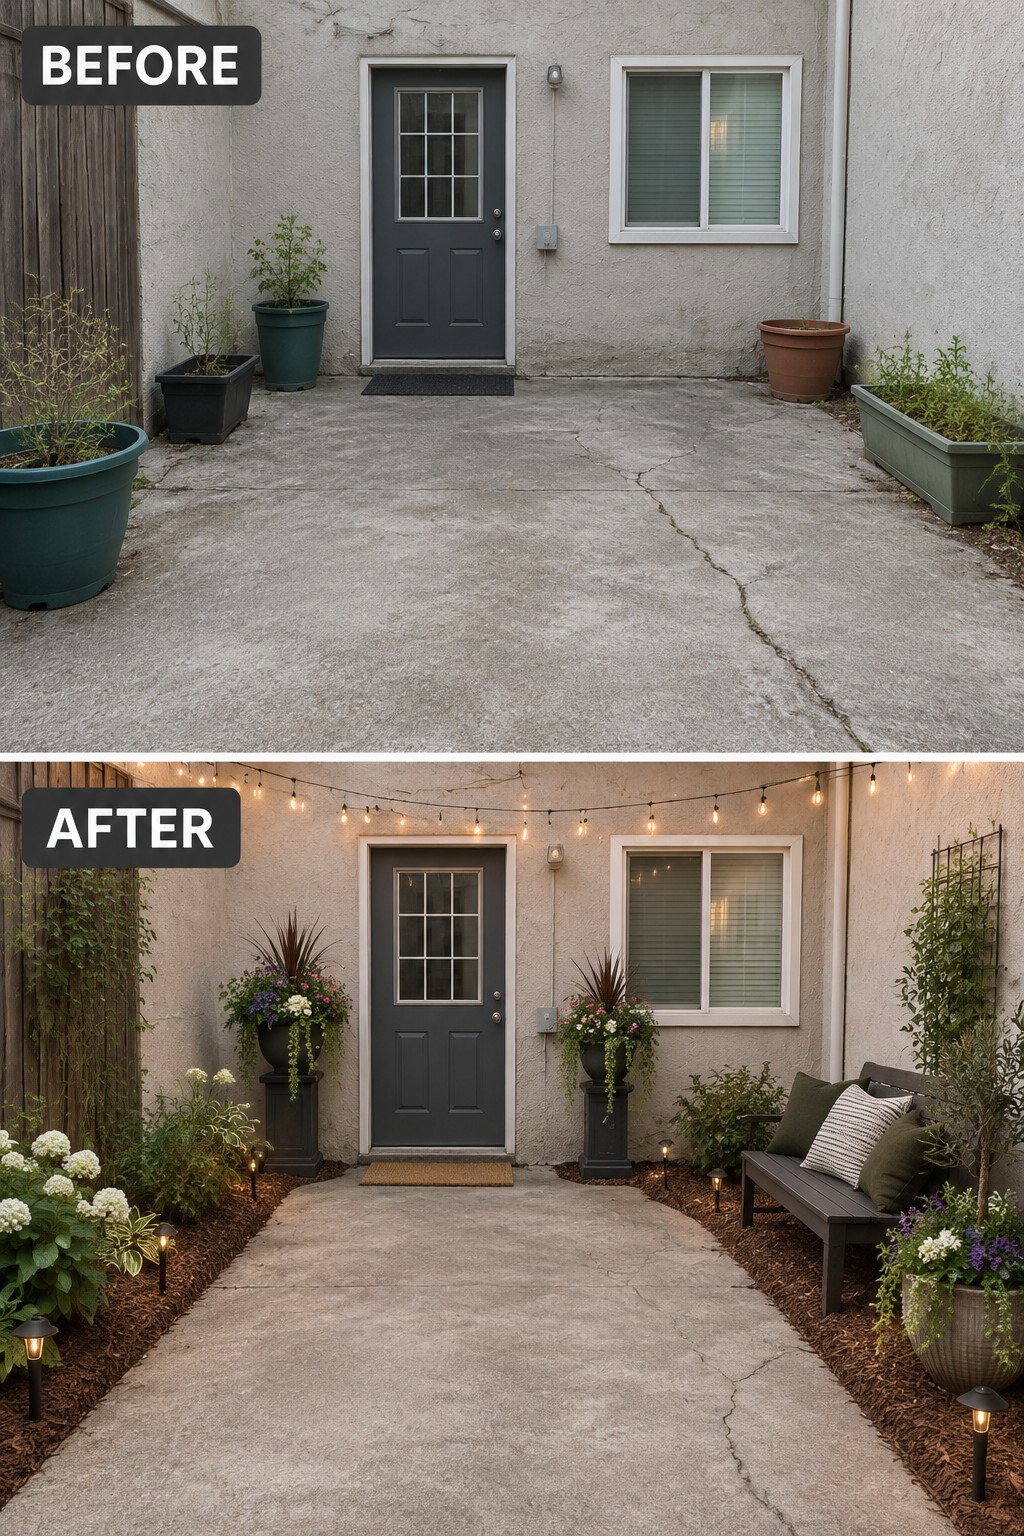
A plain concrete entry often looks unfinished when plants are just scattered in pots. Adding mulch beds along both sides gives the space clear borders and turns those random pots into actual planting areas that feel planned. The mulch also helps the beds blend with the concrete instead of fighting against it.
This approach works best on small entries or walkways where you want planting without tearing out the hard surface. Keep the beds narrow enough to leave walking room, and choose plants that stay contained so the mulch stays visible as the main ground cover.
Use Mulch To Define A Play Area
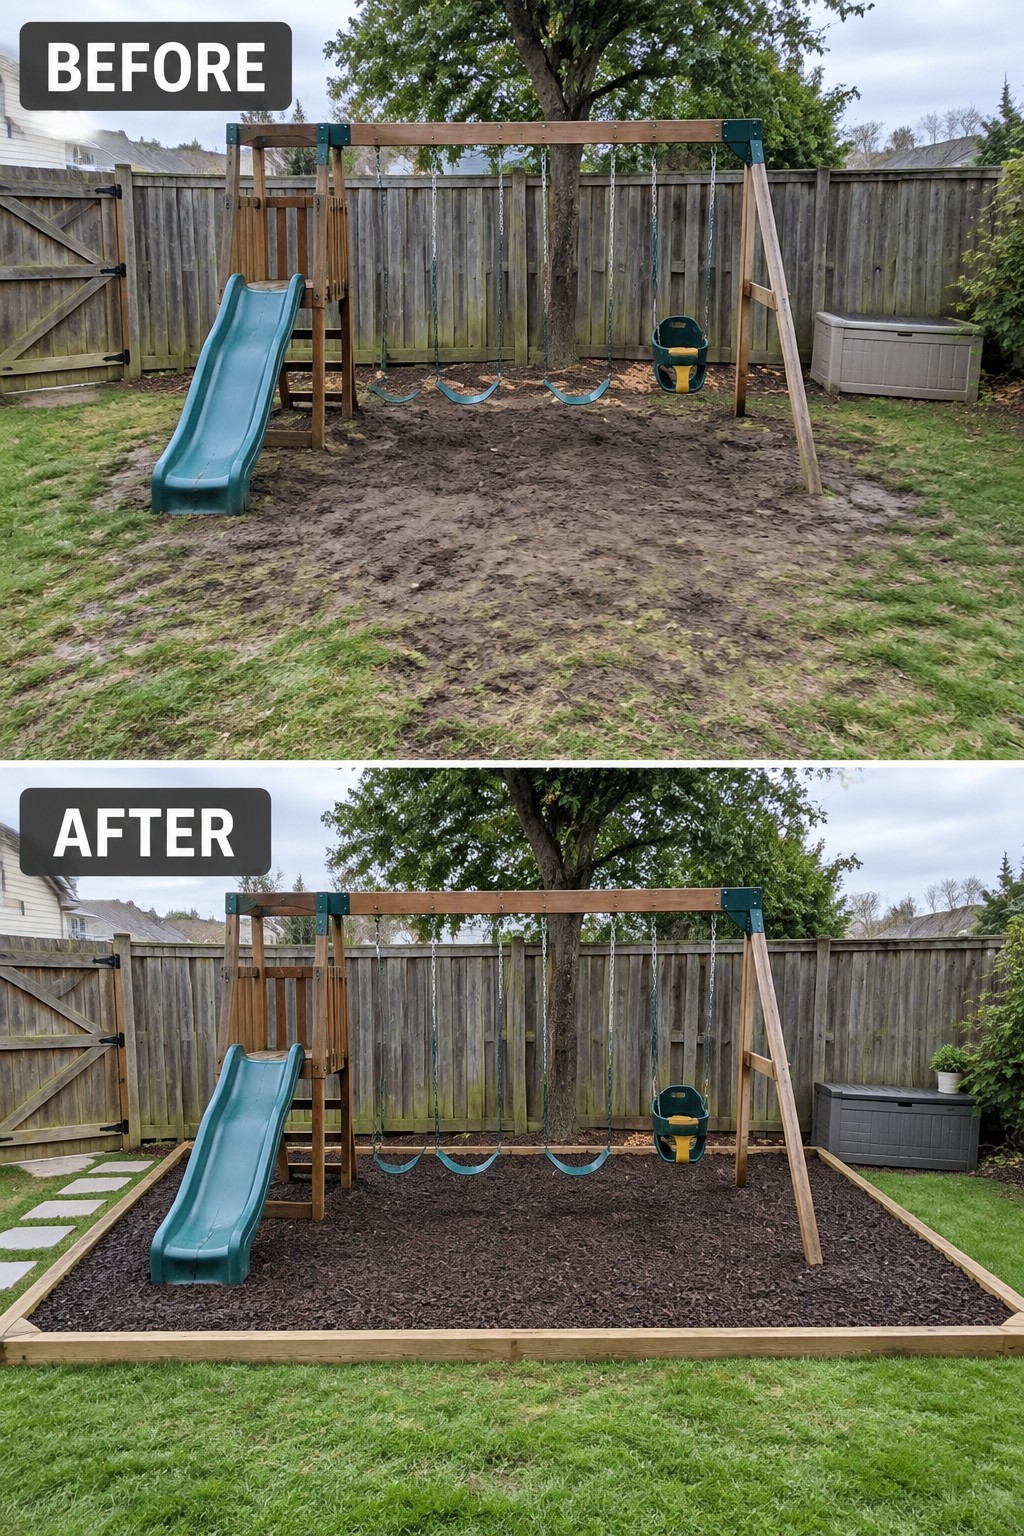
The bare dirt under this swing set was turning into a muddy mess every time it rained. Adding a simple wood border and filling the space with mulch gave the whole play zone a clean, usable surface that stays put and looks intentional.
This approach works best in backyards where play equipment sits on open ground. Start with a border to hold everything in place, then spread mulch thick enough to cover the soil completely. It keeps the area from washing out and makes it easier to maintain without constant weeding or raking.
Define Driveway Edges With Mulch And Planting
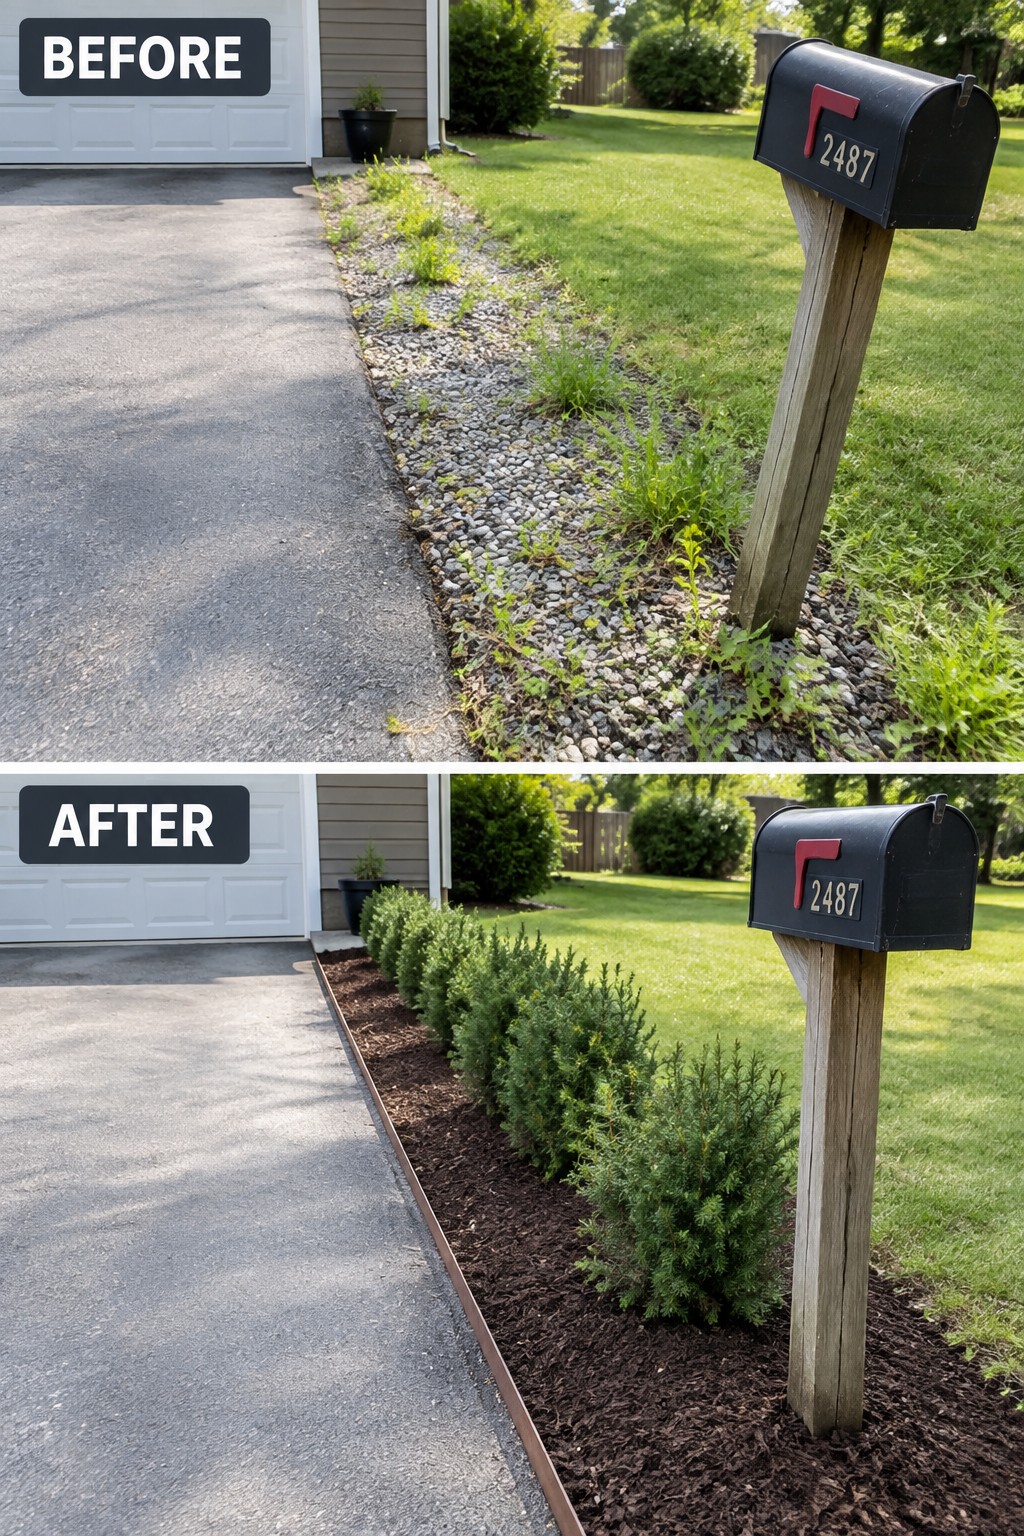
A weedy gravel strip next to a driveway often looks neglected even when the rest of the yard is fine. Switching to a clean layer of mulch and a row of compact shrubs gives the edge a finished look and stops the weeds from taking over again.
This idea works best on long straight borders where you want structure without a lot of upkeep. Clear the old growth first, add edging if needed, then spread mulch thick enough to block light. Low evergreen shrubs keep the bed from feeling empty while staying easy to mow around.
Use Mulch To Define Garden Beds And Paths
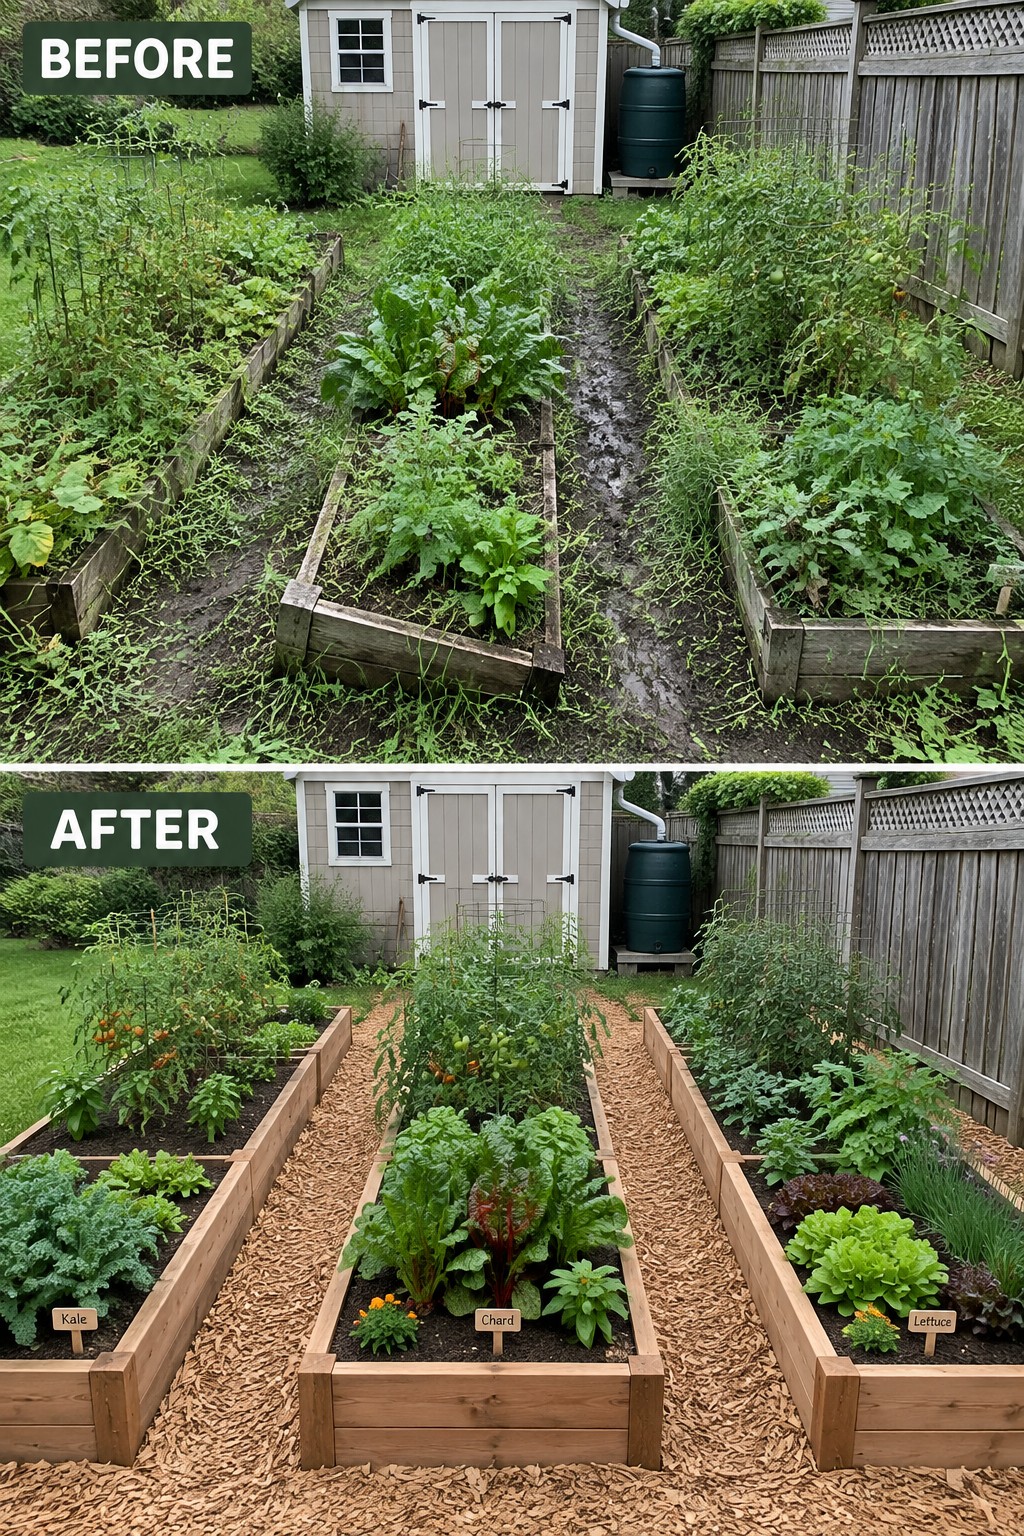
The garden shifted from a weedy, muddy layout to something much easier to walk through and maintain. Mulch paths now separate the beds, which keeps the soil contained and cuts down on the constant battle with weeds between rows.
This idea suits small to medium yards where you want a practical, low-maintenance setup. Clear the overgrowth first, then add mulch in the walkways before fussing with new plants. It gives the beds a finished edge and makes the whole space feel more intentional.
Use Mulch To Give An Overgrown Border A Clean Finish
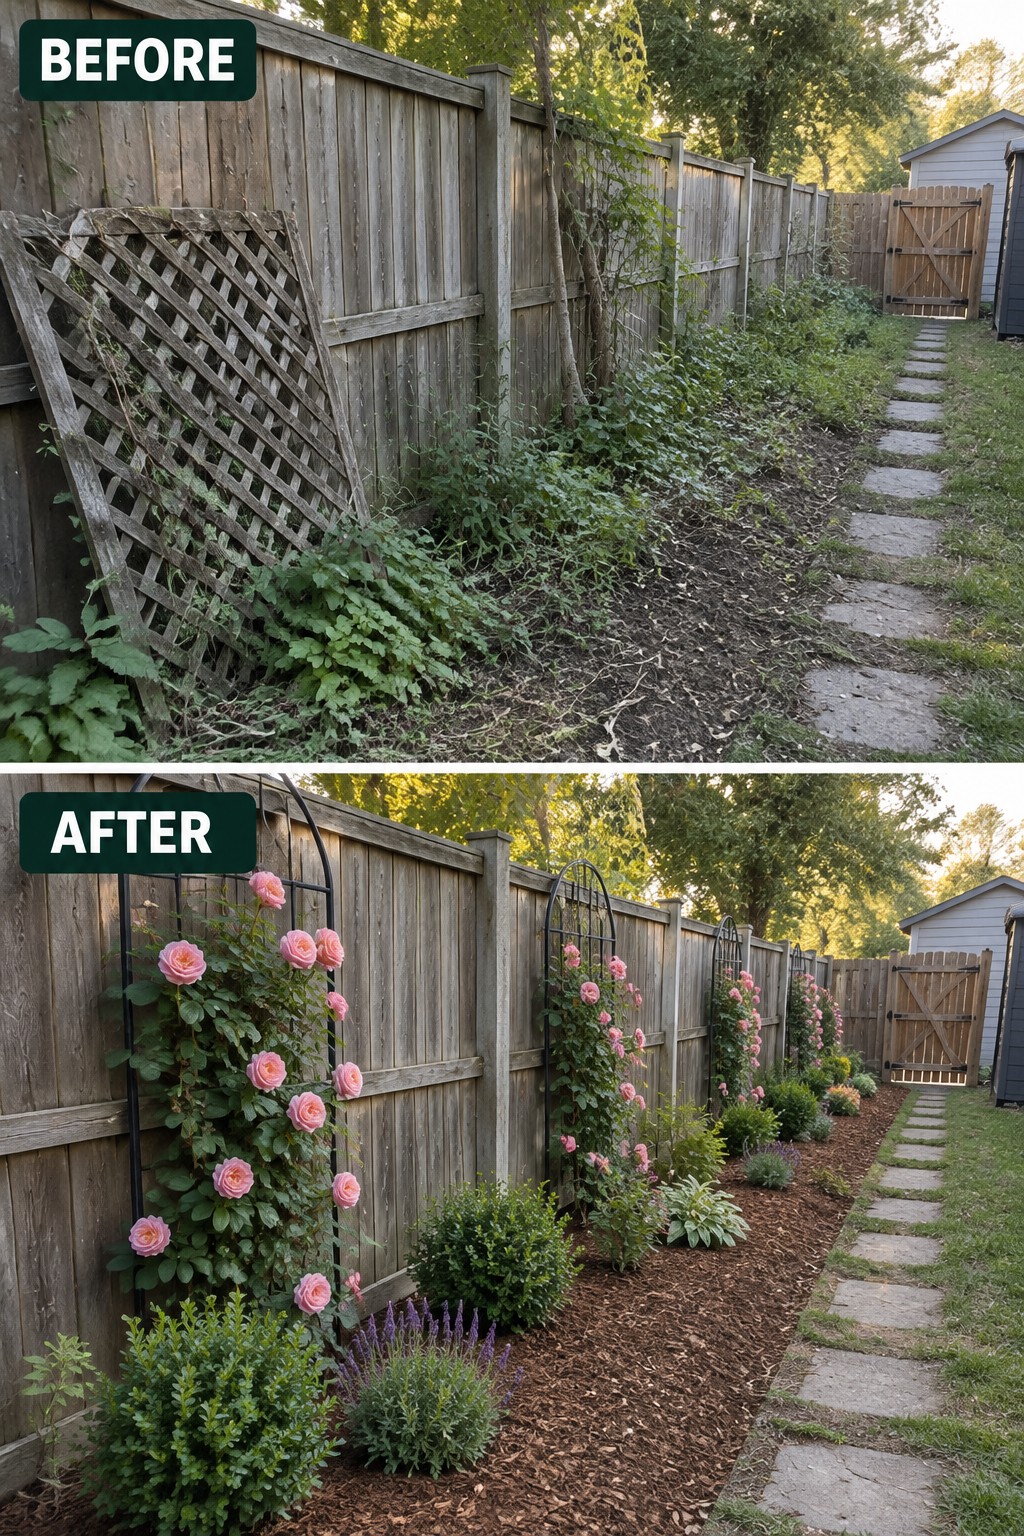
Clearing out weeds and covering the soil with mulch turns a messy strip along a fence into something that looks planned. The dark mulch creates a sharp edge against the path and gives climbing roses on simple trellises a neat background they did not have before.
This approach suits long, narrow spaces where you want low maintenance and clear structure. Start with cleanup and mulch first, then add a few vertical plants for height and smaller shrubs or perennials along the base. It keeps the area looking tidy without constant weeding or complicated planting.
Mulch A Circle Bed To Feature One Small Tree

A bare circle of dirt with one small tree can feel unfinished and weedy. Adding a layer of mulch gives the bed a clean base, lets you plant around the tree without competing weeds, and makes the tree itself stand out as the main focal point.
This approach works well in small front yards where you want structure without a lot of hardscaping. Keep the edging simple, choose one tree with good color, and fill in with low perennials and ground cover so the mulch stays visible and the bed does not get overcrowded.
Use Mulch To Define Garden Beds Around A Patio
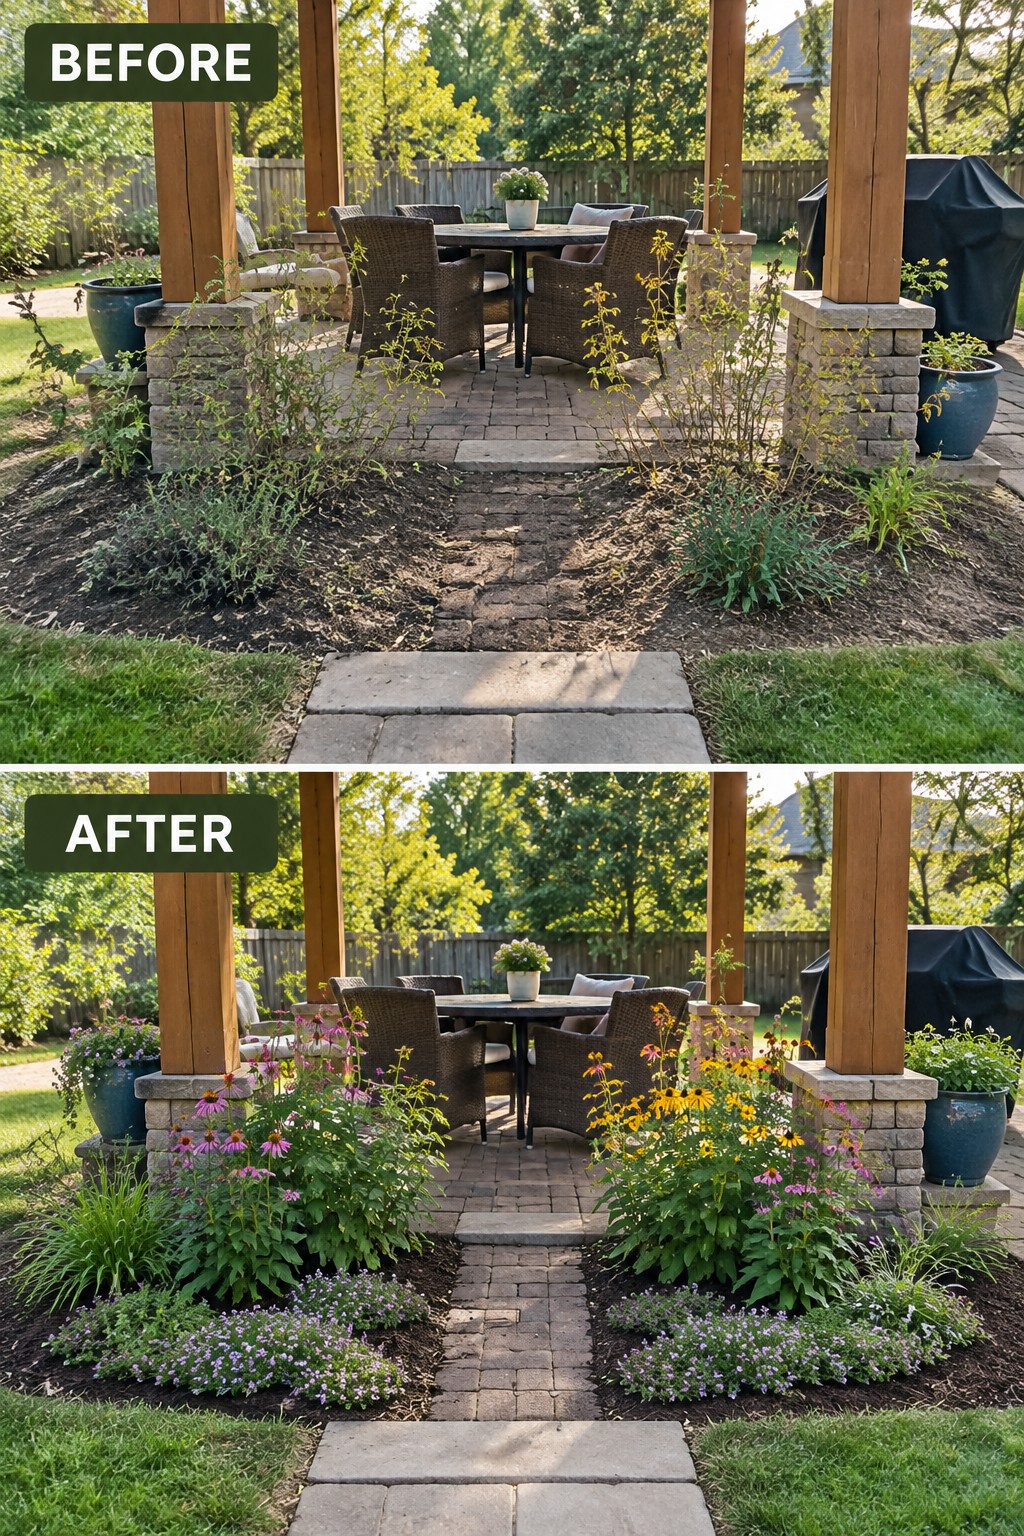
The biggest shift here came from clearing out the weedy patches and applying mulch to create clear garden beds on either side of the patio. What looked scattered and neglected now reads as intentional planting areas that frame the seating space without crowding it.
This approach works best when you want the patio to feel like part of the garden rather than just sitting on top of it. Start by removing the worst of the overgrowth, then lay down mulch in simple curved or straight beds along the edges. It keeps weeds down and gives you a clean background for adding a few reliable perennials that can handle sun and foot traffic nearby.
Use Mulch To Define A Narrow Curb Strip
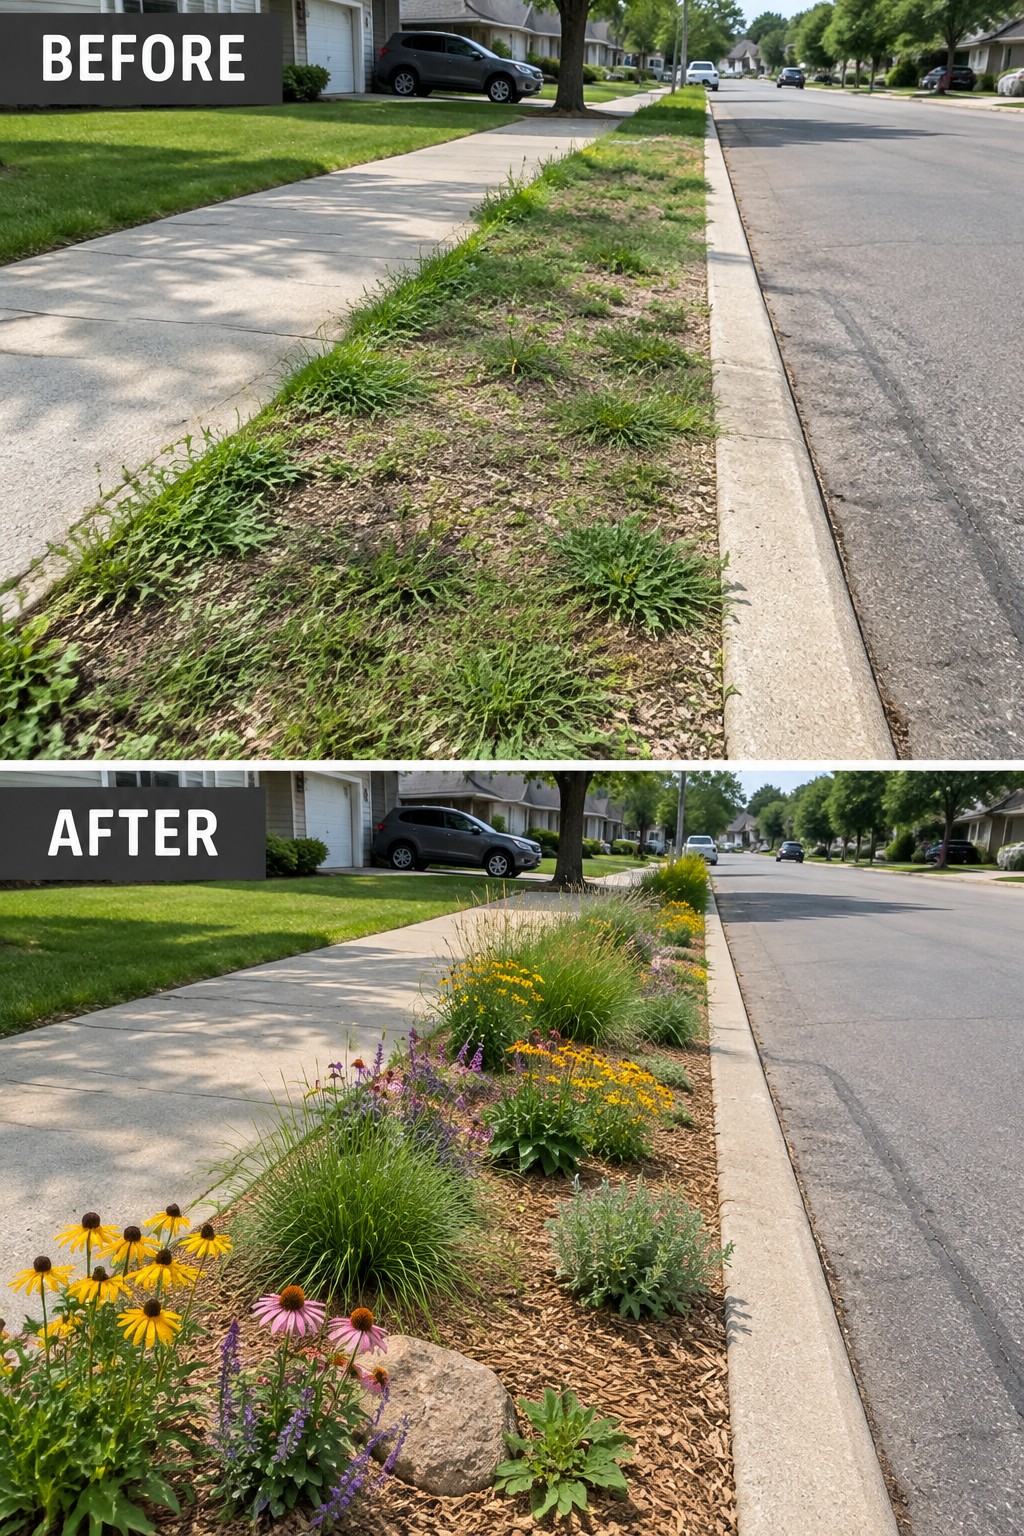
Replacing a weedy, patchy strip with mulch gives the space a clean edge and cuts down on constant mowing. The addition of a few flowering plants and a simple rock keeps the bed from looking flat while still leaving room for easy upkeep.
This approach suits homes with long roadside strips where grass often thins out. Clear the existing growth first, then spread mulch thick enough to block weeds. Choose tough perennials that handle sun and street conditions, and keep the planting low so it does not block the sidewalk.
Use Mulch To Clean Up A Narrow Foundation Border
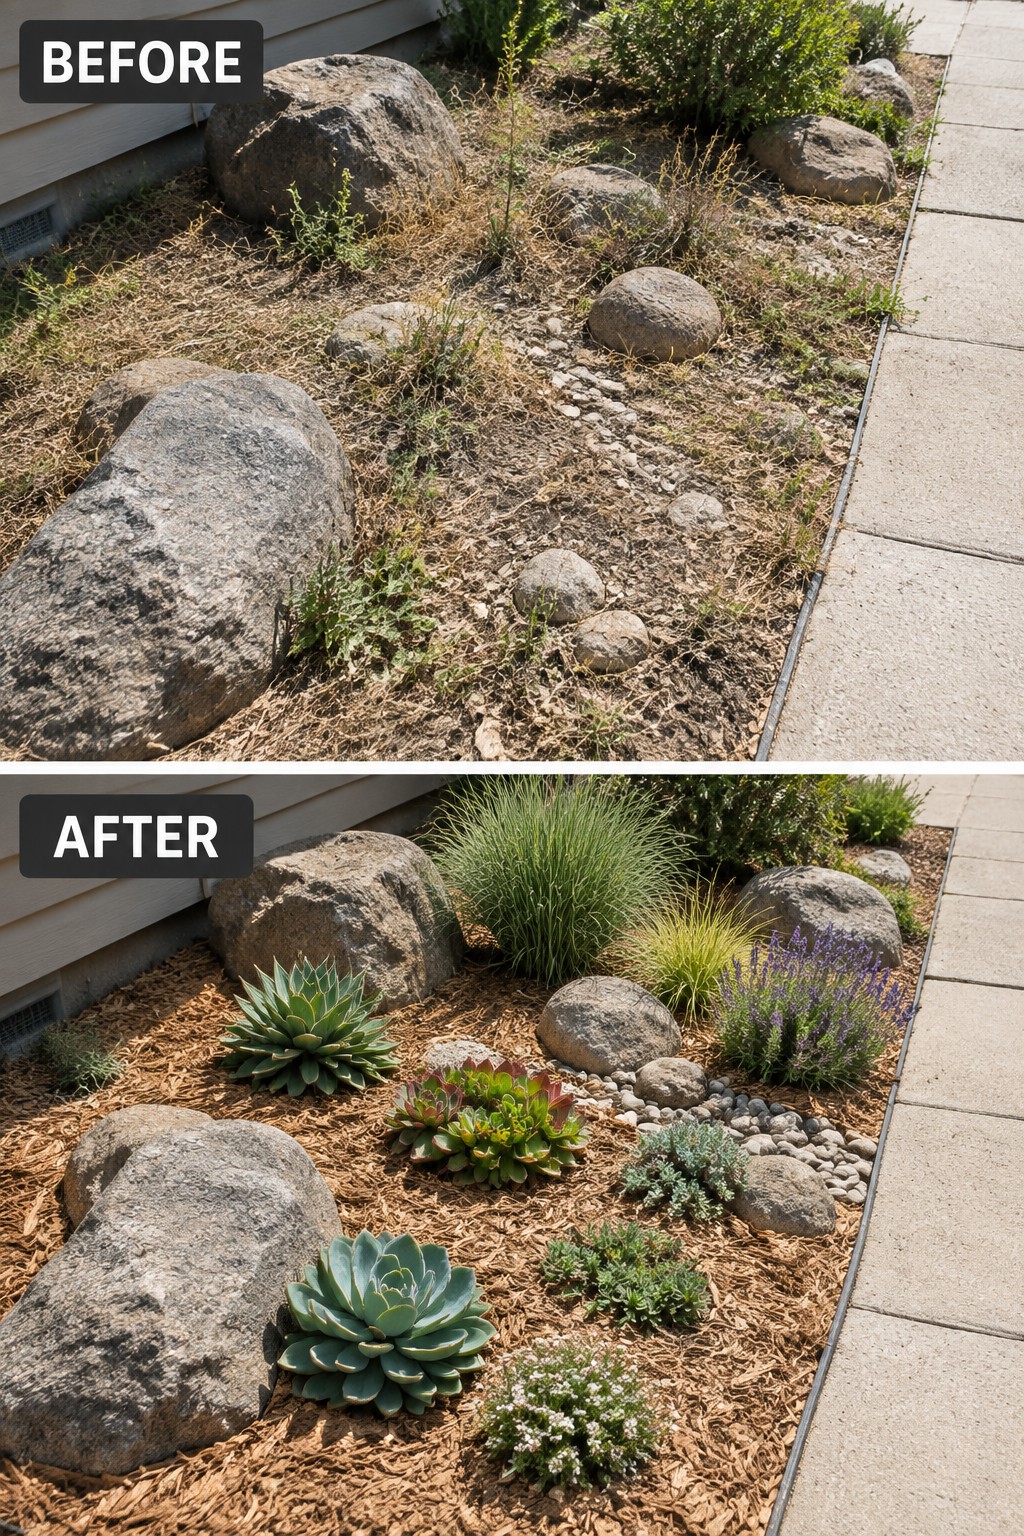
A thin strip of dry grass and scattered rocks next to the house looks messy and unfinished. Spreading mulch across the area and adding a few groups of plants gives the border clear shape and makes the whole side of the house feel cared for.
This idea works best along foundations or walkways where the space is long but narrow. Clear the weeds first, then use mulch to cover the soil and keep new growth from coming back. Pick tough plants that can handle the sun and limited width so the bed stays low maintenance.
Use Mulch To Define A Fire Pit Seating Area
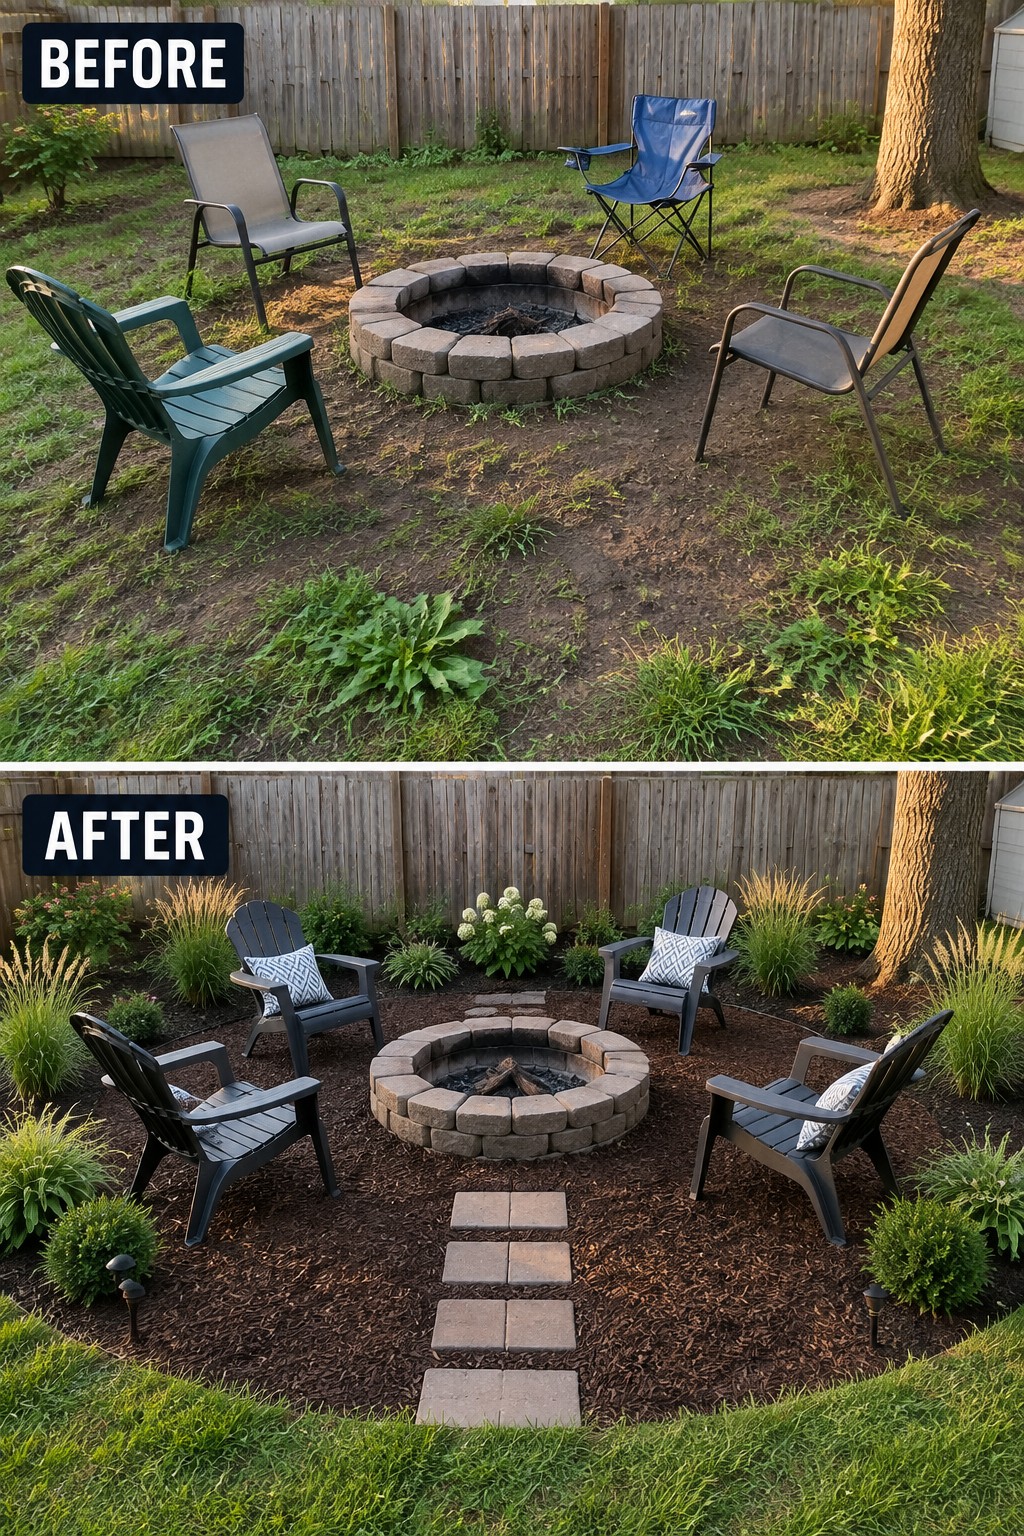
The before photo shows a fire pit sitting in the middle of patchy grass with chairs scattered around and no clear sense of space. In the after photo, a ring of mulch pulls everything together, giving the chairs a place to sit and turning the fire pit into the center of a real outdoor room. The mulch also makes the stone path feel like it belongs there instead of just appearing out of the grass.
This idea works well in smaller yards where you want one main gathering spot without a big patio budget. Clear the area first, lay down a solid layer of mulch, and keep the seating simple so the space stays open. It looks finished quickly and makes the fire pit usable even when the rest of the yard is still a work in progress.
Use Mulch To Clean Up Deck Borders
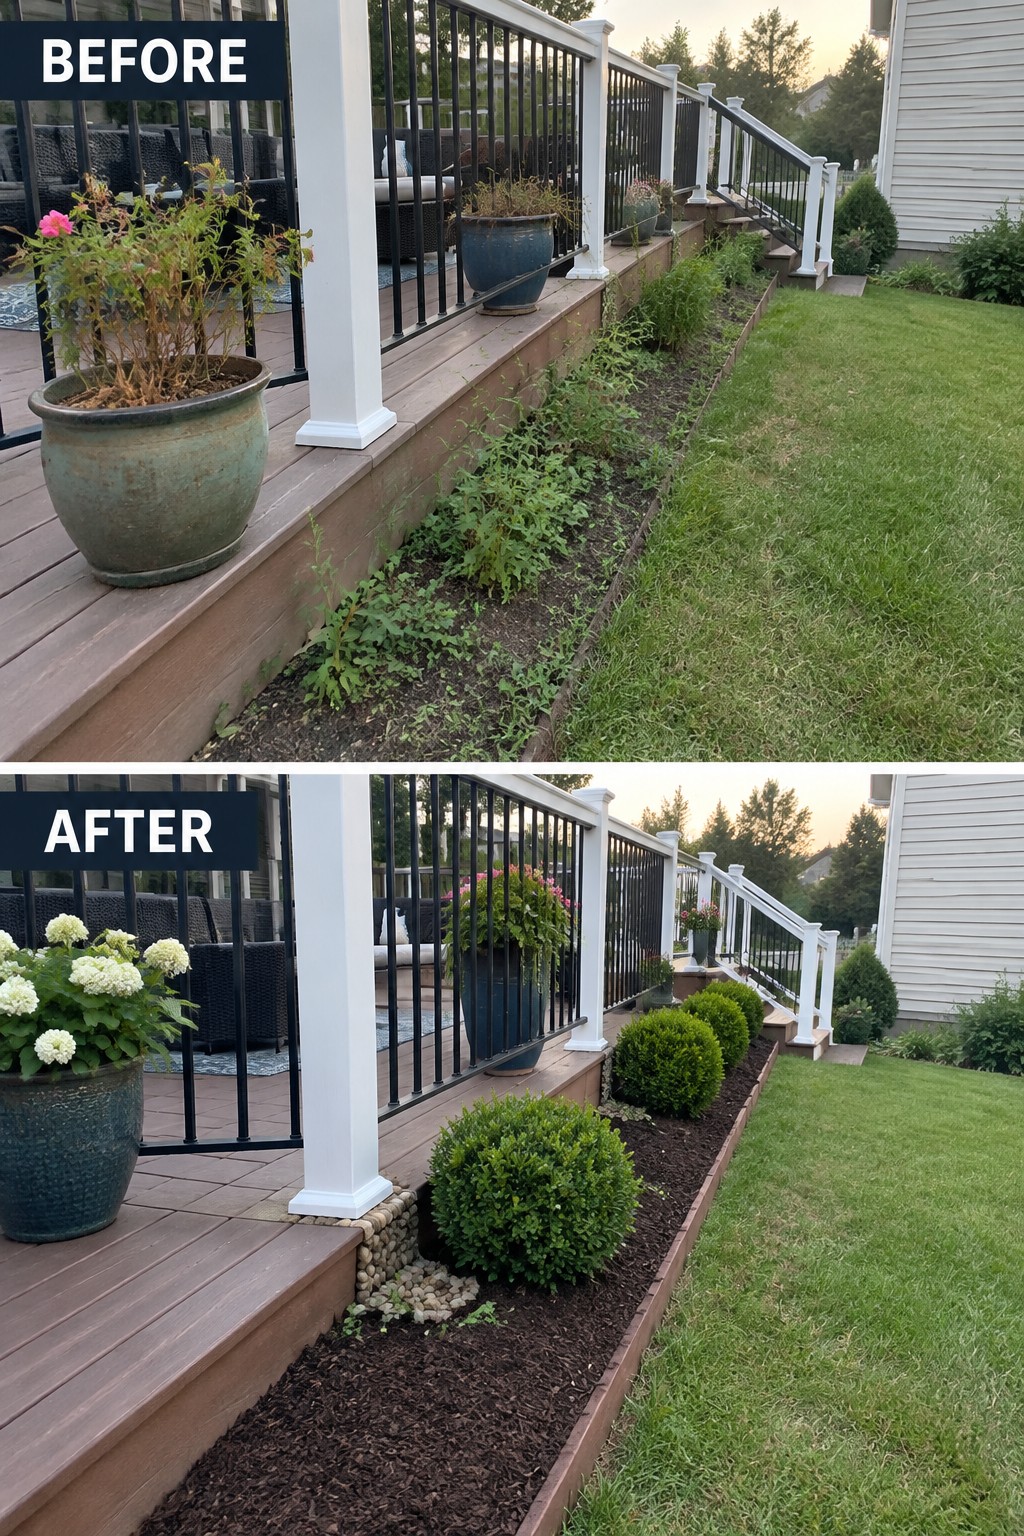
The biggest change here is how the messy strip of weeds along the deck turned into a neat, mulched bed with a row of rounded shrubs. Mulch covers the soil, stops weeds from coming back fast, and gives the whole edge a finished look without needing a lot of new plants. It also makes the deck feel more connected to the lawn instead of just ending at a ragged line of dirt and growth.
This idea works well on any house where the deck or porch meets open lawn. Clear out the worst of the weeds first, then lay down a decent layer of mulch and add a few simple shrubs or perennials that stay low. It keeps the bed looking tidy through the season and makes mowing easier since the edge is now clear.
Use Mulch To Turn A Wet Spot Into A Garden Bed
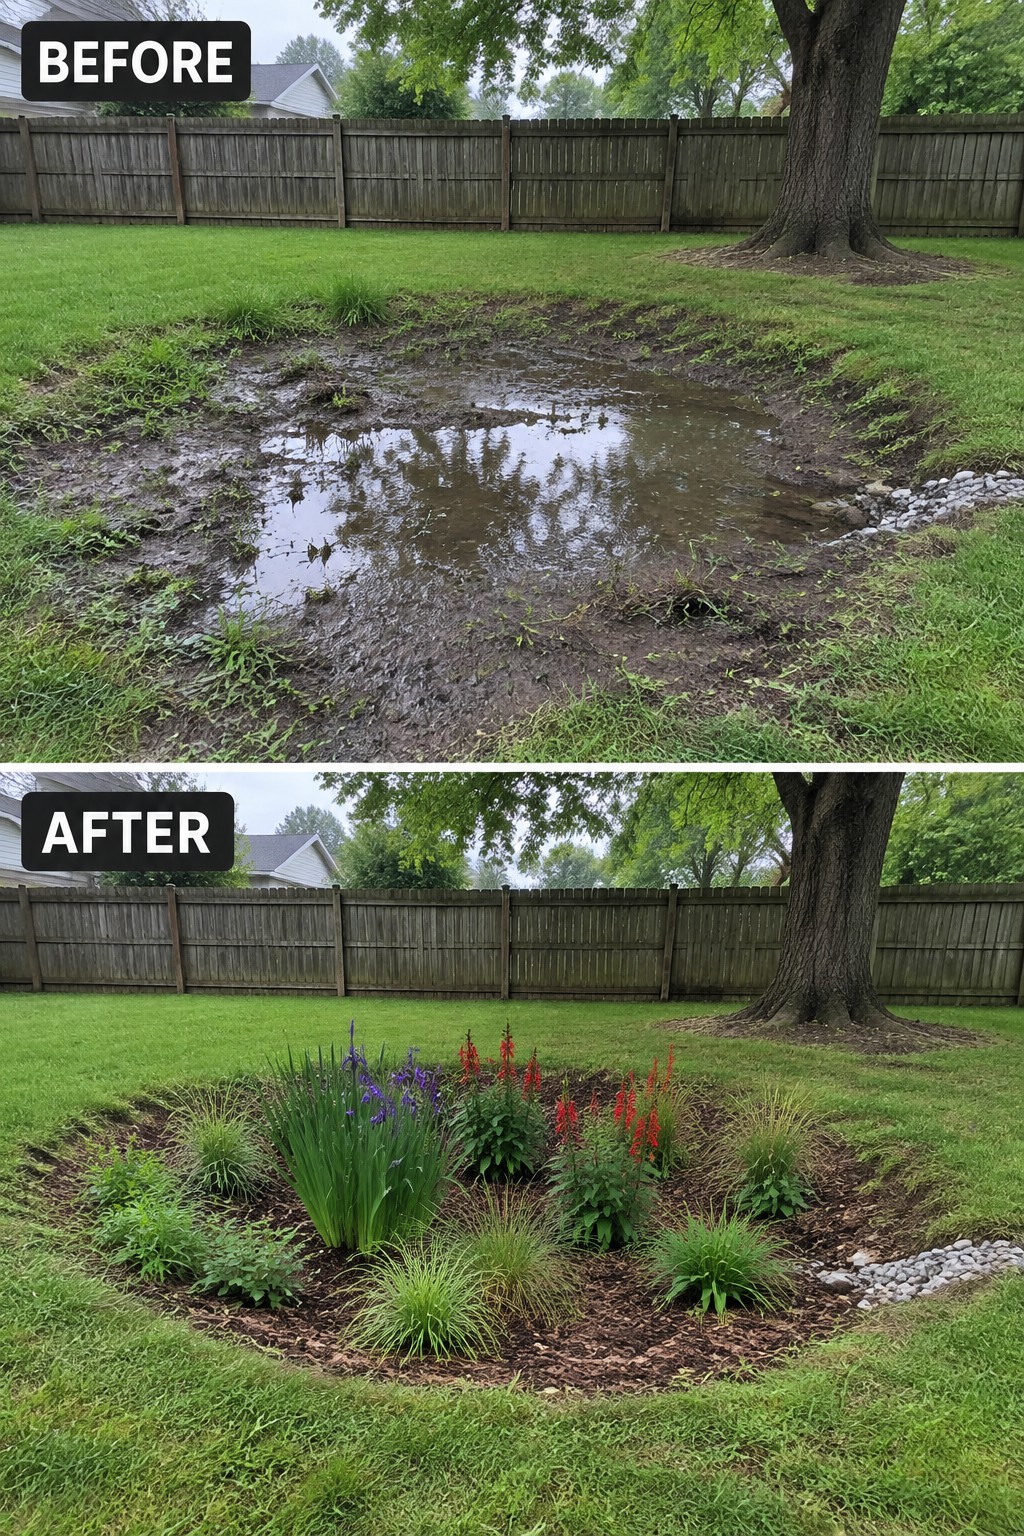
A low spot that collects water after rain can quickly turn into a muddy mess with no real purpose. Adding a simple border and filling the area with mulch gives the space structure, improves drainage appearance, and creates a spot where plants can actually thrive instead of drowning in standing water.
This approach works well in backyards where one section stays soggy while the rest of the lawn does fine. Start by letting the area dry out enough to work, then shape the bed, add a few reliable perennials, and spread mulch thick enough to keep weeds down and hold moisture once plants are established. It keeps the fix practical without needing major grading or drainage work.
Frequently Asked Questions
Q: How often do I need to add more mulch after the first application?
A: Fresh mulch breaks down over time and loses its look. Top it up once a year in spring to keep the beds looking sharp. This also helps control weeds without extra work.
Q: Can I put mulch right over existing grass or weeds?
A: Clear the area first by pulling weeds and cutting grass short. Lay down newspaper or cardboard as a barrier before adding the mulch layer. That stops anything from growing back through.
Q: What happens if heavy rain moves the mulch around?
A: Pick a coarser type if rain moves things. Rake it back after storms and add a simple border to keep it put.
