

Are your pepper seedlings outgrowing their pots, leaving you wondering when it’s time to move them? Picture this: you’ve nurtured these tiny plants from seeds, and now they’re reaching for more space. But how do you know the perfect moment to transplant them without causing stress?
In this article, we’ll guide you through the crucial timing of when to transplant your pepper seedlings. By understanding the signs and signals your plants give off, you’ll be equipped to make the right call at the right time. Stay tuned to discover how a simple act of moving seedlings can set the stage for robust pepper plants in your garden.
Key Takeaways
- Timing is crucial when transplanting pepper seedlings to ensure their health and growth.
- Indicators like true leaves development and root emergence signal readiness for transplantation.
- Select the right time based on leaf and root indicators for successful transplanting.
- Prepare suitable containers with nutrient-rich soil before moving the seedlings.
- Follow a step-by-step process for transplanting, including watering, loosening soil, transferring seedlings, planting depth, firming soil, and watering again.
- Provide immediate care post-transplantation by watering lightly, ensuring proper light exposure, controlling temperature, and protecting from pests.
Understanding Pepper Seedling Transplantation
The Importance of Timing
Transplanting your pepper seedlings at the right time is crucial for their overall health and growth. It’s essential to wait until the seedlings have developed a strong root system before moving them to larger containers or into the garden. Rushing this process can shock the plants, leading to stunted growth or even death. So, patience is key when deciding on the perfect timing for transplanting your pepper seedlings.
Indicators of Seedling Readiness
To determine if your pepper seedlings are ready for transplantation, look out for specific indicators that signal their readiness. One clear sign is when the seedlings have developed several sets of true leaves beyond their initial cotyledon leaves. Additionally, if you notice roots starting to emerge from the bottom of the current container or if the plants appear overcrowded, these are all signs that it’s time to transplant them into larger pots or directly into your garden.
By paying attention to these indicators and being patient with the timing of transplanting your pepper seedlings, you’ll set them up for success and ensure they thrive in their new environment.
Preparing for Transplanting Pepper Seedlings
Recommended Products

2.63'' square at top; 3.5" deep

2.63'' square at top; 3.5" deep
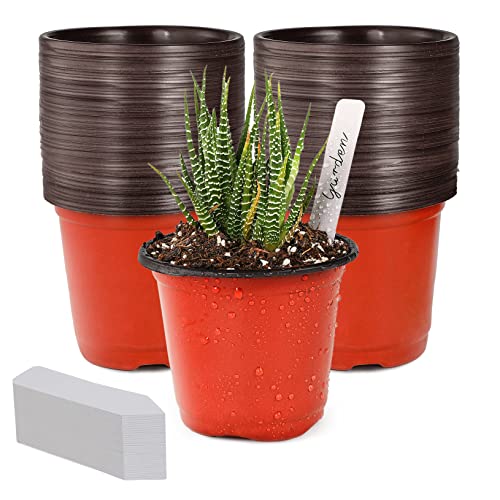
Seed Starter Pots: 100pcs small planter nursery pots with 100 labels. Plastic plant pots are very suitable for succulent seedling breeding and urban landscape plant cultivation, and you can identify your seedlings by marking their name on the labels.
Selecting the Right Time
To ensure successful transplanting of your pepper seedlings, it’s crucial to pick the optimal time. Wait until your seedlings have developed true leaves beyond their cotyledons. This stage indicates that the plants are mature enough to handle transplantation without experiencing setbacks in growth. Additionally, look for roots emerging from the bottom of the current container; this signifies that the root system is well-established and ready for a new environment.
Necessary Conditions for Transplantation
Before moving your pepper seedlings, make sure they are adequately prepared for the transition. Ensure that you have larger containers or a suitable garden bed ready to accommodate the transplants. Fill these containers with nutrient-rich soil that provides essential nutrients for healthy growth. It’s vital to water the seedlings thoroughly before transplanting to ease their transition and minimize shock.
By selecting the right time based on leaf development and root growth indicators and ensuring proper conditions like appropriate containers and soil quality, you set your pepper seedlings up for a smooth transition and robust growth in their new home.
Steps to Transplant Pepper Seedlings
Recommended Products

Made of premium thicker plastic PP material, vertical flat sides for stable gripping, this type of surface is not easy to slippery when wet

Packed:6 colors square plastic plant pots with square pot saucers,and 4 pairs of each color.
2.63'' square at top; 3.5" deep
Preparing the New Environment
When preparing the new environment for transplanting your pepper seedlings, ensure you have suitable containers ready. Opt for containers that are larger than the current ones to accommodate the growing roots of the seedlings. It’s essential to choose well-draining pots to prevent waterlogging, which can harm the plants. Additionally, make sure the containers are clean and have sufficient drainage holes at the bottom to allow excess water to escape.
The Transplanting Process
Now that you’ve prepared the new environment, it’s time for the actual transplanting process. Here’s a step-by-step guide:
- Watering: Before transplanting, water your seedlings lightly. This helps moisten the soil and ease their removal.
- Loosening Soil: Gently loosen the soil around each seedling in their current container to avoid damaging their roots during removal.
- Transferring Seedlings: Carefully lift each seedling from its existing container by holding onto its leaves or root ball.
- Planting Depth: Plant each seedling in its new container at a depth equal to its previous planting level.
- Firm Soil: After planting, gently firm down the soil around each seedling to provide stability.
- Watering Again: Give your newly transplanted pepper seedlings a good watering without soaking them excessively.
By following these steps closely and ensuring proper care post-transplantation, you’ll give your pepper seedlings an excellent start in their new environment for healthy growth and development.
Post-Transplant Care
Recommended Products

【Reduce Root Damage】 Using seedling transplant tongs can avoid damage to the seedling roots caused by pulling or digging by hand. Our gardening transplant pliers can completely lift the seedlings from the tray lattice, allowing for easy transplantation and reducing the risk of damaging the tender roots.

🌱Durable Material: The whole body of the plant transplanting tongs is made of high-quality stainless steel, easy to clean and does not rust, very durable.

【EASY TO USE】Insert the gardening plants transplant tong downwards into the soil and and gently clamp the seedling. Then remove the planting seedling from the grid. Make transplanting easier, and greatly reduce root damage, allowing seedlings to grow better.
Immediate Care After Transplanting
After you’ve successfully transplanted your pepper seedlings, it’s crucial to provide immediate care to ensure their smooth adjustment to the new environment. Here are some essential steps for post-transplant care:
- Watering: Immediately after transplanting, give your pepper seedlings a gentle watering. Ensure that the soil is moist but not waterlogged. Water them thoroughly but avoid overwatering, as it can lead to root rot.
- Light Exposure: Place your newly transplanted seedlings in a location where they can receive adequate sunlight or artificial light if indoors. Providing proper light exposure helps in photosynthesis and overall growth.
- Temperature Control: Maintain an optimal temperature range for your pepper plants post-transplantation. Avoid exposing them to extreme heat or cold, as this can cause stress and hinder their growth.
- Protection from Pests: Keep an eye out for any pests that may target your vulnerable seedlings after transplanting. Consider using organic pest control methods to safeguard your plants without harmful chemicals.
Long-term Care for Thriving Plants
To ensure that your pepper plants thrive in the long run, here are some key practices you should follow:
- Regular Watering: Establish a consistent watering schedule for your pepper plants based on their specific needs and environmental conditions. Ensure the soil remains evenly moist but not waterlogged.
- Nutrient Management: Feed your pepper plants with a balanced fertilizer rich in essential nutrients like nitrogen, phosphorus, and potassium to support healthy growth and fruit development.
- Pruning and Training: Regularly prune your pepper plants by removing dead or damaged foliage to promote new growth and enhance air circulation around the plant. Consider staking or caging taller varieties for support.
- Harvesting Guidelines: Harvest ripe peppers promptly to encourage continuous fruit production throughout the growing season. Use clean garden shears to cut peppers from the plant without damaging stems or branches.
By following these immediate care steps after transplanting and implementing long-term care practices, you’ll set up your pepper plants for success in their new environment, leading to robust growth and bountiful harvests.
Conclusion
Transplanting pepper seedlings is a crucial step in their growth journey. By paying attention to key indicators and following the right techniques, you can set your seedlings up for success. Remember to provide them with a nurturing environment, proper care, and regular maintenance to ensure they thrive in their new home. With the knowledge gained from this article, you’ll be well-equipped to handle the transplanting process with confidence and watch your pepper plants flourish. Happy gardening!
Frequently Asked Questions
When is the best time to transplant pepper seedlings?
It’s best to transplant pepper seedlings when they have at least 2 sets of true leaves and roots emerging from the soil, typically around 6-8 weeks after sowing.
What containers should I use for transplanting pepper seedlings?
Choose well-draining containers that are at least 3 inches deep with drainage holes to prevent waterlogging and promote healthy root growth.
How should I water pepper seedlings before transplanting?
Water the seedlings thoroughly a day before transplanting to ensure they are well-hydrated and less stressed during the process.
How deep should I plant the pepper seedlings during transplanting?
Plant the pepper seedlings at the same depth as they were in their original container to prevent stem rot and encourage strong root development.
How often should I water my newly transplanted pepper seedlings?
Water your newly transplanted pepper seedlings immediately after planting and then regularly, keeping the soil consistently moist but not waterlogged.
