

Ever wondered what a broccoli plant really looks like? Have you found yourself staring at a vegetable wondering about its origin? Picture this: you’re in the produce aisle, eyeing a bunch of broccoli, and you’re curious about the plant behind those vibrant green florets. Understanding the appearance of a broccoli plant can deepen your connection to this nutritious vegetable. In this article, you’ll uncover the mystery and discover the fascinating features of a broccoli plant. Get ready to enhance your veggie knowledge and gain a new appreciation for this beloved cruciferous plant.
Parts of a Broccoli Plant
Broccoli plants consist of several distinct parts that come together to form this nutritious vegetable that you enjoy. Understanding these parts can deepen your connection to broccoli and help you appreciate its growth process.
- Florets: The edible green clusters at the top of the broccoli are called florets. They are the most recognizable part of the plant and are packed with essential nutrients like vitamin C and fiber.
- Stem: The central stalk of the broccoli plant supports the florets above. While it may not be as commonly consumed as the florets, the stem is also edible and provides a crunchy texture.
- Leaves: Surrounding the base of the broccoli head are the plant’s leaves. They are typically darker green and are often removed before cooking, but they are perfectly safe to eat and are rich in antioxidants.
- Roots: Below the surface, the broccoli plant has a root system that anchors it in the soil and absorbs water and nutrients from the ground to support its growth.
- Flowers: If left to mature, the broccoli plant will produce small yellow flowers that eventually turn into seeds. These flowers are not commonly seen in the produce section as broccoli is usually harvested before this stage.
By familiarizing yourself with the various parts of a broccoli plant, you can gain a deeper understanding of this versatile vegetable and perhaps even consider growing your own to witness the full lifecycle of this nutritious plant.
Characteristics of Broccoli Plant
If you’re curious about what a broccoli plant looks like, let’s explore its key features:
- Appearance: The broccoli plant typically has a thick main stalk with dense clusters of green florets at the top.
- Size: When fully grown, broccoli plants can reach a height of about 2 feet.
- Leaves: The leaves of a broccoli plant are blue-green in color and help in capturing sunlight for photosynthesis.
- Root System: Beneath the soil, broccoli plants develop a shallow root system to anchor themselves and absorb nutrients.
- Flowers: If left to grow, broccoli plants produce small yellow flowers.
Understanding these characteristics can help you visualize the distinct appearance of a broccoli plant.
Growing Broccoli Plant
When growing a broccoli plant, it’s essential to start with healthy seedlings. Broccoli plants prefer full sun and well-draining soil.
- Planting: Space seedlings about 18 inches apart in rows that are 24 inches apart.
- Watering: Keep the soil consistently moist, especially during dry periods.
- Fertilizing: Use a balanced fertilizer and side-dress with compost during the growing season.
| Planting Depth | Seed Spacing | Row Spacing |
|---|---|---|
| 1/2 inch | 3 inches | 18 inches |
Recommended Products

CONTAINS: This organic Seed Stating soil mix is a rich blend of sphagnum peat moss & perlite with yucca extract and lime to ensure correct pH.

Seed starter: Before absorbing water and swelling, the thickness of the peat soil pellet is only 12MM, easy to store and carry. The seedling block is wrapped with a degradable mesh non-woven material, which is convenient for transportation and transplanting. When the seedlings are transplanted, they can be directly planted into the soil to improve the efficiency and success rate of transplanting

Seed starter: Before absorbing water and swelling, the thickness of the peat soil pellet is only 12MM, easy to store and carry. The seedling block is wrapped with a degradable mesh non-woven material, which is convenient for transportation and transplanting. When the seedlings are transplanted, they can be directly planted into the soil to improve the efficiency and success rate of transplanting.
Harvesting Broccoli
When it comes to harvesting your broccoli, timing is vital. You’ll want to harvest broccoli while the buds are still tight and compact. As soon as you notice the florets starting to loosen and yellow, it’s time to pick them.
To harvest your broccoli, use a sharp knife to cut the central head just below the buds. Make sure to leave some stem on the plant, as this can encourage the growth of side shoots for a second, smaller harvest.
Not all broccoli varieties mature at the same rate, so keep an eye on your plants and harvest individual heads as they reach maturity. If you see flowers starting to form, it might be too late, so check your plants regularly.
Recommended Products
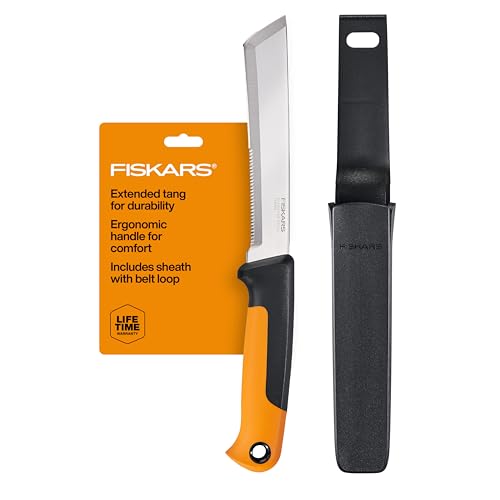
IDEAL FOR HARVESTING: Includes (1) Fiskars Harvesting Knife with hard plastic sheath and belt loop; perfect for thick stalks and stems, ensuring clean and precise cuts with ease in vegetable gardens and orchards; backed by a Lifetime Warranty

K117 wavy blade harvest knife cleanly cuts broccoli florets and produce

K114 Crop Harvest Knife, 7.25-Inch Blade, offers extended reach for larger produce and thick-stemmed vegetables.
Conclusion
That’s it! You now know the key details to look for when harvesting broccoli. Remember to cut the central head just below the tight buds using a sharp knife. Leave some stem to encourage side shoot growth for a potential second harvest. Keep an eye on the maturity rates of different broccoli varieties and harvest individual heads as they reach readiness. Don’t wait too long – once flowers appear, it might be too late. Happy harvesting!
Frequently Asked Questions
When is the best time to harvest broccoli?
Harvest broccoli when the buds are tight and compact, using a sharp knife to cut the central head just below the buds. Leave some stem for side shoot growth.
How can I encourage a second harvest from my broccoli plant?
By leaving some stem during the initial harvest, you can encourage the growth of side shoots for a potential second harvest.
How do I know when my broccoli is ready to be harvested?
Monitor your broccoli plants closely and harvest individual heads as they reach maturity. Once flowers start to form, it may be too late to harvest.
