

Changing the grow lights in your Aerogarden is essential for optimal plant growth and health. This process ensures your plants receive the right spectrum of light, promoting photosynthesis and growth. Follow this guide for a step-by-step maintenance procedure to replace your grow lights effectively.
Essential Tools for Aerogarden Light Replacement
Before diving into the process of changing your Aerogarden grow lights, it’s important to gather the right tools. Having the necessary equipment on hand will streamline the replacement process and ensure that your plants continue to thrive. This section outlines the essential tools you’ll need for a successful light replacement.
Before starting the light replacement process, ensure you have all necessary tools and supplies on hand. This preparation minimizes downtime and ensures a smooth transition. The following items are essential for the task:
| Item | Purpose |
|---|---|
| Replacement grow lights | Provides new light source |
| Screwdriver | Removes any screws holding the light fixture |
| Clean cloth | Wipes down the light fixture |
| Gloves | Protects hands during maintenance |
Unplugging for Safe Aerogarden Maintenance
Before performing any maintenance on your Aerogarden, it’s crucial to prioritize safety by unplugging the unit. This step not only protects you from electrical hazards but also ensures that the internal components are not accidentally activated during the process. Following this simple precaution sets the stage for effective and secure maintenance of your grow lights.
Safety is paramount when working with electrical components. Ensure the Aerogarden is unplugged before beginning any maintenance. This step reduces the risk of electrical shock and damage to the unit.
Confirm the unit is powered off.
Wear gloves to prevent skin contact with any residues.
Work in a well-lit area to see all components clearly.
Aerogarden Light Replacement Process
Changing the grow lights in your Aerogarden is essential for maintaining optimal plant health and growth. This process involves several straightforward steps that ensure your garden receives the proper light spectrum. Follow this guide to seamlessly replace your lights and keep your indoor garden thriving.
Follow these steps to replace the grow lights in your Aerogarden efficiently. Each step is crucial for ensuring proper installation and functionality.
Unplug the Aerogarden from the wall outlet.
Remove the light hood by unscrewing any screws or clips that hold it in place.
Carefully detach the old grow lights from their sockets. Gently twist or pull them out, depending on the fixture design.
Insert the new grow lights into the sockets. Ensure they are securely in place.
Reattach the light hood using screws or clips, ensuring it is firmly secured.
Plug the Aerogarden back in and test the new lights to confirm they are functioning properly.
Recommended Products

3 Pack Strong Fluorescent Grow Lights Compatible with AEROGARDEN Part # 970904-0200,100340 & Miracle-Gro Aero Garden Models (3, 3SL, 3 Elite, 6, 7), Chef in a Box, Chef in a Box Elite, Florist in a Box, Florist in a Box Elite B Bulbulbulbulbul

☀ High Performance & Energy Saving: LED A19 Bulbs deliver 150-degree light output.Used High Lumen Led Chips replace to 100w traditional light bulb, and power consumption, energy saving over 85%.

DIMMING & TIMING: Remote Control Available - No need to unplug/re-plug! It is designed with a 4, 8, 12 timing function and offers 4 Dimming brightness levels from 25% to 50% to 75% to 100%. You don't need to move your plants or the light bulb, just use the remote control to chose the most suitable brightness for your plants growth
Identifying Aerogarden Light Problems
Maintaining optimal growth in your Aerogarden relies heavily on the effectiveness of its grow lights. Identifying light-related issues early on can prevent stunted plant growth and ensure a thriving indoor garden. This section will guide you through recognizing common light problems and understanding their impact on your plants.
If the new lights do not illuminate after installation, follow these troubleshooting steps to identify the issue.
Check the power source to ensure it is functioning.
Inspect the connections to confirm the lights are seated properly.
Replace any blown fuses if applicable.
Recommended Products

No window, no problem - AeroGarden Grow Lights bring the strength of the sun's light indoors by generating full-spectrum LED light to help your houseplants grow and stay healthy, even in the darkest areas of your home, all year round

Why Buy Ulremapart Spacer Caps: Exclusively designed for Harvest, Bounty, Extra, Ultra, Farm models grow deck and platforms. Blocking light from getting into empty pods. Let you garden looks clean and tidy. Fit like a glove!

Highly Flexible Extension: Compatible with AeroGarden Harvest Elite hydroponic system, it provides ample vertical clearance for plant growth - preventing overcrowding and leggy growth - and accommodates the entire growth cycle.
Grow Light Options for Optimal Plant Growth
Choosing the right grow light is essential for maximizing plant growth in your Aerogarden. Various options are available, each designed to meet specific needs depending on the types of plants you’re cultivating. Understanding these options will help you create the ideal environment for your indoor garden.
Different types of grow lights serve various plant needs. Understanding these options can enhance your gardening experience. Here are some common types:
LED lights: Energy-efficient and long-lasting, ideal for all growth stages.
Fluorescent lights: Great for seedlings and low-light plants, offering a broad spectrum.
HID lights: High-intensity discharge lights are excellent for high-light plants but consume more energy.
Recommended Products
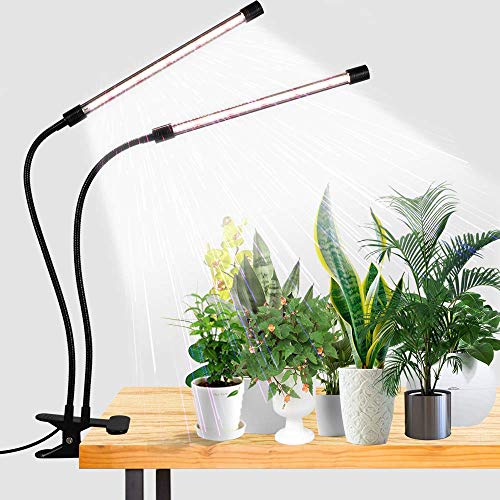
6000K White Light - equipped with 10 Red + 74 White LEDs, this growing Lamp is similar to the full-spectrum sunlight at noon,that is professionally designed for indoor garden plants.Moreover, its color rendering index is as high as 95, the light is soft and flicker-free, which is very suitable for reading lamp

5000K White Full Spectrum Light: Barrina T5 grow lights 1ft provide indoor plants with full-spectrum sunlight replacement. We provide the most reasonable grow light wave based on the ratio of the absorption of the plant
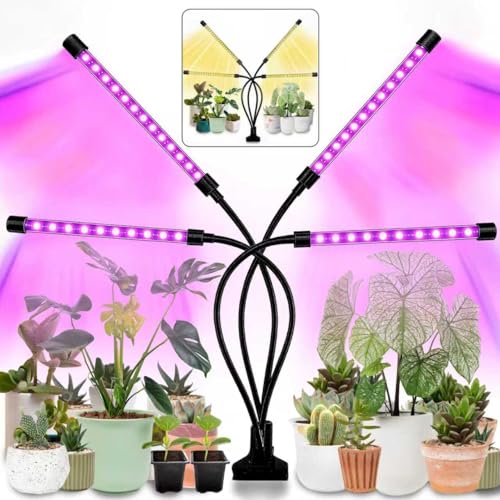
🌻Efficient LED Combination: This LED lamp has grow lights made up of 80 efficient growing LEDs ( 32 red lights, 12 blue lights,20 yellow lights and 16 white lights). It meets the conditions of plant growth without sunlight. 1--Full Spectrum(380nm-800nm): Suitable for all plants to root and sprout. 2--Red(660nm)+BLUE(460nm) Spectrum: for blooming and fruits. 3--Red+Blue+Full Spectrum: A mix of Red+Blue+Warm White is best to fuel the growth of your plants.
Maintain Your Aerogarden Light System
Maintaining the light system of your Aerogarden is crucial for optimal plant growth and health. Regularly changing and adjusting the grow lights ensures that your plants receive the right amount of light, promoting robust development. This guide will walk you through the necessary steps to effectively maintain your Aerogarden light system.
Regular maintenance of your Aerogarden light system can prolong the life of the grow lights and improve plant health. Consider the following practices:
Clean the light fixtures regularly to remove dust and debris.
Inspect the lights every few months for signs of wear or damage.
Replace lights according to the manufacturer’s recommended schedule to ensure optimal performance.
Aerogarden Light Replacement Guidelines
Maintaining optimal growth in your Aerogarden requires regular attention to its lighting system. Understanding when and how to replace the grow lights is essential for ensuring your plants thrive. This section provides clear guidelines for replacing your Aerogarden lights, helping you keep your indoor garden flourishing year-round.
Always refer to your Aerogarden manual for specific instructions related to your model. Proper maintenance and timely light replacement are key to thriving plants. Follow these guidelines to keep your garden flourishing.
