

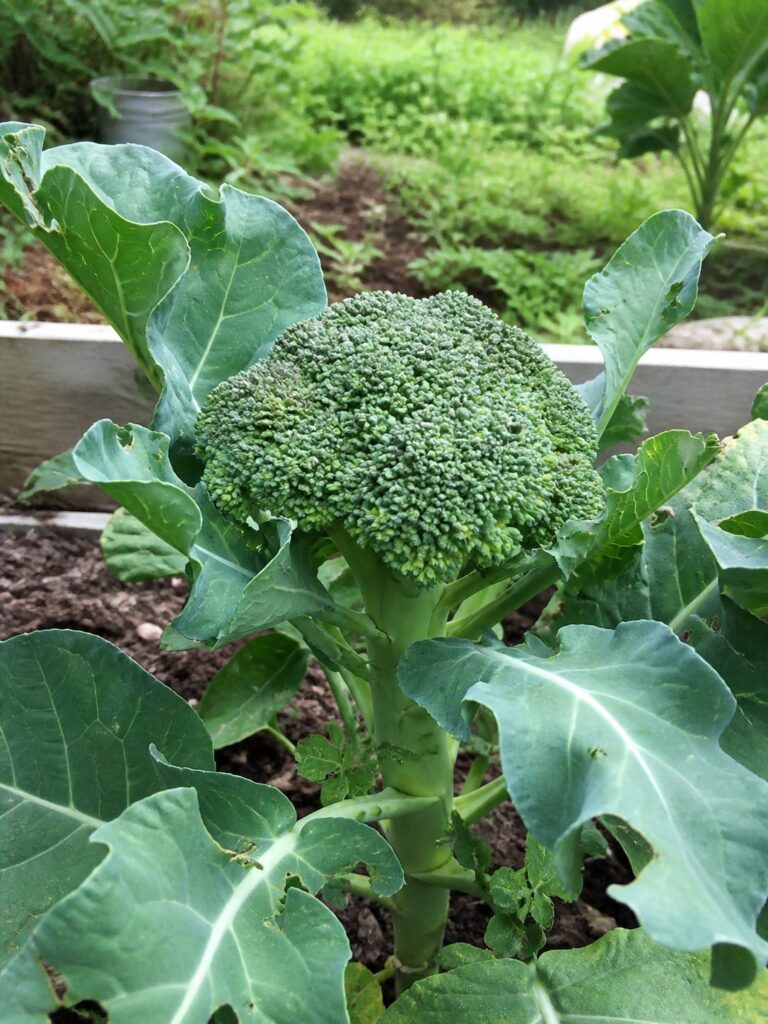
Broccoli is a cool-season crop that rewards good timing, fertile soil, and regular observation. The edible head is only one part of the harvest: after the main crown is cut, many plants produce tender side shoots for weeks. This guide lays out a practical plan from seed to final harvest, with adjustments for containers, raised beds, and changing weather.
Choose a site and variety
Give broccoli at least six hours of direct sun and a bed where brassicas have not recently grown. Full sun produces sturdier stems and tighter heads, while light afternoon shade can help in a hot climate. Calabrese types make a central head followed by side shoots; heading broccoli forms one larger crown; sprouting types produce many smaller shoots. Check the seed packet for days to maturity and whether the variety is suited to spring, fall, or both.
Prepare the soil
Broccoli grows best in fertile, well-drained soil with steady moisture. Work finished compost into the top 8–12 inches, remove large stones, and aim for a crumbly bed rather than a fluffy layer over compacted soil. A soil test is useful when pH or nutrient history is unknown; brassicas generally prefer a slightly acidic to neutral range. Avoid fresh manure, which can damage roots and encourage excessive leaf growth.
| Need | Practical starting point | Why it matters |
|---|---|---|
| Sun | 6+ hours daily | Supports compact heads and strong stems. |
| Spacing | 18–24 inches for large varieties | Leaves need room for airflow and light. |
| Root zone | 8–12 inches loose soil | Helps plants establish before heat arrives. |
| Moisture | Evenly damp, never waterlogged | Reduces stress and uneven growth. |
Start seeds or transplants
For a spring crop, start seeds indoors about 5–7 weeks before the local planting window, or sow directly when soil can be worked. Harden transplants for a week by increasing outdoor exposure gradually. Set plants slightly deeper than they grew in their pots if stems are sturdy, but keep the lowest leaves above soil. Water the root ball thoroughly and protect young plants from strong wind.
For fall production, count backward from the expected harvest using the variety’s maturity range. Sow earlier than feels necessary because growth slows as days shorten. In warm regions, a shade cloth during the hottest part of establishment can prevent stalled seedlings. The broccoli planting calendar explains how to choose between spring and fall windows.
Care through the season
Mulch after the soil warms to reduce evaporation and splashing. Water deeply when the surface begins to dry; shallow daily sprinkling encourages a weak root system. Feed according to a soil test or a balanced vegetable fertilizer label, keeping granules away from the stem. Side-dress once plants are established if growth is pale or slow, but do not push lush leaves with repeated high-nitrogen applications.
Inspect the undersides of leaves twice a week. Cabbage worms, aphids, flea beetles, and slugs are easier to manage when found early. Hand-pick larger caterpillars, use floating row cover over young plants, and remove damaged leaves from the bed. Read the broccoli pest guide for symptom-based options.
Head formation and harvest
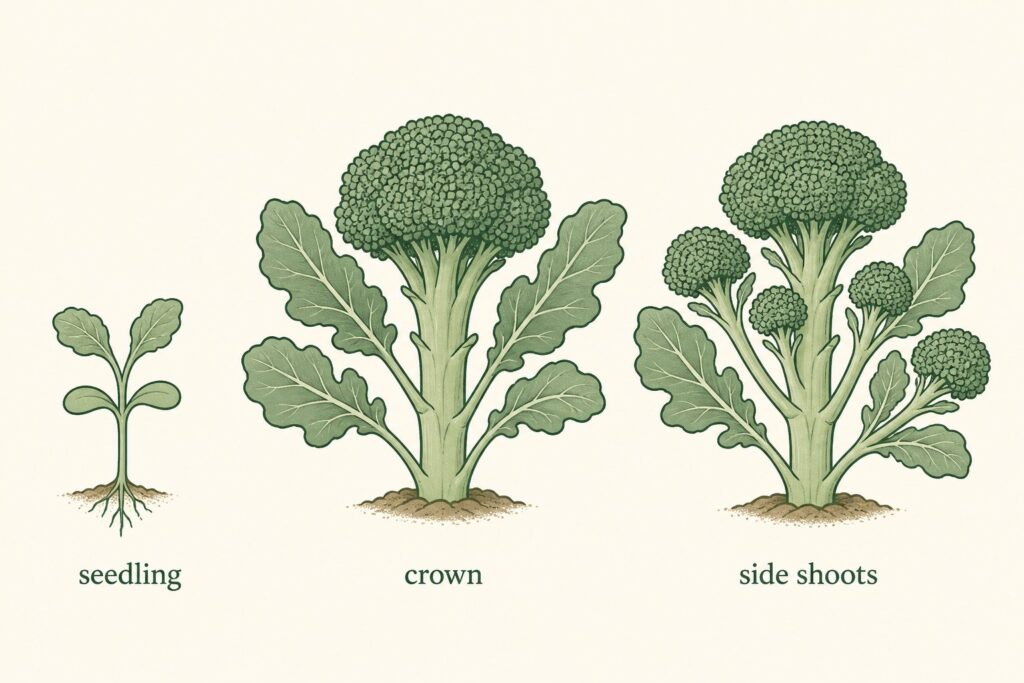
Once a central head appears, check it every day or two. Cut while the buds are tight and before yellow flowers open, leaving several inches of stem and a few leaves. Side shoots will develop from the leaf axils; harvest them when buds are firm. Cool mornings are ideal for cutting. Refrigerate unwashed heads promptly, and use damaged leaves first.
Heat, drought, crowding, and late planting can produce loose heads or premature flowering. If the plant bolts, harvest edible unopened shoots and note the weather and variety for next season. See why broccoli bolts and the head-formation troubleshooting guide.
Common mistakes
- Planting a spring crop so late that heads mature in summer heat.
- Letting seedlings become root-bound before transplanting.
- Allowing the bed to swing from dry to saturated.
- Ignoring caterpillars until foliage is heavily damaged.
- Waiting too long to cut the central head.
Use a weekly field worksheet
Write down the planting date, variety, spacing, first true leaves, first crown, and first harvest. Each note gives you a better local reference than a generic maturity number. During establishment, check whether the root ball is still moist several inches down and whether wind has exposed the stem. Once leaves expand, inspect the underside for eggs and the crown for feeding. When a head appears, switch to daily checks because buds can loosen quickly in warm weather.
Spring crops usually need an earlier start so the crown develops before sustained heat. Fall crops may take longer as days shorten, but cool nights often improve quality. Keep mulch a few inches from the stem, water at the soil line, and avoid cultivating close to shallow roots. If several plants fail together, review timing and weather; if one plant fails, inspect roots and stem before changing the whole bed.
Use the planting calendar for timing, pest guide for scouting, and harvest guide for side shoots. Return to the Broccoli hub for the full sequence.
Decisions that make the biggest difference
Broccoli responds to consistency more than complexity. Before planting, decide whether the crop will mature in spring or fall and choose a variety with enough time for that window. Prepare the bed completely, including row cover hoops and mulch, before seedlings arrive. After transplanting, water the root zone deeply and avoid disturbing it while roots spread.
During the vegetative stage, look for a stocky center and evenly colored leaves. Pale lower leaves can reflect hungry soil, but yellowing with wet roots suggests a drainage problem. Caterpillar damage often begins on outer leaves and moves inward, so turn leaves over whenever you water. Remove only badly damaged tissue and keep healthy leaves working.
As the crown develops, stop relying on the packet’s size estimate. Temperature can speed or slow growth by several days. Tight buds are the harvest cue. Cut the head with a clean knife, leave several inches of stem, and continue caring for the plant if it is a side-shoot variety. Small side shoots are often more tender than a late central crown.
Questions to ask before replanting
- Was the variety suited to the season?
- Did seedlings spend too long indoors?
- Was the soil evenly moist but well drained?
- Did pests remove enough leaf area to slow growth?
- Did heat arrive before the expected crown date?
Answering these questions turns one disappointing crop into a useful local reference. Use the seasonal timing guide, bolting guide, and harvest guide from the Broccoli hub.
Field checklist
Keep a short dated record of planting, first growth, weather, moisture, and harvest. Check the root zone several inches down rather than judging the surface. Inspect new leaves and crown or pods twice each week, then move to daily checks as harvest approaches. Correct light, spacing, drainage, and timing before adding fertilizer. At season end, note what worked so next year’s decision is based on your own conditions.
Decision points through the season
Use the plant’s stage, not a fixed routine. In the first week after transplanting, check the original root ball and surrounding soil separately. Once roots spread, water the whole planting area deeply and keep mulch away from the crown. During leaf growth, inspect undersides for eggs and compare plants for even light. When a crown appears, check daily because warm weather can loosen buds quickly.
A good record includes variety, sowing date, transplant date, first head, side shoots, and final harvest. If the whole row struggles, review timing and weather; if one plant struggles, inspect its stem and roots. Use the planting, pest, and harvest guides on the Broccoli hub to turn those observations into the next action.
Use the crop stage to guide care
Broccoli is most reliable when its fastest growth happens in cool, even conditions. Choose full sun, improve drainage with finished compost, and keep moisture steady rather than alternating drought with heavy soaking. Plant most full-sized varieties about 18 to 24 inches apart. A two- to three-inch mulch layer, held away from stems, helps moderate soil temperature and reduces evaporation.
| Stage | What to watch | Useful response |
|---|---|---|
| First two weeks | Wilting or feeding damage | Water the root zone and inspect leaf undersides. |
| Leaf growth | Pale or uneven growth | Check moisture before making soil-test-based fertility changes. |
| Head formation | Heat and tight buds | Harvest promptly at the tight-bud stage. |
Record the transplant date, variety, and first head date. Those notes help refine next season more reliably than a calendar alone.
Practical decision guide
A complete broccoli crop depends on cool-season timing, fertile well-drained soil, steady moisture, and harvesting heads before individual buds loosen. Planting in a broad window is less reliable than matching a variety to local frost dates and the period when it will mature. In many climates, a fall crop avoids the rapid warm-up that makes spring broccoli difficult.
- Choose a full-sun bed with compost-amended, well-drained soil.
- Start seeds or buy healthy young transplants suited to your planting window.
- Set plants about 18 to 24 inches apart, following the variety label.
- Water the root zone consistently and mulch after plants establish.
- Scout weekly for caterpillars, aphids, and early bud changes.
- Cut the main head while buds are tight, then keep caring for side shoots.
Seasonal checks and common mistakes
Weather changes the plan. Check soil moisture below the surface after hot or windy periods, avoid working saturated soil, and adjust care to the plant stage rather than following a rigid calendar. Young plants need establishment care; developing heads need protection from stress; mature heads need frequent inspection. Common mistakes include treating a symptom before identifying it, overfeeding leafy plants, delaying harvest while waiting for size, and assuming a rule from another climate will fit every garden.
Before changing the plan
| What you see | First check | Useful response |
|---|---|---|
| Slow growth | Temperature, water, roots, and weeds | Correct the clear limitation before adding fertilizer. |
| Uneven plants | Spacing, shade, and drainage across the bed | Compare several plants and revise the site next season. |
| Quality declining | Weather and maturity stage | Harvest usable produce and adjust the next sowing window. |
Keep a short record of variety, planting date, major weather, and harvest quality. It is the most reliable way to refine a local broccoli plan without relying on false precision.
Frequently asked questions
Can broccoli grow in a container?
Yes, but choose a container at least 12 inches deep and wide enough for one plant, with reliable drainage. Containers dry faster than beds, so check moisture frequently.
Does broccoli need a lot of fertilizer?
It needs fertile soil, not unlimited fertilizer. Compost and a soil-guided balanced feed are safer than repeated high-nitrogen applications.
Use the Broccoli hub to move from this overview to timing, troubleshooting, pest, and harvest resources.
