

Have you ever tried growing lettuce only to end up with wilted leaves or sparse patches? You’re not alone. Many gardeners struggle with this leafy green, but the good news is that planting lettuce doesn’t have to be complicated.
Key Takeaways
- Lettuce Varieties: Different types of lettuce, such as Iceberg, Romaine, Butterhead, and Leaf, offer a range of flavors and textures; knowing these helps in selecting the right one for your garden.
- Growth Characteristics: Lettuce thrives best in cooler temperatures (60°F to 70°F) with specific spacing and maturity times that vary by variety.
- Soil Preparation: Use well-draining, nutrient-rich soil with a pH of 6.0 to 7.0 and incorporate organic matter for optimal growth conditions.
- Planting Techniques: Choose between direct seeding and transplanting based on your gardening style; both methods require specific care for successful establishment.
- Watering and Pest Management: Maintain consistent moisture while using effective pest control methods to protect your lettuce from common garden pests.
- Harvesting and Storing: Harvest lettuce at the right time for the best flavor, and store it properly to extend freshness and enjoy your greens longer.
Understanding Lettuce Varieties
Lettuce comes in several varieties, each offering unique flavors and textures. Knowing these varieties helps you choose the best for your garden.
Types of Lettuce
- Iceberg Lettuce: Known for its crisp texture and mild flavor, Iceberg is popular in salads and sandwiches.
- Romaine Lettuce: With its sturdy leaves and slightly bitter taste, Romaine provides excellent crunch in Caesar salads.
- Butterhead Lettuce: This variety features soft, loose leaves and a sweet flavor, making it ideal for wraps and salads.
- Leaf Lettuce: Available in red and green varieties, Leaf Lettuce offers tender leaves packed with flavor, great for mixed salads.
- Crisphead Lettuce: Similar to Iceberg but with a denser head, Crisphead is less common but offers a refreshing crunch.
Growth Characteristics
Lettuce varieties exhibit distinct growth patterns.
- Maturity Times: Most types mature in 30 to 70 days. For faster yields, select quick-growing options like Leaf Lettuce.
- Spacing Requirements: Space your plants depending on their type. Iceberg and Crisphead prefer more room, about 12 inches apart, while Leaf and Butterhead can grow closer, around 6 to 8 inches apart.
- Temperature Preferences: Lettuce thrives in cooler temperatures, ideally between 60°F and 70°F. Heat can cause bolting, so plan your planting schedule accordingly.
- Sunlight Needs: Aim for at least 6 hours of direct sunlight daily. In extremely hot climates, partial shade helps maintain moisture and reduces stress on the plants.
Understanding these characteristics ensures successful growth and a bountiful lettuce harvest.
Preparing the Planting Site
Preparing the planting site is crucial for successful lettuce growth. Focus on the soil quality, sunlight exposure, and drainage to create the best environment for your plants.
Recommended Products

Quick, at home results for Soil pH, Nitrogen, Phosphorous and Potash Innovative and inexpensive soil test kit features an easy-to-use capsule system and patented color comparators

Comprehensive Soil Analysis: Liquid soil test kits offer a comprehensive analysis of essential soil parameters, including pH, ammonia, nitrogen, phosphorus, and potassium. Having all these measurements in one kit provides a holistic understanding of the soil's fertility and health.

Quick, at home results for Soil pH, Nitrogen, Phosphrous and Potash
Soil Requirements
Soil plays a key role in lettuce cultivation. Aim for loose, well-draining soil that allows roots to spread easily. The ideal soil pH ranges from 6.0 to 7.0. Incorporate organic matter, such as compost or aged manure, to enhance soil structure and fertility.
You can also conduct a soil test to determine nutrient levels. Based on the results, you might need to add fertilizers, like nitrogen-rich options, to promote healthy growth. Regularly till the soil to keep it aerated and free from compaction.
Sunlight and Drainage
Lettuce thrives in full sun, needing at least six hours of direct sunlight daily. Choose a planting location that receives adequate sunlight, avoiding shaded areas that could hinder growth.
Drainage is equally important for healthy lettuce. Raised beds or mounded rows improve drainage, preventing waterlogging and root rot. If your garden area has heavy clay soil, consider amending it with sand or gravel to enhance drainage capacity.
Regularly check for standing water after rainfall, and adjust your planting site if you notice pooling. These steps ensure that your lettuce receives the necessary light and moisture for optimal growth.
Planting Techniques
You can use two main techniques for planting lettuce: direct seeding and transplanting seedlings. Both methods have their advantages, depending on your gardening style and local conditions.
Recommended Products

EASIER SEED STARTING: Our Burpee SuperSeed tray with 36 flexible pop-out cells is designed to simplify indoor seed starting for all your favorite vegetables, flowers and herbs. Just add seed starting mix, seeds, water and light to get growing! Rows are labeled alphanumerically for seedling identification with included Plant-o-Gram diagram. Tray dimensions: 11.5" x 10-3/8" x 2-1/4"

Upgraded Flexible Cells: Upgraded Silicone Seed Starter Tray with 12 flexible pop-out cells per tray. The soft silicone cells keep seedlings well protected and can be gently bent and popped out when it's time to transplant to your outdoor garden! Our seed starting trays are specifically designed to reduce stress on seedlings, so you won't damage their roots when transplanting

EASIER SEED STARTING: Our Burpee SuperSeed tray with 16 extra-large flexible pop-out cells is designed to simplify indoor seed starting. Just add seed starting mix, seeds, water and light to get growing! Rows are labeled alphanumerically for seedling identification with included Plant-o-Gram diagram.
Direct Seeding
Direct seeding involves planting seeds directly into the soil. This technique works best in cooler weather, as lettuce germinates well at temperatures between 60°F and 70°F. Follow these steps for successful direct seeding:
- Prepare the Soil: Loosen the soil to a depth of 12 inches. Ensure it’s free of weeds and debris.
- Sow the Seeds: Create shallow rows about 1/4 to 1/2 inch deep. Space seeds 1 inch apart for better airflow and growth.
- Cover the Seeds: Lightly cover the seeds with soil and pat down gently. Water the area without soaking to avoid displacing seeds.
- Thin the Seedlings: Once seedlings reach 2 inches, thin them to 6 to 12 inches apart, depending on the variety.
This method is ideal for small gardens and quicker planting. Expect to see seedlings within 7 to 14 days.
Transplanting Seedlings
Transplanting involves starting seeds indoors or in a controlled environment and moving them outside once they’re ready. This method allows for earlier harvesting and better control over growing conditions. Here’s how to implement it:
- Start Seeds Indoors: Plant seeds in trays or small pots 4 to 6 weeks before the last frost date. Use a quality seed-starting mix for optimal results.
- Harden Off Seedlings: Gradually acclimate seedlings to outdoor conditions for 7 to 10 days. Start by placing them outside for a few hours each day, slowly increasing exposure.
- Prepare the Garden Bed: Ensure the garden bed is nutrient-rich and has good drainage. Dig holes slightly larger than the seedling root ball.
- Transplant Carefully: Gently remove seedlings from their containers, keeping roots intact. Place them into the prepared holes and fill with soil, ensuring the base of the plant is level with the soil surface.
- Water Thoroughly: Water the transplanted seedlings immediately and keep the soil consistently moist for the first few weeks.
Transplanting encourages stronger plants and can improve yields significantly. You’ll notice that transplanted lettuce can mature within 30 to 60 days after planting, depending on the variety.
Watering and Maintenance
Maintaining proper water levels and pest control ensures healthy lettuce growth. Here’s how to effectively manage both.
Recommended Products

【Even & Consistent Root Watering】Features micro-pore seepage technology that distributes water evenly along the entire hose, transforming spot watering into uniform line watering directly to plant roots. Unlike traditional drip irrigation systems with clog-prone emitters, this soaker hose creates a continuous moisture band for healthier, deeper-rooted plants
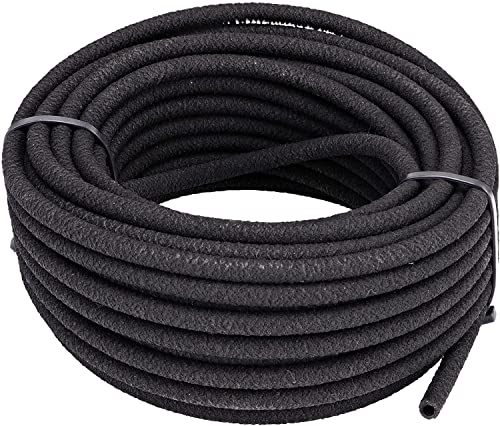
Slowly waters the soil around your plants for complete root zone hydration; Ideal for short runs on flat surfaces, such as vegetable gardens, borders, and around small plants

COMPLETE 2-IN-1 SYSTEM:All-in-One Solution: This premium kit combines a soaker hose and distribution tubing with connectors, stakes, and a 2-way splitter. Easily build a fully customized, automated micro-dripping system without extra hardware store trips.
Irrigation Strategies
Use consistent watering to keep lettuce hydrated. Aim for 1 to 1.5 inches of water per week, adjusting for rainfall. Water in the morning to prevent fungal diseases. Use drip irrigation or soaker hoses to deliver moisture directly to the soil, reducing evaporation. Mulch around lettuce plants with straw or grass clippings to retain soil moisture and regulate temperature.
Monitor soil moisture by checking the top inch. If it feels dry, water the plants. For seedlings, avoid overwatering to prevent rot. A light, frequent watering schedule benefits young plants, transitioning to deeper, less frequent watering as they mature.
Pest Control
Implement pest control measures early to protect your lettuce. Inspect plants weekly for common pests like aphids, slugs, and caterpillars. Handpick larger pests or use a strong spray of water to dislodge them.
Introduce beneficial insects like ladybugs and lacewings, which prey on harmful pests. Use organic pesticides, such as neem oil, as a last resort, ensuring you follow label instructions carefully. Rotate crops annually to prevent pest buildup and improve soil health. Cover your lettuce with row covers to deter pests without blocking sunlight.
Harvesting Lettuce
Harvesting lettuce involves knowing the right time and the best techniques. Proper harvesting maximizes flavor and quality, ensuring you enjoy your fresh greens.
Timing and Techniques
Harvest lettuce when leaves are crisp and vibrant. For loose-leaf varieties, start harvesting about 30 days after planting. Cut outer leaves at the base, allowing the inner leaves to continue growing. For head lettuces, like Iceberg or Romaine, wait until the head feels firm, usually around 60 to 75 days after planting. Use a sharp knife or garden scissors to make clean cuts, which minimizes plant stress.
Consider harvesting in the morning after dew has dried. This timing enhances flavor and keeps leaves fresh longer. Always handle the lettuce gently to avoid bruising.
Storing Harvested Lettuce
Store harvested lettuce properly to maintain its freshness. After cutting, rinse leaves gently under cool water to remove dirt. Pat them dry with a clean towel or use a salad spinner to remove excess moisture.
For short-term storage, place washed and dried lettuce in a perforated plastic bag. Store it in the crisper drawer of your refrigerator. This method keeps it fresh for about five to seven days.
For longer storage, consider freezing the lettuce. Blanch leaves in boiling water for 1 to 2 minutes, then plunge them in ice water. Drain and pack in airtight containers or freezer bags. Frozen lettuce is best used in cooked dishes, as texture changes.
By following these tips, you can enjoy your lettuce harvest at its best.
Conclusion
Growing lettuce can be a rewarding experience when you know the right techniques. By understanding the specific needs of different lettuce varieties and paying attention to soil quality sunlight and watering practices you’ll set yourself up for success.
Whether you choose to direct seed or transplant seedlings both methods have their perks and can lead to a bountiful harvest. With a little patience and care you’ll soon be enjoying fresh crisp lettuce right from your garden.
So grab your gardening tools and get planting. Your taste buds will thank you when you savor the flavors of your homegrown lettuce. Happy gardening!
Frequently Asked Questions
What are the common challenges when growing lettuce?
Growing lettuce can be challenging due to issues like wilted leaves, sparse patches, and pests. Ensuring proper soil quality, adequate sunlight, and sufficient watering are crucial. Understanding each lettuce variety’s growth needs can help mitigate these problems.
Which types of lettuce can I grow?
You can grow various types of lettuce, including Iceberg, Romaine, Butterhead, Leaf, and Crisphead. Each type has its unique flavor and texture, allowing you to choose what suits your taste and culinary needs.
How should I prepare the soil for growing lettuce?
Lettuce thrives in loose, well-draining soil with a pH between 6.0 and 7.0. It’s helpful to amend the soil with organic matter and conduct a soil test to determine nutrient levels, ensuring the ideal conditions for growth.
What sunlight and temperature do lettuce plants require?
Lettuce grows best in full sun, needing at least six hours of direct sun daily. It prefers cooler temperatures, ideally between 60°F and 70°F, which helps prevent bolting and maintains the quality of the leaves.
What are the best watering practices for lettuce?
Lettuce needs about 1 to 1.5 inches of water per week, adjusting for rainfall. Water in the morning to help prevent fungal diseases, and consider mulching to retain moisture while monitoring soil moisture levels as plants mature.
What are the two main planting methods for lettuce?
The two main methods are direct seeding and transplanting seedlings. Direct seeding is great for cool weather, while transplanting allows earlier harvesting with better control over conditions. Choose the method that fits your gardening setup.
How do I know when to harvest my lettuce?
Harvest loose-leaf varieties roughly 30 days after planting by cutting the outer leaves. For head lettuces, wait until they feel firm, typically between 60 to 75 days after planting, to ensure the best flavor and quality.
What’s the best way to store freshly harvested lettuce?
For short-term storage, rinse and dry lettuce leaves, then keep them in the refrigerator. For longer storage, blanch and freeze the leaves to preserve their flavor and nutrients after harvesting.
