
I’ve always found that a truly functional kitchen starts with a pantry you can count on, especially when fresh produce from the garden or market starts piling up.
Over the years, I’ve learned the hard way that beginners like I was need simple, reliable canning methods to avoid waste and build real confidence.
What stands out first in someone else’s kitchen is that quiet assurance of jars lined up neatly, full of summer peaches or tomato sauce ready for winter.
A couple of these ideas changed how I approach stocking ours, like the quick pickle recipes that actually hold up through the seasons.
You might want to try the ones that match your harvest first and see how they fit your routine.
Rustic Wood Shelves for Canned Goods

A wooden credenza like this makes a perfect spot to line up your home-canned jars. The shelves hold everything from pickles and peppers to tomatoes and sauces, all labeled neatly. That natural wood tone keeps things feeling homey and practical, turning storage into something you actually enjoy looking at.
Put one in a sunny kitchen corner or entryway shelf area. It suits older homes or cottages best, where you want easy access without built-ins. Go for sturdy pine or oak to handle the jar weight… and leave room on top for a scale or pitcher.
Pantry Shelves with Labeled Glass Jars

One straightforward way to build a stocked pantry is open shelving lined with clear glass jars. You see beans, nuts, and flour right there, all labeled in simple handwriting. That under-shelf lighting makes it practical too, so you grab what you need without hunting. Keeps things visible and tidy, which beats digging through cabinets every time.
Set this up in a kitchen nook or hallway spot where you have a few feet of wall space. Grab a basic white unit like this, fill jars with your canning projects or bulk buys, and label them straight. It suits small homes best, adds a bit of calm order. Just keep dust off the open shelves with a quick wipe now and then.
Countertop Jar Rack for Canning

A wooden rack like this one keeps mason jars lined up on the counter, lids on and ready to fill. It makes the whole canning process smoother since you don’t hunt for jars mid-session, and it tucks right next to the pressure cooker.
Place it by the sink for easy rinsing and filling. This works fine in smaller kitchens too. Pick a rack sized for your common jar types, pints or quarts.
Glass Fronted Pantry Cabinet for Canned Goods

One simple way to build out your stocked pantry is with a glass fronted cabinet. It turns rows of home canned jars into a nice display you can see every day. Those amber honey jars and deep red sauces look right at home on wood shelves, and a bit of interior lighting keeps it all looking fresh without much fuss.
This setup fits best in a kitchen with some corner space. Repurpose an old china cabinet with a fresh coat of soft green paint, or build one to match your cabinets. Line up the heaviest jars on lower shelves so nothing tips, and toss in a few clean dish towels for everyday use.
Open Shelving for Canning Jars

Open shelving like this oak unit turns your kitchen into a practical pantry showcase. Jars wrapped in red checkered cloths line the shelves, right alongside oil bottles and bundles of rosemary. It keeps everything handy for cooking or canning, and the natural wood gives a warm, farmhouse feel without much fuss.
Put these shelves near the sink or prep area where you do most of your preserving. Start with your tallest jars on top to save space below for herbs or baskets. It suits cozy kitchens best… just dust regularly since it’s all out in the open.
Simple Pantry Storage with Glass Jars
One easy way to build up your pantry stock is lining shelves with clear glass jars full of dry goods like beans and grains. You can see everything at a glance. No digging around in bags. It keeps things fresh longer too since the lids seal tight. Folks starting out with canning love this because it makes the whole space feel organized right away.
Just grab mason jars in a few sizes and label them with what is inside. Works best in a walk-in pantry or deep kitchen shelves where you have room for three or four rows. Add a little step stool if the top shelf is high. Stick to basics like black beans, lentils, and rice first. Keeps it simple for beginners.
Rustic Pantry Shelves for Canned Goods
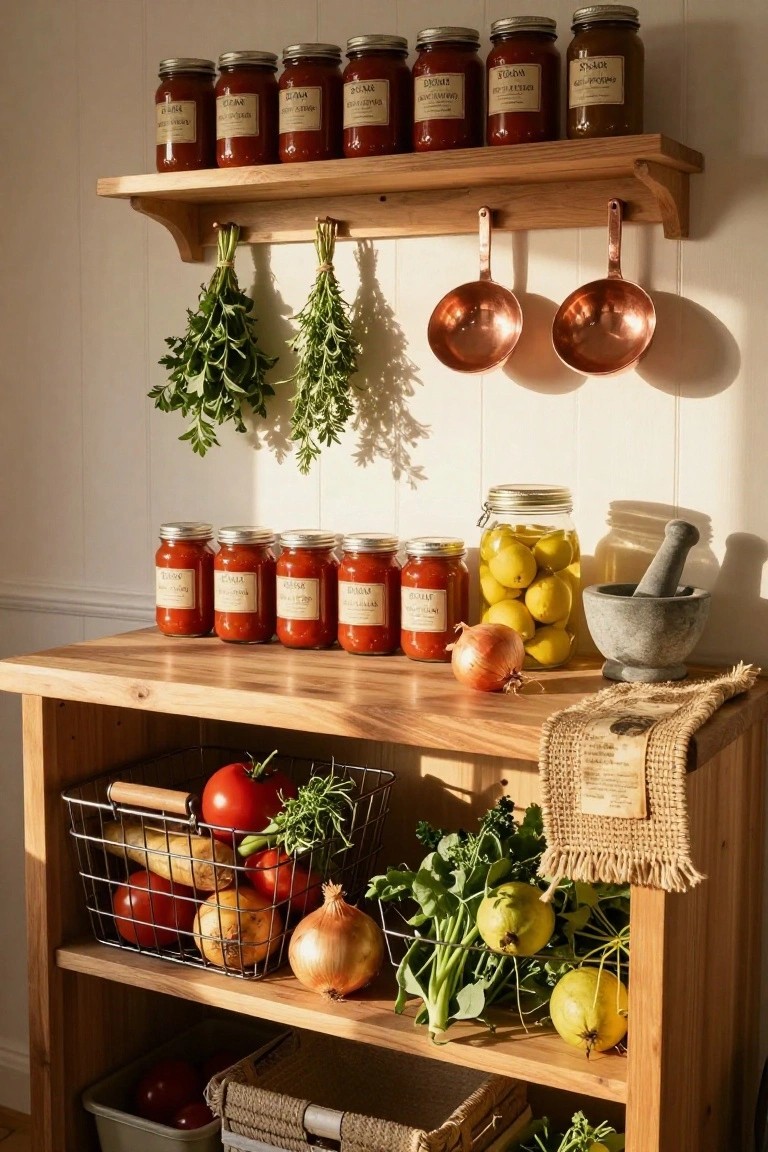
A simple wooden shelf unit like this turns your canning efforts into everyday kitchen storage. Rows of jars filled with tomato sauce sit neatly on the shelves, right next to fresh onions and lemons on the counter below. It keeps things handy for cooking, and the warm wood gives a cozy, farmhouse feel without much effort.
This works best in a casual kitchen or mudroom where you want open storage. Hang a few herbs from hooks above to add green, and toss produce in a wire basket underneath. Start small, maybe two shelves over your work counter. Just make sure the wood is sturdy enough for the weight of full jars.
Open Shelves for Canning Jars
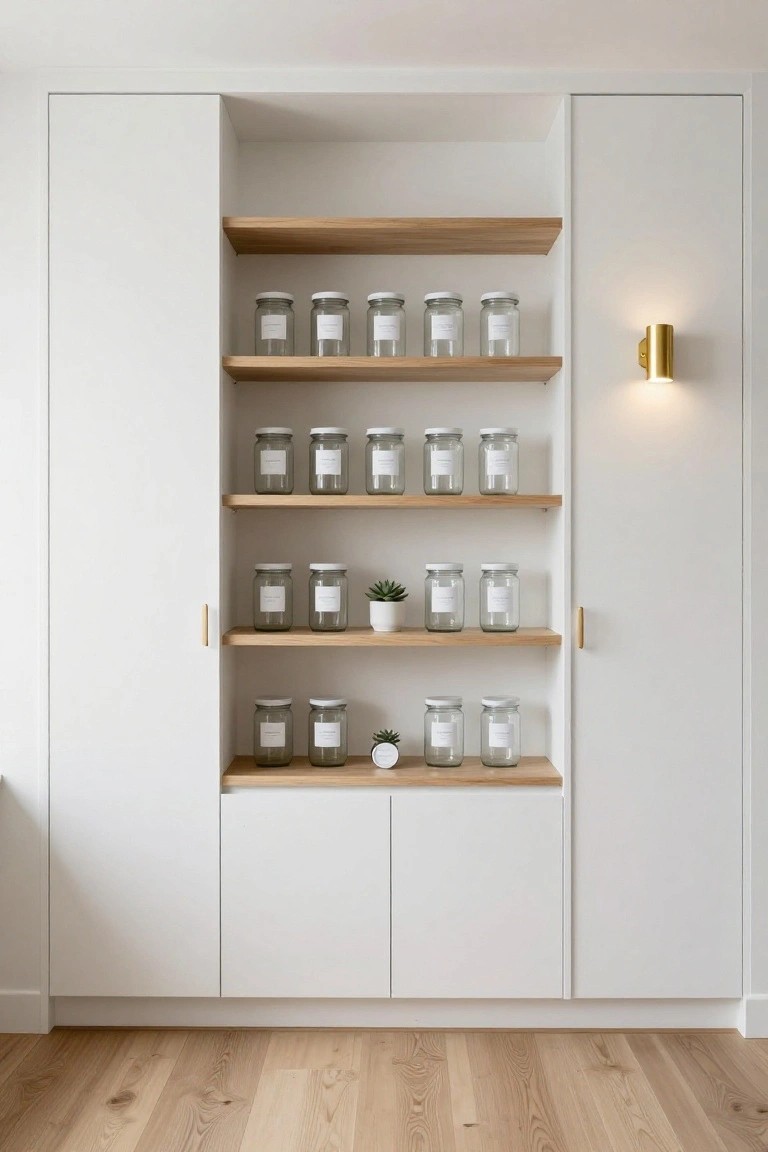
One straightforward way to organize your pantry is with open wooden shelves inside a built-in cabinet. Rows of clear glass jars, all labeled simply, let you spot what you have at a glance. Those jars on light wood shelves against white cabinets keep things tidy and make the space feel open. A couple small plants add a touch of life without clutter.
This works best in a modern kitchen or entry pantry where you want storage that’s practical and a little pretty. Line up jars by type, like sauces or veggies, and keep labels facing out. Skip it if your kitchen gets too dusty. Easy to pull off with basic shelves and matching jars from the store.
Open Shelves for Canned Goods
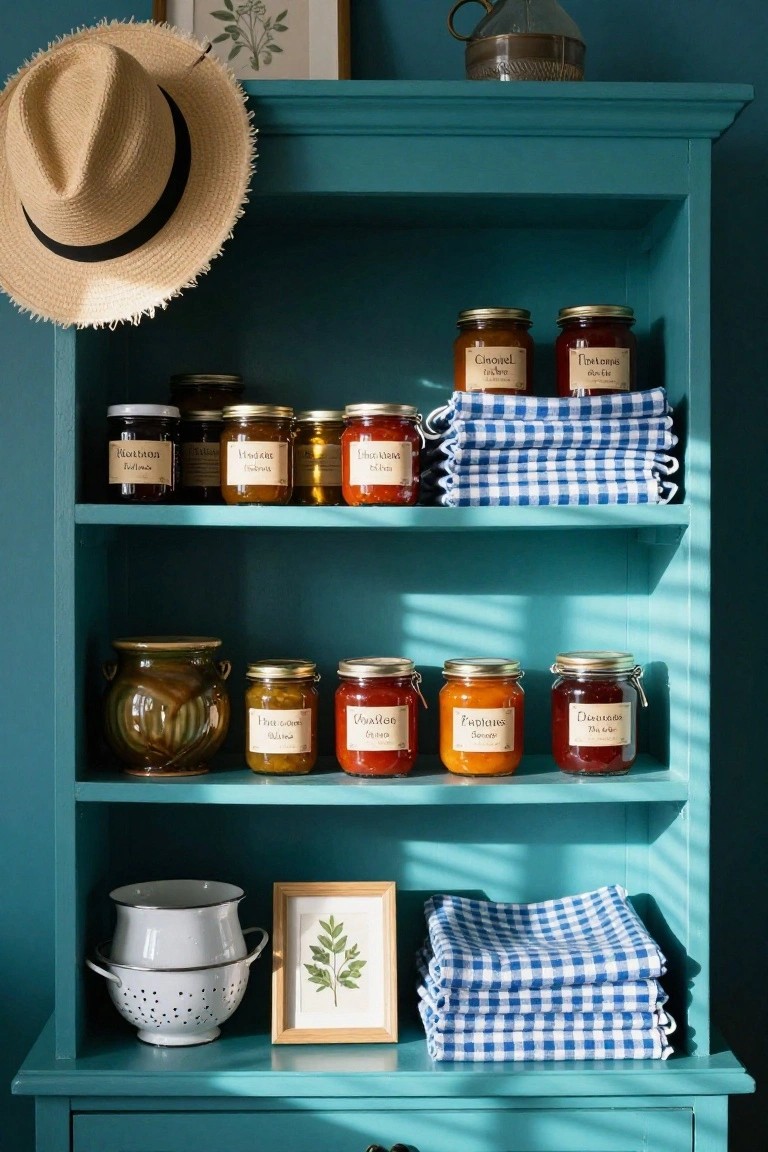
One simple way to build a stocked pantry is with open shelves like these. They let you see all your home-canned jars at a glance, from jams to pickles. The teal color keeps things cheerful without overwhelming a small space, and mixing jar sizes adds a bit of everyday charm.
Set this up on a kitchen wall or in a butler’s pantry. Line up your favorites by color or type for easy grabbing. It suits cozy homes best… just dust the shelves now and then since everything’s out in the open.
Open Shelves for Canning Storage
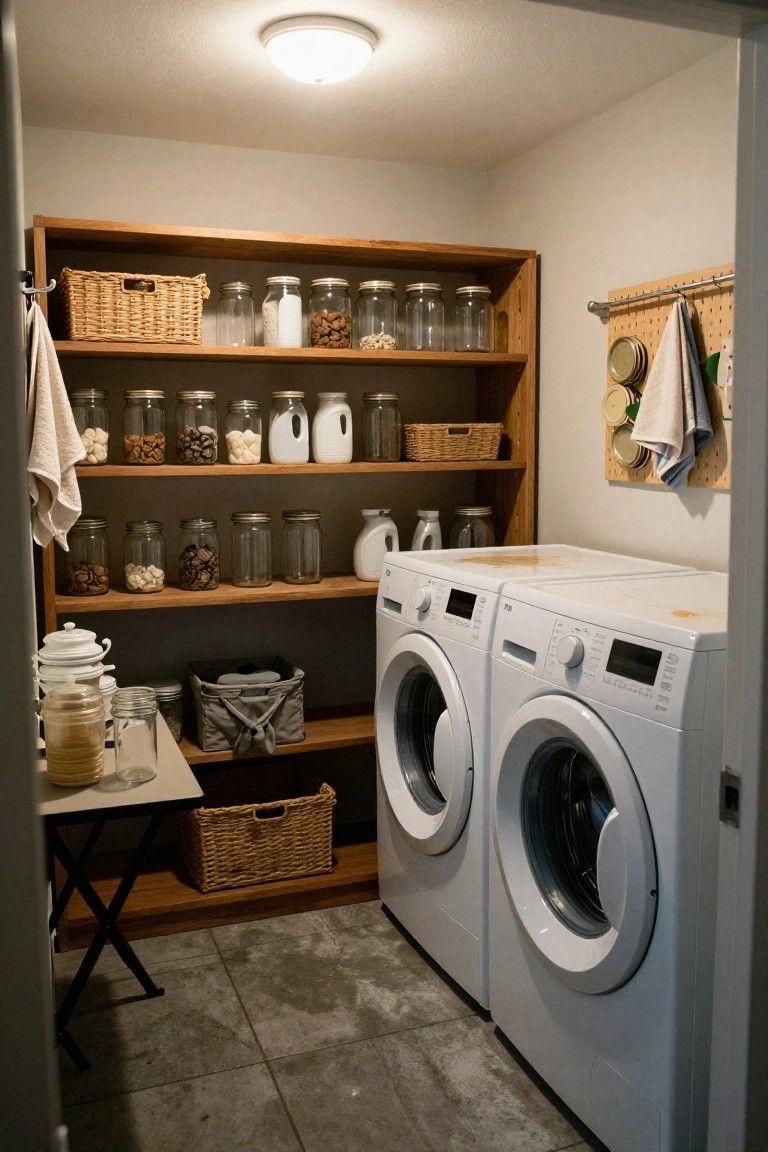
One smart way to start your stocked pantry is with open wooden shelves right in the laundry room. You see jars of flour, nuts, and dry goods lined up neat, easy to grab. This keeps your canning projects visible and handy, without needing a whole separate room. Wood shelves warm up the plain white machines too.
Fit these shelves along one wall next to the washer and dryer if space is tight. Use mason jars for everything from rice to homemade jams. It works best in utility spots like this… practical for beginners. Just measure your wall first to avoid crowding the machines.
Pantry Shelves for Canned Goods

If you’re canning for the first time, setting up open wooden shelves in a small pantry room makes storing your jars simple and practical. The colorful jars of tomatoes, peppers, and pickles line up neatly, turning what could be a cluttered closet into a spot that feels organized and ready for use. That brick wall in the background adds a bit of rustic charm without much effort.
This works best in a spare closet or underused corner near the kitchen. Stack the shelves deep enough for quart jars but leave room to grab what you need. Start with basics like pickles and sauces, and you’ll see your stockpile grow fast… just label everything clearly to avoid mix-ups later.
Open Cupboard for Canned Goods Storage

One simple way to build out your pantry is with a tall open cupboard like this. It holds rows of home-canned jars right where you can see them. The shelves give plenty of space for different sizes, and the mix of colors from jams and pickles makes it look full without trying too hard. Add a few dried flowers or pots at the bottom, and it feels like a real working space.
This setup works best in a kitchen or nearby mudroom where you need quick access. Look for an old armoire or freestanding cabinet with adjustable shelves. Keep the bottom low for bigger crocks, and group jars by type up top. Just watch the dust. Wipe shelves now and then, especially if it’s not enclosed.
Pantry Shelves for Canning Jars
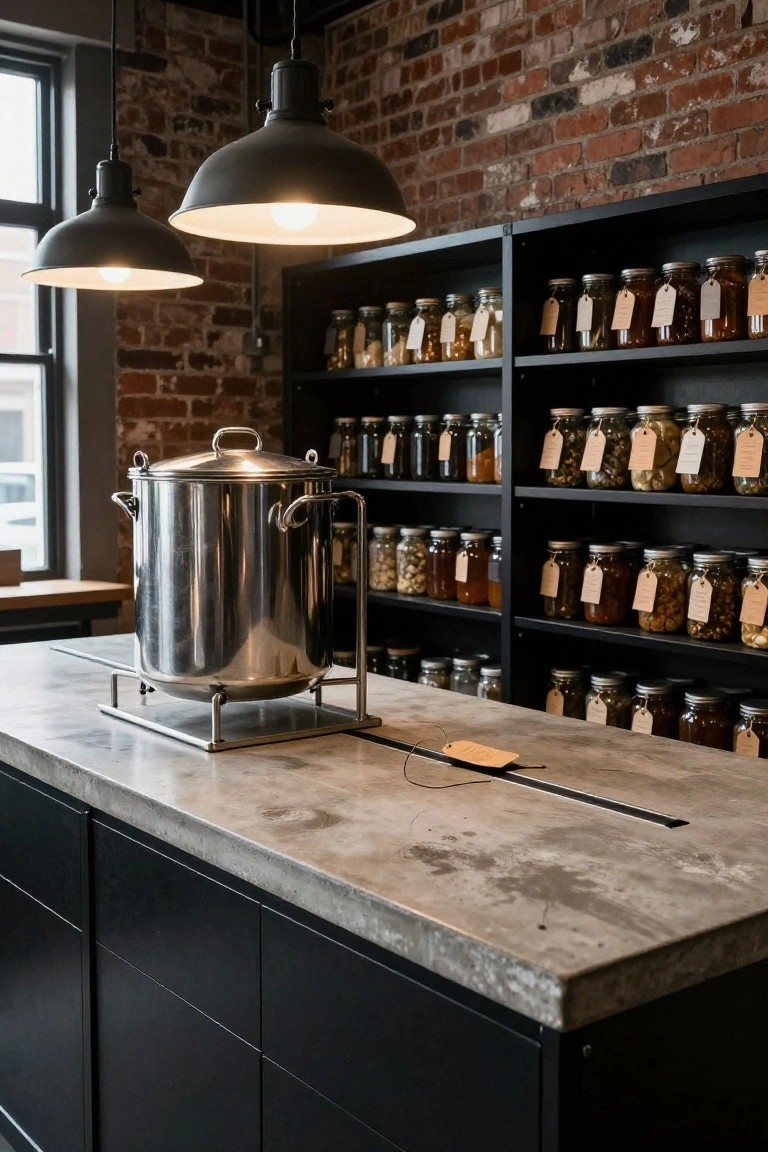
One straightforward way to build a stocked pantry starts with open shelves like these black ones running along the wall. They’re packed floor to ceiling with mason jars full of spices, nuts, dried fruits, and preserves, all neatly labeled. That big stainless steel stockpot sitting on the concrete counter nearby makes the whole spot feel like a real canning station. It keeps everything visible and easy to grab, so you always know what you’ve got on hand.
This works best in a kitchen corner or small room off the main space, especially if you like a rustic look with brick or concrete around. Go for deep shelves to fit quart jars without crowding, and stick to black or dark wood to cut down on showing dust. It’s practical for beginners, but watch the light, keep it away from direct sun to protect your goods.
Glass-Door Pantry for Canned Goods

One smart way to keep your canning haul organized is with tall cabinets that have glass doors. You can see all the jars at a glance. The soft LED lighting inside highlights the colors of fruits and veggies without taking up counter space. It turns storage into something you actually want to look at.
Put this in a kitchen corner or mudroom where you prep food. Line up matching mason jars filled with pickles, jams, or dried fruits for the best effect. Hang a chalkboard nearby to jot down what to can next. Just keep shelves evenly loaded so nothing tips.
Open Pantry Shelves for Canning Jars

Nothing beats a simple open shelf setup for keeping your home-canned goods right where you can see them. This corner cabinet with its shelves stacked full of jars shows how practical it can be. The gray painted wood and louvered doors give it a cozy, old-house feel that fits right into a kitchen or mudroom. It makes grabbing a jar quick, and everything stays organized without hiding your hard work.
Put this kind of shelving in a spot with good light, like near a window, so you can enjoy the look while prepping meals. Start with basic pine boards on brackets inside a frame you paint to match your walls. Add crates below for overflow or a few herbs. It works best in smaller homes where you want storage that doubles as display… just keep dust off those jars.
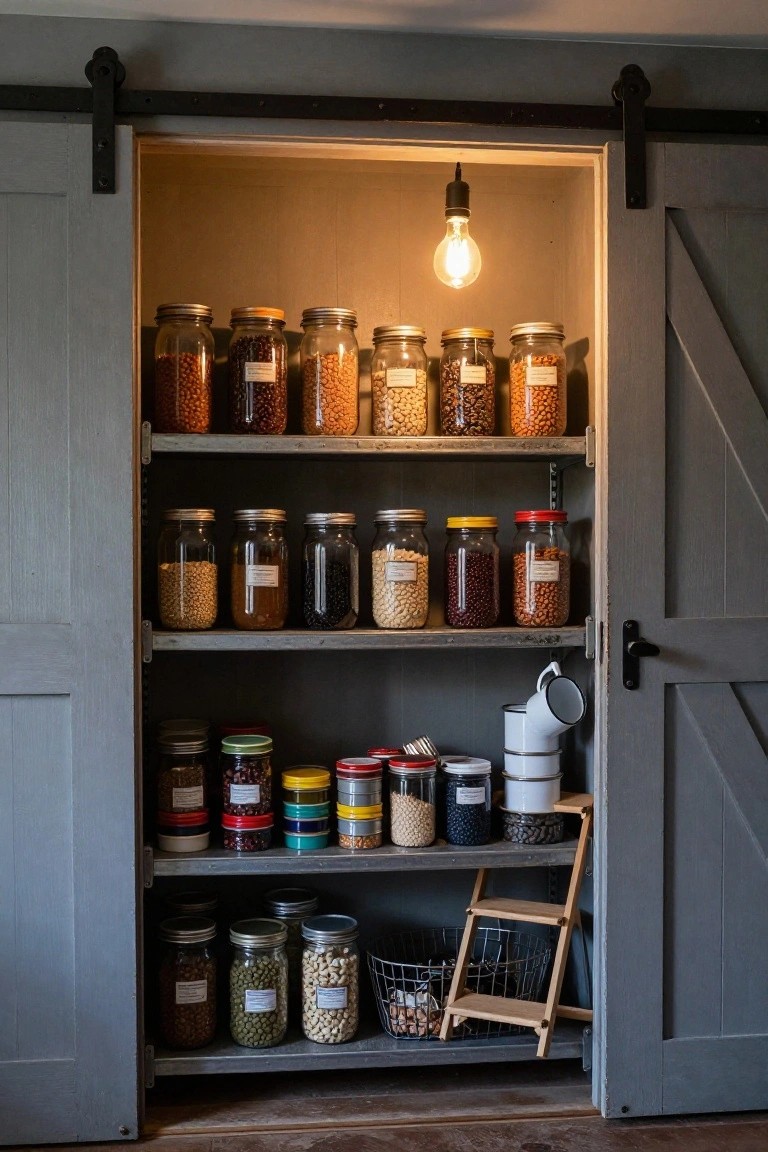
Sliding Door Pantry for Canned Goods

A simple sliding door on a pantry cabinet keeps your home-canned jars organized and out of sight until you need them. Here the navy blue door slides open to show wire shelves full of tomato jars, with soft lighting along the back wall that makes everything easy to spot. It turns basic storage into something practical that fits right into a kitchen setup without taking up extra floor space.
You can add this kind of pantry in a tight kitchen corner or next to cabinets. Use sturdy wire racks for good airflow around the jars, and LED strips for that clean light. It works best in homes where you do a lot of canning… just make sure the door track is smooth so it glides without sticking.
Open Shelves for Pantry Staples

Nothing beats open shelves when you’re starting out with canning. You line them with glass jars packed with nuts, dried beans, spices, and your first home-canned batches. Everything stays right there in view. No digging around. It makes checking stock simple and keeps the kitchen feeling practical.
Hang these shelves along a wall near the sink or window. They fit most kitchens, even tight ones. Grab mason jars in different sizes, label with basic tags, and fill as you go. Watch for dust though. A quick wipe keeps it tidy.
Open Shelves for Canned Goods

One straightforward way to build out your pantry starts with open wooden shelves right in the kitchen. Here, they’re mounted along the wall by the window, packed with jars of jams, sauces, and sauces in neat rows. It keeps everything visible and handy, plus it turns your canning efforts into part of the room’s look. No hiding supplies in dark cabinets.
Put these shelves where you prep most, like over the sink area. They’re perfect for older homes or cottages with that cozy feel. Just make sure they’re sturdy enough for the weight… and dust them now and then if you don’t rotate stock often.
Rustic Stone Shelves for Pantry Staples
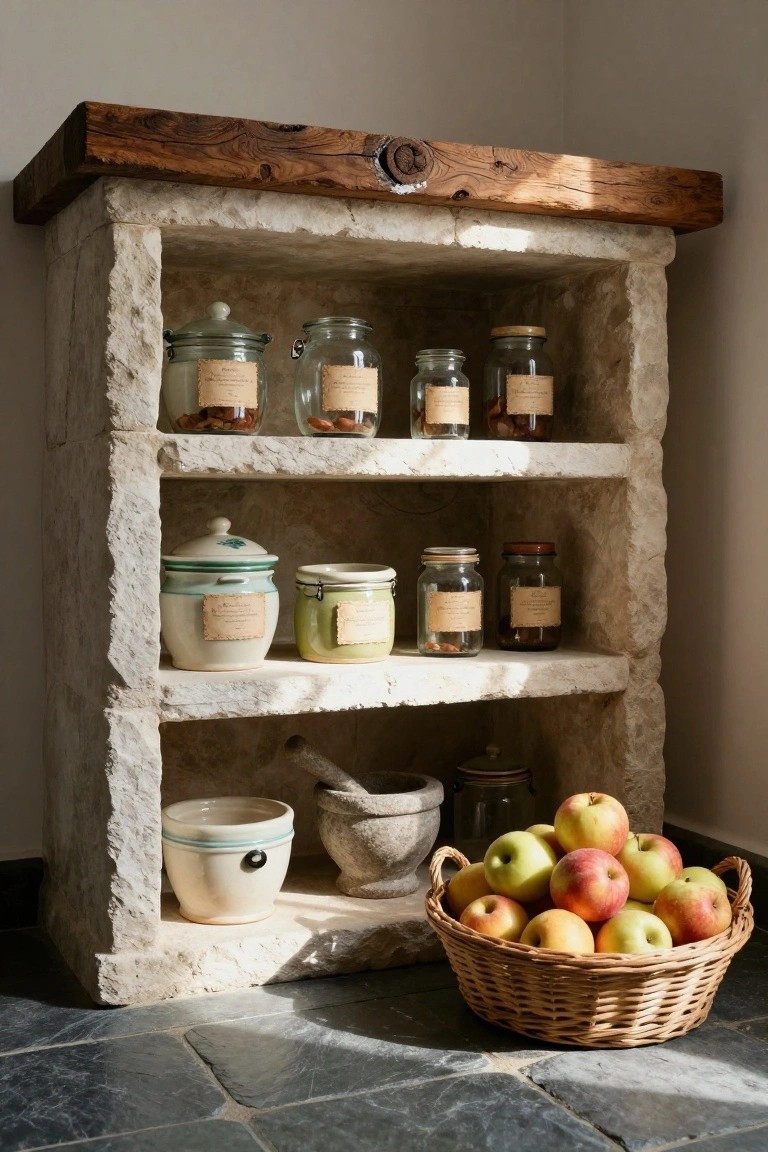
A built-in stone shelf like this makes pantry storage feel natural and sturdy. It holds rows of glass jars with nuts, dried fruits, and whatever else you’ve canned, right there in a kitchen corner. The rough stone texture adds that lived-in charm without trying too hard.
Use it in a casual kitchen or entry pantry where you want easy access to basics. Line up your labeled jars on the shelves, tuck in a mortar and pestle for grinding spices. It suits older homes or farmhouse styles best… just check the stone stays dry to avoid any moisture issues.
Frequently Asked Questions
Q: Do I need a pressure canner right away, or can I start with just a stockpot?
A: Grab a stockpot for high-acid foods like jams, pickles, and tomatoes, since they process fine in boiling water. Save the pressure canner for veggies and meats later on. That way you build skills without overwhelming your kitchen.
Q: What if one of my jars doesn’t seal after processing?
A: Pop it in the fridge and use the contents within a week. Don’t risk storing it on the shelf unsealed. Test seals by pressing the lid center, it shouldn’t flex.
Q: How do I store my canned jars so they last?
Keep them in a cool, dark spot like a basement shelf away from heat or sunlight.
Q: Can I reuse the lids from last year’s canning?
A: Lids seal only once, so buy fresh ones each time. Reuse the jars if they’re chip-free. And yeah, it’s worth the small cost for peace of mind.