
When I first turned our backyard into a starter homestead, I realized small daily skills like proper composting kept everything from falling apart.
Without them, even the best plans for gardens or coops just don’t hold up to real weather and wear.
You notice right away how fresh eggs or homegrown greens change your meals and mood.
I still test tweaks on things like fence-building to match our sloped land better.
These basics build a rhythm that makes self-sufficient living feel steady and your own.
Pantry Storage on Open Shelves

One straightforward setup for daily homesteading starts with open wooden shelves right in your kitchen workspace. Fill them with glass jars holding beans, nuts, dried peppers, and other bulk staples, each one labeled for quick spotting. It puts everything you reach for often at eye level, cutting down on rummaging through cabinets.
Try this in a corner by the sink or stove where you do most prep work. Grab affordable mason jars, add simple labels with contents and pack dates, and secure the shelves well to hold the weight. Fits older farmhouses or any practical kitchen, especially if you buy dry goods in bulk or dry your own herbs.
Grow Herbs on Your Windowsill
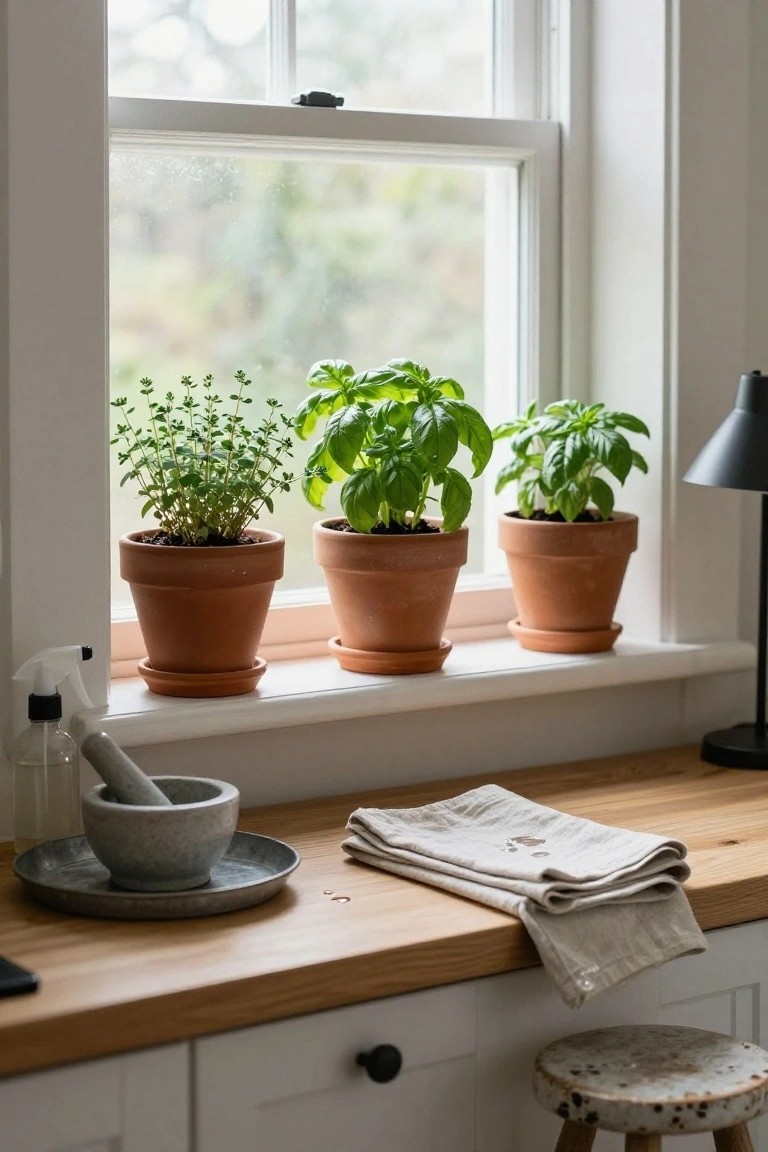
One easy way to start homesteading is setting up a few herb plants right on your kitchen windowsill. You get fresh thyme, basil, whatever you like, ready to pick for cooking. No big garden needed. It keeps things practical and saves money on store-bought bunches that go bad fast.
Pick a sunny south-facing window if you can. Use simple terracotta pots with good drainage, and keep the soil moist but not soggy. This works great in small apartments or city homes. Just trim back when they get leggy… keeps them bushy and producing.
Efficient Pantry Storage for Dry Goods

When you’re starting out with homesteading, one of the first things you notice is how much bulk food you end up buying. Beans, grains, nuts, all those staples take up space if you don’t have a good system. This pantry setup uses rows of glass jars on open shelves, each one labeled clearly so you know exactly what’s inside. It keeps everything dry and fresh, and you can see at a glance how much you have left. The onions go in baskets below, simple as that.
To pull this off in your own home, start with mason jars or any clear glass ones that seal tight. Line up your shelves floor to ceiling if you can, and add a wooden ladder leaning in the corner for the top spots. It works best in a walk-in closet or small room off the kitchen. Watch for moisture though, keep it ventilated. Once it’s going, restocking becomes a habit, and you’ll waste less food every week.
Open Shelves for Kitchen Jars

Open shelves in the kitchen make a lot of sense for homesteaders. You line them with jars of homemade jams, sauces, and pickles, all easy to spot and reach. In this setup, the wooden shelves sit above the counter, holding those colorful glass containers that look right at home next to fresh oranges and herbs on the table. It turns storage into something useful every day, no fumbling in dark cabinets.
Put these shelves in a casual eating area or near the sink where you prep food most. They suit older homes with wood cabinets or any space aiming for that lived-in feel. Just keep the jars organized by use, and dust them now and then… it stays practical without extra work.
Exposed Brick Kitchen Walls

Exposed brick walls give a kitchen that solid, homesteading warmth right away. They work because the texture pulls your eye without trying too hard, and it fits everyday tasks like kneading dough or hanging pots for easy reach. In this setup, the rough bricks pair with simple things like a loaf rising in a basket.
You can add this look in older homes or even cover smooth walls with brick panels if you want to start small. It suits cozy spaces where you do real cooking, not fancy stuff. Keep an eye on sealing the bricks so flour and spills don’t stick.
Open Shelves for Pantry Storage

Nothing beats open wooden shelves when you start preserving your own food. You line them up with jars of pickled peppers, fermented veggies, or dried herbs, and everything stays right where you can see it. That small clock and potted plants tucked in just make the spot feel lived-in, not fussy.
Put these shelves in a kitchen corner or mudroom where you process your harvest. Use sturdy wood like oak to hold the weight, and label your jars clearly. They suit a beginner homesteader’s setup… keeps daily grabs simple without digging through cabinets.
Starting Seeds Indoors on a Simple Bench

One practical way to dip into homesteading is setting up a seed-starting station right inside by a window. Here a wooden bench holds a tray of peat pots labeled for dill, oregano, parsley, and lettuce. The sunny spot makes it easy for sprouts to get what they need without much fuss.
This works best in kitchens or any room with good light. Grab a sturdy bench or shelf, some seed trays, and a watering can. Keep soil moist but not soggy… and you’ll have fresh herbs ready to plant out soon. Great for apartments or small homes where outdoor space is tight.
Wall-Mounted Tool Storage in the Workshop

Nothing beats grabbing a chisel or file without hunting around. This setup uses a simple wooden rack mounted right above the workbench, with pegs holding tools and slots for sharpening stones. It keeps everything visible and in reach, so you spend less time searching and more time working on projects like repairs or building furniture.
Hang one like this in a garage corner or shed, using oak or pine for durability. Pegs work for handles, jars below catch screws and nails. Fits small homestead spaces best. Just make sure it’s sturdy enough for heavier tools.
Simple Open Shelves for Produce Storage

Open shelves like this make storing fresh harvest easy and right at hand. The whitewashed wood unit holds woven baskets full of potatoes and carrots, with extra bunches hanging from hooks up top. It keeps everything visible so you grab what you need without digging around. Plus it fits a homesteading kitchen without taking much space.
Put these shelves in a pantry corner or along a kitchen wall where you prep meals. They work best in cooler spots to keep root veggies fresh longer… just make sure there’s some air flow. Baskets let produce breathe, and the rustic look goes with any country-style home.
Set Up a Homestead Planning Board

A simple corkboard turns any wall spot into a daily hub for homestead chores. Pin up plant care notes like basil watering or harvest dates, clip on a calendar for seeding reminders, and keep seed jars or spice tins right nearby. It keeps scattered tasks in one glanceable place so nothing slips through, especially when you’re starting out with garden plots or kitchen preserving.
Hang it near a desk in the kitchen or entryway where you pass often. Use pushpins for quick swaps, add hooks for tools or string bundles, and jot extras on sticky notes. It fits small homes best, stays low cost with a basic board and clips, and grows with your routines… just refresh it weekly to avoid overload.
Open Shelves for Homemade Bath Goods

One practical move in a homestead bathroom is using open wooden shelves to store your own soaps and lotions. These shelves hold neat stacks of wrapped bars, glass dropper bottles, and pump dispensers, all within arm’s reach of the sink. It turns a simple corner into a spot that’s both useful and a little pretty, especially with a bunch of dried lavender nearby.
Set up something like this in a small wash area or utility room. Grab basic brackets, a plank of light wood, and arrange your handmade stuff by how often you use it. Works best in spaces that get some natural light… keeps things from feeling cluttered if you don’t overload the shelves.
Setting Up a Home Curing Cabinet

One practical setup for beginner homesteaders is this wooden cabinet turned curing chamber. It has a glass door to check progress without letting air in, hooks from a rod for hanging hams or salami, and a hygrometer to track humidity. A small dish of salt on the bottom helps absorb moisture. The LED light inside makes everything easy to see, and it fits right into a kitchen without taking much space.
Put one like this in your kitchen or pantry where you can keep temperatures around 55 degrees and humidity at 70 to 80 percent. It works best in cooler spots away from direct heat. Start with basic recipes for prosciutto or salami, and you’ll have home-cured meat ready in a few months. Just watch for mold and air flow.
Strain Homemade Yogurt in Your Kitchen

Making yogurt at home doesn’t need special gear. Just set a wooden strainer over your sink like this, and let the whey drip away while you go about your day. Fresh milk sits in jars nearby, ready for the next batch, and a quick handwritten note keeps the recipe simple. It’s a steady daily skill that turns store milk or raw milk into thick yogurt without much fuss.
This works in any kitchen with a deep sink and counter space. Clip your favorite proportions to the shelf above, weigh what you need on a basic scale, and strain after it sets overnight. Start small to learn the timing… too long and it gets too thick. Cleanup is easy since it all goes down the drain.
Tiered Plant Shelves for Indoor Growing

One easy way to get into growing your own plants at home is with a simple tiered shelf like this rattan one. It holds pots at different levels so you can fit more in a small spot, right by a window for good light. You see seedlings, bigger plants, and even a tray for starting soil. Keeps everything organized and off the floor.
Put it in a sunny corner of the kitchen or living room where you pass by often. Works great in apartments or any tight space. Just check the bottom shelf doesn’t get too wet from watering, and group plants with similar needs together. Start with herbs or easy greens. You’ll use it every day.
Hanging Herbs Over the Fireplace Mantel

One easy homesteading trick is hanging bundles of fresh herbs right above your fireplace mantel. The gentle heat from the fire dries them out nicely without much fuss. You see rosemary and other greens tied up on a simple wooden beam here, adding a bit of green life to the stone hearth. It keeps your kitchen herbs handy and turns a plain spot into something useful.
This works best in homes with a wood-burning fireplace, especially if you grow your own herbs. Just tie small bunches with twine and space them out so air circulates. Watch the fire isn’t too hot, or they might scorch. Fits right into everyday routines… grab a handful for cooking once they’re crisp.
Bedside Linen Storage on a Stool

Keeping linens close at hand makes changing beds and towels a quick chore. This setup uses a plain wooden stool stacked with folded sheets and blankets. A basket underneath holds extras. Natural wood keeps it sturdy and fits right into a simple bedroom corner. It stays out of the way but grabs what you need fast.
Put one by any bed or in a guest room. Works best in smaller spaces where you want storage without bulk. Stack by size or color if you like. Watch the stool height so it matches your bed. Linens breathe better folded loose, not crammed tight.
Simple Kitchen Compost Station

One easy way to get into homesteading is setting up a little compost station right on your kitchen counter. You see it here with a big metal bin next to a wooden cutting board full of carrot peels and greens. It keeps scraps contained instead of letting them scatter around the sink. Folks starting out like how it makes turning waste into garden gold feel automatic.
Just grab a sturdy bin that fits your counter space and a cutting board you don’t mind dedicating to scraps. Place it near the sink for quick tosses while prepping meals. It works best in smaller kitchens where you want everything handy. Watch for odors though… empty it to your outdoor pile every couple days.
Seed Organization Station

One practical spot every beginner homesteader needs is a simple seed organization station. Right there on a kitchen table or side table you can gather jars of saved seeds like millet or chickpeas, along with blank envelopes for packaging up your harvest. It keeps everything handy for planting season and makes seed saving feel straightforward instead of scattered.
Set this up in a quiet corner with good light, maybe near a window. Use clear jars so you can see what’s inside and label them clearly. It works best in smaller homes where space is tight. Just keep it dust free and out of kids’ reach if you have little ones grabbing at the trays.
Simple Home Apothecary Shelf

One easy way to get into homesteading is setting up an apothecary shelf right in your kitchen or pantry. These open wood shelves hold dried herbs in muslin bags, amber bottles for tinctures, and basics like a mortar and pestle. It keeps everything handy for making teas or salves, and the natural wood gives it a cozy, practical feel without much fuss.
Put it where you work most, like near the stove or in a mudroom. Start small with a few shelves and common herbs you grow or buy. Label bottles clearly so you grab the right one fast. Works best in homes with some rustic charm… just avoid cluttering it up too quick.
Open Shelving for Ferments

If you’re starting with homesteading basics like sauerkraut or kombucha, set aside some open shelf space in your pantry. It keeps crocks and jars right where you can check them daily without digging around. Everything stays visible and easy to reach, which makes the whole process less of a hassle.
Grab a few white ceramic crocks for kraut and a glass jar with a spigot for continuous brew kombucha. Tuck in a thermometer and some linen covers too. This setup fits any kitchen cabinet, especially narrower ones. Wipe down the shelves now and then to avoid spills turning into trouble.
Frequently Asked Questions
Q: What if I don’t have a yard or much space?
A: Start small with pots on a balcony or windowsill. Grow herbs like basil or lettuce that thrive in containers and give you fresh picks right away. You will build skills fast without needing land.
Q: Which of these skills should a total newbie tackle first?
A: Go for composting. It turns your kitchen scraps into garden gold and teaches you about soil in a low-pressure way. Just grab a bin and mix greens with browns.
Q: Do I need expensive tools to get started?
A: Stick to basics you probably own already, like a shovel or jars. Borrow or buy used when you need more. Save your cash for seeds and soil.
Q: How do I avoid killing my first plants?
And yeah, most of us do. Water only when the top inch of soil feels dry, and put them where they get the right sun. Watch them close for a week.