Growing chives from seed is a straightforward process that rewards gardeners with fresh herbs for culinary use. To succeed, ensure you provide the right conditions and care for optimal growth. Following essential tips will help you cultivate a thriving chive garden.
Chive Gardening Supplies for Successful Growth
To cultivate chives successfully from seed, having the right gardening supplies is crucial. This section outlines the essential tools and materials needed to create an optimal growing environment, ensuring your chive plants thrive from the very start. With the proper supplies, you can set the stage for a bountiful harvest of this flavorful herb.
Before starting your chive garden, gather the necessary supplies. Having the right tools and materials will streamline the planting process and ensure your seeds thrive.
Chive seeds: Purchase high-quality seeds from a reputable supplier.
Seed trays or pots: Choose containers with drainage holes for proper water management.
Seed starting mix: Use a lightweight, well-draining soil mix.
Watering can or spray bottle: Ensure gentle watering to avoid displacing seeds.
Labels: Keep track of different varieties if planting multiple types.
Chive Seed Planting Area Preparation
Preparing the planting area for chive seeds is a crucial step in ensuring a successful harvest. This section will guide you through the essential preparations needed to create an optimal environment for chives, including soil selection, sunlight requirements, and spacing considerations. By following these tips, you can set the stage for robust growth and flavor.
Preparing your planting area is crucial for chive seed success. Ensure you select a location that meets the light and temperature requirements for optimal growth.
Chives prefer full sun but can tolerate partial shade. Aim for at least 6 hours of sunlight daily.
Choose a planting time: Start seeds indoors 6-8 weeks before the last frost date or sow directly outdoors after the last frost.
Prepare the soil: Loosen the soil in your garden bed or containers. Mix in compost to enhance nutrient content.
Check for pests: Inspect your planting area for any signs of pests or diseases that could affect seedling growth.
Chives Planting Strategy for Success
Successfully growing chives from seed requires careful planning and execution. Understanding the optimal planting strategy is crucial for ensuring healthy growth and robust flavor. This section outlines effective techniques to maximize your chive yield, helping you cultivate a thriving herb garden.
Once you have prepared your supplies and planting area, it’s time to execute your planting strategy. Follow these steps to ensure successful germination and growth.
Sow seeds: Scatter chive seeds evenly across the surface of the soil. Cover lightly with soil, about 1/4 inch deep.
Water gently: Use a spray bottle to moisten the soil without washing away the seeds.
Maintain humidity: Cover seed trays with plastic wrap or a humidity dome to retain moisture until germination occurs.
Provide warmth: Keep the trays in a warm location, ideally between 65°F and 75°F, to encourage sprouting.
Thin seedlings: Once seedlings develop two true leaves, thin them to 3-4 inches apart to prevent overcrowding.
| Step | Action | Notes |
|---|---|---|
| 1 | Sow seeds | Ensure even distribution |
| 2 | Water gently | Avoid displacing seeds |
| 3 | Maintain humidity | Use plastic wrap |
| 4 | Provide warmth | Ideal temperature range |
| 5 | Thin seedlings | Space for healthy growth |
Chive Watering and Fertilization Techniques
Proper watering and fertilization are crucial for growing healthy chives from seed. Understanding the right techniques can significantly impact their growth and flavor. This section will provide essential strategies to ensure your chives thrive throughout their development.
Proper watering and fertilization are essential for robust chive growth. Understanding the needs of your plants will enhance their flavor and yield.
Chives prefer consistently moist soil but do not tolerate waterlogged conditions.
Water frequency: Water when the top inch of soil feels dry. Adjust frequency based on weather conditions.
Fertilize appropriately: Use a balanced, water-soluble fertilizer every 4-6 weeks during the growing season.
Organic options: Consider compost tea or fish emulsion as organic alternatives for fertilizing.
Recommended Products

Accurate Soil Moisture Detection: The XLUX Soil Moisture Meter can tell you if the soil deep inside your pot or garden is dry, moist or wet; whereas your eyes and fingers can only determine the moisture level of the soil surface. The probe is 5.5 inches (14 cm) longer than regular styles, allowing it to measure the soil moisture at the bottom of larger and deeper flower pots.
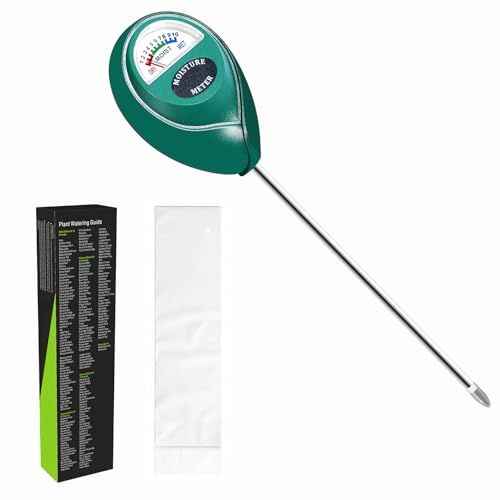
Trusted Since 2015: Become one of the many plant lovers who rely on the proven accuracy of XLUX. Established in 2015, our soil moisture meter has earned over 60,000+ verified ratings for its consistent performance. While many many newer brands come and go, we provide the long-term reliability and quality that American households have trusted for over a decade.

【Instant & Accurate Moisture Reading, No More Guesswork】 This plant moisture meter gives precise soil moisture readings in seconds! The responsive pointer instantly tells you if soil is dry, moist, or wet. It helps avoid overwatering & root rot, letting you water plants like a pro with confidence
Optimal Timing for Chive Harvesting
Timing is crucial when it comes to harvesting chives for the best flavor and texture. Understanding the right moment to pick your chives can enhance your culinary experiences and ensure a bountiful yield. This section will guide you through the optimal timing for harvesting chives, helping you maximize their freshness and taste.
Harvesting chives at the right time ensures maximum flavor and encourages further growth. Knowing when and how to cut will keep your plants productive.
Chives can be harvested once they reach about 6 inches in height.
Cutting technique: Use sharp scissors to snip leaves at the base, leaving a few inches for regrowth.
Frequency: Regular harvesting promotes bushier growth. Aim to harvest every few weeks.
Storage: Store freshly cut chives in a damp paper towel in the refrigerator for up to a week.
Chives are best used fresh, but they can also be frozen for later use.
Chive Growth Problem-Solving Strategies
Growing chives from seed can be rewarding, but challenges may arise along the way. Understanding common growth problems and their solutions is crucial for ensuring healthy plants. This section will provide practical strategies to tackle issues that may hinder your chive cultivation efforts.
Even with careful planning, issues may arise during chive cultivation. Identifying and addressing these problems early can save your plants.
Damping off: This fungal disease can kill seedlings. Ensure good air circulation and avoid overwatering.
Pests: Watch for aphids and onion flies. Use insecticidal soap or neem oil as needed.
Nutrient deficiencies: Yellowing leaves may indicate a lack of nutrients. Adjust fertilization accordingly.
Regular monitoring of your plants will help catch these issues early.
Essential Tips for Chive Seed Growth
Growing chives from seed can be a rewarding endeavor, providing fresh flavor for your culinary creations. To ensure successful germination and robust growth, it’s crucial to follow specific guidelines tailored to chive seeds. This section outlines essential tips that will help you cultivate healthy chives in your garden or indoors.
Growing chives from seed can be a rewarding experience. Following these essential tips will help ensure a successful harvest.
Choose the right location with adequate sunlight.
Maintain consistent moisture without overwatering.
Harvest regularly to promote growth and flavor.
By implementing these strategies, you can enjoy a bountiful supply of fresh chives for your culinary needs.