

Ever wondered how to grow beets in your own backyard? Picture this: you stroll to your garden, pluck fresh beets from the earth, and savor their vibrant flavors in your favorite dishes. Exciting, right? In this article, you’ll uncover the secrets to cultivating these root vegetables effortlessly.
Have you ever bought beets at the store, only to find them lacking that farm-fresh taste? Growing your own ensures a bountiful harvest of juicy, earthy beets that elevate your culinary creations. From planting to harvesting, we’ve got you covered every step of the way.
Selecting the Right Beet Varieties
When selecting beet varieties for your garden, consider factors like size, flavor, and growing conditions. Here are some popular options to help you get started:
- Red Ace: Ideal for beginners, these beets are known for their smooth skin and delicious taste.
- Golden: If you’re looking for a milder flavor and vibrant color, go for golden beets. They’re sweeter than red varieties.
- Chioggia: With its eye-catching pink-and-white-striped flesh, Chioggia beets are perfect for adding a pop of color to your dishes.
Recommended Products
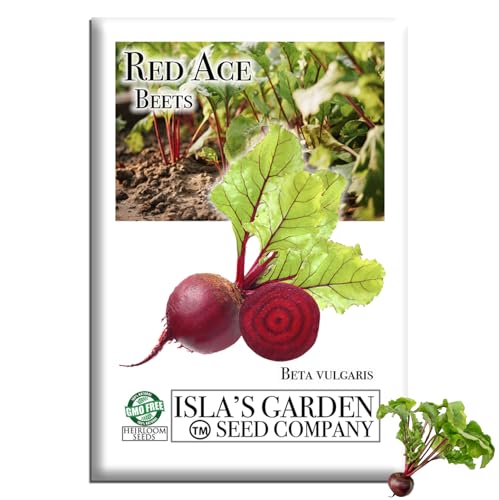
🥬 Productive Garden Beet Variety: Red Ace Beets produce smooth, round roots with a deep red color and dependable growth in home gardens. The sturdy plants develop leafy green tops while forming uniform beet roots beneath the soil. A reliable choice for backyard vegetable gardens and raised beds where gardeners want steady root harvests.

TOP-RATED NUTRITIONAL HEIRLOOM: Detroit Dark Red is a premium, high-yielding, and stress-resistant beet variety that stands at the pinnacle of root vegetables. This all-season favorite is a mid-early universal cultivar, perfect for consistent home harvests of professional quality.

Golden roots and edible greens: Grow Golden Detroit beets for yellow roots you can roast, pickle or slice into salads. The leafy tops can also be cooked as garden greens.
Preparing the Planting Site
When setting up your beet garden, choose a sunny location with well-draining soil. Avoid areas with large rocks or heavy clay, as they can hinder beet growth.
Soil Preparation
Loosen the soil to a depth of about 12 inches using a garden fork or tiller. Remove any weeds or debris that may compete with your beet plants for nutrients.
pH Levels
Test the soil pH using a kit from a garden center. Beets prefer slightly acidic soil, ideally with a pH between 6.0 and 7.0. Adjust pH levels if needed by adding lime to raise pH or sulfur to lower it.
Fertilizing
Incorporate organic matter such as compost into the soil before planting. Avoid high-nitrogen fertilizers, as they can promote leafy growth over root development.
Spacing
Space rows about 12-18 inches apart to allow room for beet roots to develop properly. Plant seeds 1 inch deep and thin seedlings to 3-4 inches apart once they reach a height of 2-3 inches.
Mulching
Apply a layer of organic mulch around the plants to retain soil moisture, suppress weeds, and regulate soil temperature. Mulch is particularly beneficial in warmer climates to keep the soil cool.
Watering
Keep the soil consistently moist but not waterlogged. Water deeply to encourage strong root growth. Avoid overhead watering to prevent the foliage from rotting.
Protection
Protect young seedlings from pests like birds and rabbits by covering them with row covers or netting. Remove any weeds promptly to prevent competition for nutrients.
Sowing and Tending to Beet Plants
Once you’ve prepared the planting site, it’s time to sow your beet seeds and care for your growing plants.
Planting Beet Seeds or Seedlings
When choosing beet seeds or seedlings, select high-quality varieties suited to your region. Follow these steps to ensure a successful planting process:
- Seed Planting:
- Sow seeds directly into prepared soil, around ½ inch deep and 1 to 2 inches apart.
- Thin seedlings to 3 to 4 inches apart once they have grown a few inches tall to avoid overcrowding.
- Seedling Planting:
- Transplant seedlings carefully into the garden bed, maintaining spacing of 3 to 4 inches between each plant.
- Water gently after transplanting to help them settle into their new environment.
- General Tips:
- Consistent watering is critical, especially during dry spells, to support healthy growth.
- Mulching around plants can help retain moisture and suppress weeds.
- Monitor for pests regularly and take appropriate action if necessary.
Recommended Products

PREMIUM INGREDIENTS: This specifically crafted organic compost blend for seed germination and rooting cuttings is carefully formulated to provide essential nutrients that supports seedling development, drainage and aeration.

You will receive a 12-quart bag per purchase.

Package Includes: You will get 55pcs 30mm seed starter pods. Once the seedlings have grown, simply insert the entire seed starter or seedling into an outdoor terrace, deck planter or backyard garden. Since there is no root disturbance, it is easy to build plants. It could't be easier!
Harvesting Delicious Beets
Once your beets have matured, it’s time to harvest and enjoy the fruits of your labor:
- Harvesting:
- Gently pull mature beets from the soil, taking care not to damage the roots.
- Trim the leaves, leaving around 1 to 2 inches of stem attached to the beet.
- Storage:
- Remove excess soil without washing the beets to prolong storage life.
- Store beets in a cool, dark place or the refrigerator for several weeks.
- Cooking:
- Beets can be roasted, boiled, pickled, or grated raw for a variety of tasty dishes.
- Don’t forget to try beet greens; they are nutritious and delicious in salads or sautéed.
Beet Planting Timeline
Here’s a timeline of key activities from planting to harvesting your homegrown beets:
| Activity | Timing |
|---|---|
| Planting seeds | Early spring or fall |
| Transplanting | 2-3 weeks after seeds |
| Thinning seedlings | 3-4 weeks after emergence |
| Harvesting | About 60 days after planting |
Enjoy the Beet Growing Journey
Caring for Beet Plants
To ensure healthy growth, there are important aspects to consider when caring for your beet plants:
- Watering: Keep the soil consistently moist by watering regularly. Aim for at least 1-2 inches of water per week.
- Mulching: Apply a layer of mulch around the plants to retain moisture, suppress weeds, and regulate soil temperature.
- Weeding: Regularly remove weeds to prevent them from competing with your beet plants for nutrients and water.
- Pest Control: Monitor for pests like aphids and caterpillars. Consider natural remedies or insecticidal soap if needed.
- Harvesting: Harvest beets when they reach a suitable size to avoid them becoming woody. Ensure you gently lift them from the soil to avoid damage.
Remember to observe your plants regularly and adjust your care routine as needed.
Harvesting and Storing Beets
When it’s time to harvest your beets, gently loosen the soil around them with a garden fork and pull the beets out by grasping the foliage near the root. Avoid damaging the root as you do this; you want your beets to be in perfect condition for storage.
Inspect your harvested beets. If any have cuts, bruises, or signs of disease, use these first as they won’t store well. Trim the tops, leaving about an inch attached to the beet. This helps them last longer in storage.
For optimal storage, keep your beets in a cool, dark, and humid place. A root cellar or the refrigerator crisper drawer are great options for storing your beets.
To maximize freshness, store beets away from ethylene-producing fruits like apples, as this can make your beets spoil faster.
Remember to check your stored beets regularly for any signs of spoilage. Remove any beets that show soft spots or mold to prevent them from affecting the rest of your stored beets.
| Optimal Storage Conditions | Cool, dark, and humid place |
|---|---|
| Tops Trimming | Leave about an inch attached to the beet |
| Spoilage Check | Regularly inspect for soft spots or mold |
Recommended Products

Fresh Herb Keeper for Preservation: This fresh herb keeper is designed to extend the freshness of your herbs by up to 10 days, ensuring vibrant flavors for your dishes
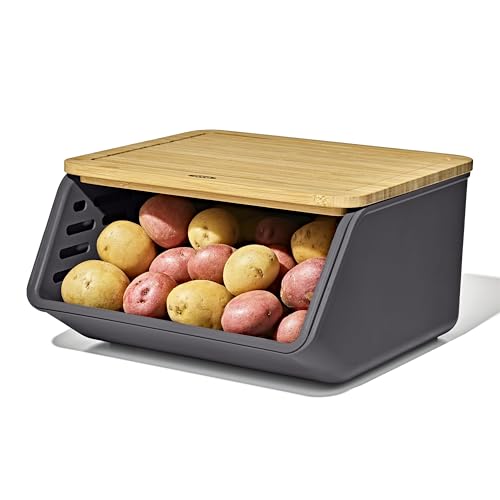
Longer-lasting freshness: Opaque bin and FSC-certified bamboo lid help maintain a cool, dark environment ideal for potatoes, onions and other root vegetables
Conclusion
That’s it! Harvesting and storing your beets is crucial for maintaining their freshness and flavor. Remember to handle them with care, trim the tops, and store them in the right conditions. By following these simple steps, you can enjoy delicious beets for an extended period. Happy gardening!
Frequently Asked Questions
How should I harvest beets to ensure they stay fresh during storage?
To harvest beets, gently loosen the soil around them, being careful not to damage the roots. Inspect for cuts or bruises, and trim the tops to about an inch. This process helps in preserving the beets during storage.
What are the optimal conditions for storing beets?
For storing beets, opt for a cool, dark, and humid place. Keep them away from ethylene-producing fruits to prevent spoilage. These conditions help maintain the freshness and quality of stored beets.
How can I ensure the beets I’ve stored remain fresh?
Regularly check stored beets for spoilage. By keeping an eye on them, you can ensure their quality is maintained over time.
