

Ever wondered how you can bring a burst of freshness to your meals right from your kitchen counter? Picture this: you reach for a handful of vibrant broccoli sprouts, grown by your own hands. Exciting, right? In this article, you’ll discover an easy and rewarding way to sprout broccoli seeds in a simple jar.
Are you looking to add a nutritious punch to your salads, sandwiches, or smoothies? Sprouting broccoli seeds at home is not only fun but also incredibly beneficial for your health. Get ready to explore the step-by-step process and unlock the potential of these tiny nutritional powerhouses.
Choosing the Right Seeds
To ensure successful broccoli sprouting, start with high-quality broccoli seeds. Here’s how to choose the right seeds for the best results:
- Organic Seeds: Opt for organic broccoli seeds to avoid exposure to harmful chemicals.
- High Germination Rate: Look for seeds with a high germination rate to maximize sprouting success.
- Specifically Meant for Sprouting: Select seeds that are specifically labeled for sprouting to ensure they are free from pathogens.
Remember, the quality of your seeds plays a crucial role in the sprouting process.
Recommended Products

Sprouts or Microgreens-No Garden Needed - Grow crisp, fresh greens anywhere whether in a tiny apartment, busy workspace, or on the go. Sprout our Organic Broccoli Sprouting Seeds in a jar for a crunchy, nutrient-rich addition to meals. Broccoli seeds for planting are ideal for health-conscious individuals seeking a nutritious daily upgrade. This package includes seeds and growing instructions only. Sprouting jar sold separately.
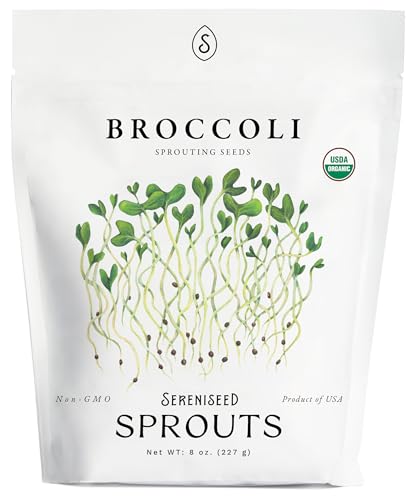
Tested quality. These broccoli sprouting seeds are grown in the USA, non-GMO, open pollinated, certified organic by Oregon Tilth, and tested for pathogens.

GROW NUTRITIOUS BROCCOLI SPROUTS AT HOME: Enjoy vitamin-packed organic broccoli sprouts with Nature Jims' broccoli sprout seeds. Ideal for indoor and outdoor growing, these seeds for sprouting offer fresh, healthy sprouts in no time.
Preparing the Jar
When getting ready to sprout broccoli seeds in a jar, it’s crucial to prepare the jar correctly. Here are some steps to ensure your sprouting success:
- Clean the jar: Start by washing the jar thoroughly with hot, soapy water. Rinse it well to remove any soap residue.
- Sanitize the jar: To prevent the growth of harmful bacteria, sanitize the jar by either boiling it in water for a few minutes or running it through the dishwasher on a high-temperature setting.
- Choose the right jar: Opt for a wide-mouthed glass jar to make rinsing and draining the seeds easier.
- Prepare ventilation: Cover the mouth of the jar with a piece of breathable cloth secured with a rubber band. This allows air circulation while keeping pests out.
- Ensure proper drainage: Tilt the jar at an angle to allow excess water to drain out after each rinse.
- Place the jar in a warm, dark place: Find a spot that maintains a consistent temperature, away from direct sunlight, to facilitate seed germination.
By following these steps, you’ll set the stage for successful broccoli seed sprouting in a jar.
Soaking the Seeds
When soaking the broccoli seeds, it’s essential to use clean, filtered water at room temperature. Fill the jar with water and add about 1-2 tablespoons of seeds per quart of water. Ensure the seeds are fully submerged as they will absorb water during this process.
Let the seeds soak for 6-8 hours or overnight. This step helps to soften the seed coat and kickstart the germination process. You might notice the seeds swelling up as they absorb water, a sign that they’re rehydrating and preparing to grow.
After the soaking period, drain the water from the jar using a mesh lid or cheesecloth, making sure to leave the seeds inside. Rinse the seeds with fresh water and place the jar in a dark location to continue the sprouting process.
Remember, soaking is a crucial step in preparing the seeds for germination and ensuring successful sprouting in your jar.
Rinsing and Draining
When it comes to sprouting broccoli seeds in a jar, the process of rinsing and draining plays a crucial role in ensuring successful growth. Here are some key steps to follow:
- Rinsing: After soaking the seeds, it’s essential to rinse them thoroughly under cool, running water. This helps remove any residue and prevents mold or bacterial growth.
- Draining: Once rinsed, drain the seeds using a mesh or sprouting lid on the jar. Tilt the jar at an angle to allow excess water to escape while ensuring proper airflow.
- Frequency: Rinse and drain the seeds at least twice a day to keep them moist but not waterlogged. This promotes healthy sprouting without the risk of rot.
- Storage: Store the jar in a dark location with proper ventilation to prevent excess moisture buildup. Ensure that the seeds have access to fresh air to support their growth.
- Observation: Keep an eye on the seeds during the rinsing and draining process. Look out for any signs of discoloration, foul odors, or mold, and adjust your routine accordingly.
By properly rinsing and draining the broccoli seeds in your sprouting jar, you create an optimal environment for healthy and successful sprout growth.
Recommended Products

All-in-One Convenient Design: The sprouting jar lid's innovative two-in-one structure allows it to double as a sturdy stand—no extra parts needed. This integrated sprouting lid fits securely on 3.74-inch wide-mouth Mason jars, guaranteeing leak-free sprouting
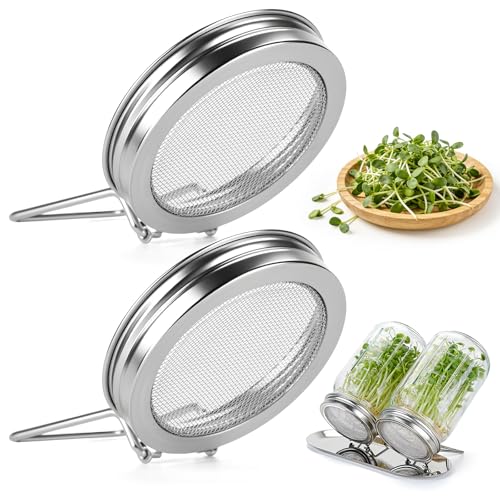
2-in-1 Sprouting Kit: The all-in-one sprouting lid features a built-in stand that allows the jar to be tilted for hands-free draining, improves airflow, and makes rinsing easier—no additional rack required. No tray and jars included
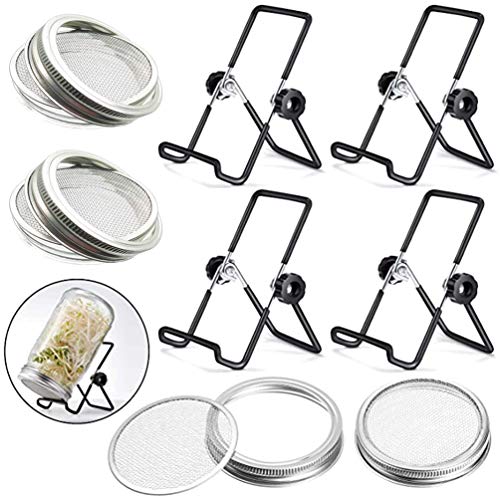
Premium Stainless Steel Sprouting Lids: Includes 4 wide mouth sprouting jar lids made from premium 304 stainless steel. Rust-resistant, corrosion-resistant, and built for long-lasting use. Compatible with most wide mouth Mason jars (jars not included)
Harvesting and Storing
- Harvest: When your broccoli sprouts have reached the desired size, it’s time to harvest them. Use clean scissors to cut the sprouts just above the seeds.
- Rinse: Give the harvested sprouts a final rinse to remove any remaining seed husks or residue.
- Storage: Store the sprouts in a clean, airtight container lined with a paper towel to absorb excess moisture.
- Refrigerate: Place the container in the refrigerator to prolong the freshness of your sprouts.
- Freshness: Consume your sprouts within a few days for the best flavor and nutritional benefits.
| Storage Tips | Temperature | Duration |
|---|---|---|
| Refrigerator | 35-40°F (2-4°C) | 2-3 days |
Conclusion
You’ve now learned how to sprout broccoli seeds in a jar and the importance of proper harvesting and storing techniques. Remember to use clean scissors for harvesting, rinse the sprouts thoroughly, and store them in an airtight container with a paper towel in the fridge. Keep the sprouts fresh by storing them at 35-40°F (2-4°C) and enjoy their nutritional benefits within 2-3 days. Happy sprouting!
Frequently Asked Questions
How should I harvest broccoli sprouts?
To harvest broccoli sprouts, use clean scissors to cut them just above the soil level, avoiding damaging the roots.
How should I store broccoli sprouts?
Store broccoli sprouts in an airtight container lined with a paper towel in the refrigerator at a temperature between 35-40°F (2-4°C).
How long can I keep broccoli sprouts fresh?
Consume broccoli sprouts within 2-3 days for the best freshness and nutritional benefits.
